Adventures in Dough Part 1 was
homemade pizza. After that was a success, I decided it was time to conquer an even bigger baking fear:
pie crust!
Cue the dramatic music because this post is gonna be epic. It's also long, so strap in.
Again, I turned to Smitten Kitchen for
this recipe. You read correctly: all butter, no fancy equipment, no fear.
So which pie to make? In my house, there is only one answer. Scott's all-time favorite: chicken pot pie.
I've been making chicken pot pie for a long time, but I've been relying on store-bought crust and frozen mixed vegetables. Those days are over, my friends. I made my own pie crust and I'm never looking back. You can't imagine the flavor difference.
Notes: This was the best chicken pie I have ever tasted, so there is nothing I would change about it.
I highly recommend
this post (again by Smitten Kitchen) on rolling out your dough. This is flaky pie crust, which means sticky dough with lots of butter. The key? LOTS of flour and patience.
You can make this crust when you have the time and freeze it until you're ready to use it. Just make sure you defrost it in the refrigerator for a full 24 hours.
I used dark meat for the chicken (Scott's favorite), but you can use breast meat if you want. If you need a time saver, the rotisserie chickens from the grocery store are always available.
Feel free to use whatever veggies you like. I used what looked good at the store that day.
You and me, we're gonna do this together, OK? Don't fear the crust.
Ingredients:
For the crust (this recipe is straight from Smitten Kitchen's, linked above):
2 1/2 cups all purpose flour
1 cup cold tap water with ice cubes in it
1 tablespoon of sugar
1 teaspoon of kosher salt
2 sticks of unsalted butter
For the pot pie:
2 cups cooked and shredded chicken
2 large carrots
1/3 of a bunch of asparagus (about 6 or 7 stalks)
1 small head of broccoli, cut into florets
2 garlic cloves, minced
1 leek, chopped (a small onion would work great too)
10 sprigs fresh thyme, leaves stripped and chopped
1/3 cup of butter
1/2 cup of milk
1 3/4 cups chicken stock
1/3 cup flour
Salt
Pepper
Directions:
Let's start with the crust! Just remember cold ingredients = good crust.
Your butter should be cold, straight from the fridge. It needs to be in small cubes. I cut mine up early in the morning and put in back in the fridge to chill down so that it was really cold when I wanted it.
 |
| Ice, ice, butter |
Add your dry ingredients (flour, sugar, salt) to a big bowl and whisk them together. Drop the butter on top and start cutting the butter into the dry mixture. I have a handy pastry blender that makes this easier, but you could use two knives (dragging them through the butter and flour in opposite directions) or just use your hands (I've totally done that before when making biscuits. Worked like a charm).
 |
| Not quite done |
Keep blending the butter and flour together until the butter chunks are about the size of small peas. You don't want them to disappear: little chunks of butter = delicious flakiness. The mixture will look more like the color of cornmeal than flour.
Take your cold water and add a little at a time to the butter/flour mix. Use a rubber spatula (or a spoon) to pull the batter together.
 |
| Like so |
The dough will become sticky and will start to look like one mass rather than half dough/half flour. Once you've used up your water, knead the dough in the bowl just a tiny bit so that it's in a ball.
Divide your ball into two equal-sized halves. Put each half on a piece of plastic wrap.
 |
| Lookin' good! |
Use the plastic wrap to help you shape the balls into discs (this will help your rolling process later). Put them in the fridge for AT LEAST one hour, preferably more. Remember: cold = good.
Still with me? OK, let's take a break for the pie filling.
Now is a good time to chop your veggies. I diced the carrots and cut the asparagus on a bias.
 |
| Garlic and leeks |
I cleaned my leeks by cutting them into rings, separating them, and dunking them into a big bowl of cold water. All the sand sinks to the bottom. Now chop those up, too.
I wanted to do a quick saute on my veggies because they were all raw. If you cut them up small enough, you can probably skip this step because they'll cook inside the pie in the oven.
 |
| Butter in the pan, saute over medium for 3-5 minutes. No biggie. |
Now, you can't have chicken pie without the roux. So, melt your 1/3 cup of butter into a 2-quart (or larger) pot.
Once the butter has melted, whisk in your flour and you'll end up with a thick, gravy-looking concoction that looks like this:
Let the roux bubble for just a minute. Then pour in your chicken stock (while whisking) and your milk (while whisking). Add your chopped thyme leaves, season with salt and pepper, and you'll get a thin, gravy-looking concoction that looks like this:
 |
| Not quite finished |
Let that thicken up until it's back to the consistency of gravy. Then add in your cooked chicken and your cooked veggies.
 |
| What does a filling have to do to get inside a pie around here? |
Yay! Filling accomplished. Turn the heat off and just let the filling stand by until you're ready to put it in the pie. Now would be a good time to preheat your oven to 375.
OK, deep breath. It's back to the pie crust. We can do this!
Your pie crust is chilling the fridge. Before you get it out, get your rolling pin, a butter knife, and as much flour as you can get your hands on. Pick a flat surface in your kitchen (even your table will do -- that's what I did) with lots of room and FLOUR THE LIVING HECK OUT OF IT! Got your rolling pin? FLOUR THAT TOO!
OK. Take one of your dough discs out of the fridge and put in on your floured surface. Dust some flour on top of it (yes, you need that much flour).
I am not an expert on rolling dough. I say, if you're not a pro, just do what works. You want the pie crust flat, 12-inches in diameter, and even in thickness. I got mine that way by starting in the middle of the dough and rolling the pin north, south, east, and west. Then, I picked up the dough, turned it about a quarter turn, and repeated the same process. If it sticks a little when you try to turn it, use your butter knife to help you get it unstuck.
 |
| Not done yet! |
If you're like me and you (a) have a hot kitchen and (b) aren't very patient, you will likely overwork your dough. It will start to get droopy and sticky. If you are like me, at this point you will (a) panic and (b) put your dough on a sheet tray in the freezer for a few minutes.
 |
| Deep breaths, deep breaths |
It's no biggie. You want the dough to be cold, right? It's not cooperating because it's too hot, right? So, let it (and you) chill out for a few minutes. Everything will be right as rain.
When you've got your dough flat, even, and 12 inches in diameter, congratulations! You have your bottom pie crust!
OK, now take dough disc number two out, make sure you're adequately floured, and repeat your rolling process with your crust top.
Once it's ready to go, add your pie filling.
 |
| So close to deliciousness |
Now drape your top crust over it and crimp the edges closed.
One last step: gotta let out that steam, so cut some small slits in the top crust.
 |
| Cue the music from Psycho |
Bake your beautiful creation at 375 for 45 minutes. Wait impatiently.
And then...
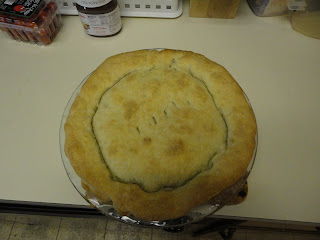 |
| TA-DA!!! |
Let it stand for about 10 minutes (if you can possibly wait that long) and then enjoy the greatest chicken pot pie you will ever taste.
 |
| Sorry Moravian ladies, but this is the real deal |


