Showing posts with label salad. Show all posts

Tuesday, August 31, 2021

Homemade cole slaw dressing

When I made veggie burgers the other night, I made cole slaw as a side dish. Now, you can buy cole slaw dressing in a jar, but (a) those jars are huge and you won't use it all and (b) it's super easy to make your own!

Notes: I make this even easier by mixing the dressing right in the bowl where I plan to put the cole slaw. 

This makes enough dressing to reasonably dress about 4 cups of cole slaw (about half of one those bagged mixes). I say "reasonably" because I don't like over-dressed slaw. It should be thoroughly coated, but not swimming in dressing. 

You can 100% make this ahead of time. Even a day ahead would be fine! But certainly the morning of. I think it's best if you make it at least an hour ahead so it has time to sit in the fridge and marinate. 

Ingredients

2.5 tablespoons mayo

1 teaspoon honey

2 teaspoons honey mustard

2 teaspoons relish (sweet or dill, whichever you like)

About 10 dashes hot sauce

Salt and pepper

Directions: Mix all the ingredients in a bowl until well combined. Toss with about four cups of your favorite cole slaw mix.

Monday, February 15, 2016

What's in the Box? Spinach Salad with Mustard Brown Sugar Roasted Broccoli

Time for another edition of What's in the Box? I was inspired by my buffalo roasted broccoli to try another version. I thought it would make a nice addition to a lunch time salad.


Notes: This salad is delicious. This one has goat cheese again (can you tell I'm a fan?), but you could sub out some bleu cheese or feta if you prefer.

Ingredients:
Baby spinach
Mustard Brown Sugar Roasted Broccoli (recipe follows)
Dried cranberries
Herb goat cheese

In a plastic container or mason jar, place about  2 cups of greens. Add the desired amount of broccoli, cranberries, and goat cheese.

When you're ready to eat, mix everything together and enjoy!

Mustard Brown Sugar Roasted Broccoli
2 broccoli crowns
2 tablespoons butter
1 tablespoon whole grain mustard
2 rounded teaspoons brown sugar

Directions: Heat oven to 400.

Cut the broccoli into small florets. Melt the butter in the microwave and then whisk in brown sugar and mustard.

Pour the mixture over the broccoli and toss to coat well. Arrange the broccoli in a single layer on a baking sheet. Roast for 20 minutes until fork tender and starting to brown.

Monday, January 18, 2016

What's in the Box? Arugula, Sweet Potato, and Goat Cheese Salad

I take my lunch to work. We don't have a ton of dining options on campus and I don't like having to spend money on food everyday, so I buy lunch supplies during my weekend grocery run.

Coming up with things to eat for lunch, however, can be tedious. No one wants to eat PB&J every day, right? To help you come up with ideas, I thought I'd do a couple of posts on my lunch. So what's in the (lunch) box?


This week it's an arugula, sweet potato, and goat cheese salad. I'm topping mine with pomegranate seeds.

Here's what you need to make at least three of these salads for the week:
1 box or bag of pre-washed arugula
1 medium sweet potato
1 small container of goat cheese

On Sunday or Saturday (whenever you have some time), peel and chop your sweet potato. Toss the cubes with a little olive oil, season with salt and pepper, and roast at 400 degrees for about 20-25 minutes until tender. Let them cool and store them in a food storage container in the fridge.

I use this little Rubbermaid container (LunchBlox). It comes with a little tray that sits on top of your greens and holds your toppings. That way you can mix everything together when you eat it. It even comes with a little container for dressing (I'm not using a dressing since I've got the pomegranates and cheese, but you can use what you like).

If you don't have one of these, no worries. Whatever container you have is fine---mason jar salads are all the rage! To pack it in a regular container, put the dressing at the bottom of the container. Then put in the greens and then top with some of the sweet potatoes and some of the goat cheese. When you're ready to eat, just mix everything together.

Now, I usually supplement my salad with more things for lunch (a salad this size isn't enough food for me!). I might bring an apple or an orange, a yogurt, and some salted nuts. But I'll post more ideas like that later!

Enjoy your homemade lunch!

Saturday, July 5, 2014

Lima Bean, Tomato, and Corn Salad


One can never had too many recipes that are suitable for ferrying to parties. Summer time means lots of cookouts, BBQs, family reunions, and pot lucks.

Dishes that travel well have a couple of good qualities. First, they don't contain ingredients that spoil easily (read: no mayo). Second, they are flexible and can be easily doubled or tripled. Finally, they don't take hours and hours of prep (who wants to spend all day or morning in the kitchen while you're trying to get ready for a party?). This salad meets all the criteria.

Notes: I wouldn't recommend canned lima beans for this. They are too mushy and salty, and they won't have the nice bright green color to make the salad pretty. Frozen lima beans work much better.

You can substitute frozen corn with no problem, but since it's summer and corn is in season, I thought fresh would be great.

This salad doesn't have a heavy dressing. I just used fresh herbs and the toasted garlic.

You can easily double or triple this recipe depending on how many people you need to serve. This will serve 4-6 depending on the serving size.

Ingredients:
1 bag frozen lima beans
3 ears fresh corn
1 pint cherry or grape tomatoes
1 small bunch parsley
1 small bunch chives
3-4 cloves garlic
2 tablespoons butter
Salt
Pepper

Directions:

Start by shucking the corn. Strip the kernels off by standing the ears up in the middle of a large bowl and running your knife down the side.

Heat a large skillet on medium and add the butter. While the butter melts, mince the garlic. Add the garlic to the butter and sautee until it just starts to turn light golden brown. Add the corn and lima beans (don't bother defrosting). Season liberally with salt and pepper. Cover and cook, stirring occasionally, until the corn and lima beans are tender, about 7-10 minutes. Remove from heat and let cool.

While the beans and corn are cooling, slice the tomatoes in half and mince the chives and parsley. Add them to the bowl you plan to serve the salad in. When the corn and beans are cool, add them to the tomatoes and toss everything together. Serve immediately or let it chill in the fridge. Enjoy!

Tuesday, July 23, 2013

Eggplant Caprese

This dish is a cross between a caprese salad (featuring tomatoes, fresh mozzarella, and basil) and eggplant parmesan (featuring fried eggplant). It came about mostly because I saw some very pretty eggplants in my grocery store and wanted to make something with them. Since it's hot, though, I didn't want to make eggplant parm because I didn't want to turn the oven on. And so eggplant caprese was born.

Notes: Everything about this dish celebrates the flavors of summer. Use the freshest eggplants and tomatoes you can find. And don't skimp on the fresh mozzarella! Nothing substitutes for it. The beauty of this dish is its simplicity. When you use few ingredients, make sure they're good ones.

This recipe serves two people, but it could be easily doubled to feed four. It will just take a little longer to fry all the eggplant.

Traditional caprese salad calls for basil leaves, but since I had homemade pesto, I figured a little play on the original wouldn't hurt.

It's a show stopper, so if you want to impress you friends, make them this dish!

Food as fashion

Ingredients:
1 medium eggplant
1/2 cup flour
1/2 cup milk
1 cup cornmeal
1 tablespoon dried oregano
2 large tomatoes
1 ball fresh mozzarella
2-3 teaspoons of pesto (use homemade if you have it!)
Salt
Pepper
Olive oil for frying

Directions:

In a medium bowl, whisk together milk and flour to make a wet batter. Pour the cornmeal into a pie plate or cake pan. Add salt, pepper, and oregano to the cornmeal and mix to combine.

Slice the eggplant into 1/2-1/4 inch rounds. Dunk each round into the wet batter, shake off the excess, then coat the round with cornmeal. Put the breaded eggplant rounds on either a large plate or cooling rack. When all the rounds are breaded, put them in the fridge for about 10 minutes.

While the eggplant is chilling, slice the tomatoes into thick slices. Pour oil into a large skillet and heat on medium high. Test the oil by sprinkling a little cornmeal in it. If if floats and starts to bubble, the oil is the right temperature. Take the eggplant out of the fridge and fry a few slices at a time, approximately 3 minutes on each side, until they are golden brown. Drain the rounds by laying them on a plate lined with a paper towel.

When you put the last batch of eggplant in the pan, slice the mozzarella and pull the pesto out of the fridge. When the eggplant is done, layer the cheese, eggplant, and tomatoes on a plate and top with pesto. Serve and enjoy!

Wednesday, January 9, 2013

Pomegranate and Goat Cheese Salad with Cranberry Mustard Dressing

I'm sure many of you have a new year's resolution to eat healthier. There's no rule that says your healthy eating can't be delicious too.

I take my lunch to work most of the time and I'm always looking for things to take that aren't sandwiches. Don't get me wrong; I love sandwiches. But you need to shake up the routine and a salad fits the bill.

Incidentally, if you're looking for a handy salad container that fits in a lunch box, this is the one I have (Rubbermaid is giving me no money for the plug, by the way). I love it.

Notes: I think the flavors in this salad are perfectly balanced. The goat cheese is smooth and tangy while the pomegranate seeds are sweet and fresh. The dressing adds a nice depth without overpowering the other ingredients.

This salad is enough just for a single serving, but you could easily double it for two if you need to. If you don't happen to have cranberry mustard, you could use your favorite mustard. Or you could just mix the olive oil and vinegar and make a basic balsamic vinaigrette.

Perplexed by pomegranates? Worry not! Hop on over to this post to jog your memory.

Ingredients:
2 cups washed salad greens
2-3 tablespoons of crumbled goat cheese
2 tablespoons of pomegranate seeds
1/4 teaspoon cranberry mustard
Splash of balsamic vinegar
1/2 tablespoon olive oil
Salt
Pepper

Directions:

To your salad bowl (the bowl you're going to eat out of), add the mustard, balsamic vinegar, and olive oil. Whisk together until the mixture is emulsified.

Add your salad greens to the bowl and toss them in the dressing to coat (you can just use your hands -- it's easier). Top with goat cheese and pomegranate seeds and toss lightly to mix. Season with a sprinkle of salt and pepper.

If you plan to take your salad to work, pack your dressing in a separate container and just lay the goat cheese and pomegranates on top of the greens. When you get ready to eat lunch, shake the container to mix the dressing and then pour it over the salad.

Pretty AND delicious
Enjoy!


Wednesday, July 18, 2012

Summer Salad Series: Caprese Pasta Salad

I am slowly winning Scott over to pasta salad.

For many years, he operated under the assumption that pasta salad came in only two varieties: vinegary and doused with store-bought Italian dressing or gloppy and drowned in mayonnaise. Since he likes neither vinegar nor mayonnaise, he was hesitant to try any pasta salad. And by "hesitant" I mean that he adamantly told me he did not like pasta salad: no way, no how.

After I convinced him that there were more varieties besides vinegary and gloppy, there remained the "but it's cold" hurdle. Pasta, in Scott's estimation, was not supposed to be cold. It took a warm Louisiana graduation to change his mind. I made some for the parents during graduation weekend. He tried it and -- surprise! -- it was tasty. Ever since then, he's been much more open to pasta salad. The verdict for this dish? "I wish I'd known how to make this myself when we lived apart!"

Notes: This dish was so very delicious. It's refreshing and mild -- exactly what you need on a hot summer evening.

The only reason this isn't Q.E.D is because it takes time to chill in the fridge. Otherwise, it's barely cooking at all.

If you wanted to up the nutritional content, add some chopped baby spinach.

I bought lemon basil because that's what the co-op had, but it didn't change the flavor enough for me to notice. I've just written it with regular basil.

Ingredients:
1 pound penne pasta
1 bunch fresh basil
1/2 pound of cherry tomatoes
1 fresh mozzarella ball
Salt
Pepper
Olive oil

Directions:

Fill a stock pot with water and bring it to a boil. Add a small handful of salt and drop the pasta. Cook according to box directions, it should be between 6-7 minutes.

While you're waiting for the water to boil, quarter the cherry tomatoes (or if they are small, just cut them in half). Chiffonade the basil (or just chop it if you're lazy like me). Dice the mozzarella ball.

When the pasta is finished, drain it in a colander. While the noodles are still in the colander, drizzle them with olive oil and season them with salt and pepper. Toss the noodles to coat them with oil. Repeat the process once more: drizzle more oil, season, and toss the noodles. Periodically stir the noodles until they stop steaming. If at any point they seem sticky, drizzle on more oil.

Add the tomatoes, mozzarella, and basil. Toss to combine and pour the salad into the container that you plan to store it in. Chill for at least two hours or overnight.


Serve cold and enjoy!


Friday, July 13, 2012

Summer Salad Series: Kale Salad with Avocado Lime Dressing

I am sans photo for this summer salad, but I had to share anyway. It's so easy, which makes it perfect for your hottest and laziest summer day.

Notes: When I made the recipe initially, I failed to add the honey and the lime juice was pretty overpowering. You could also use agave if you'd rather. You could use sugar, but you might want to use a little less to start out with and give the dressing a taste. You can always add more.

You can double this recipe to make more salad. This makes enough for one person.

I used red kale, but you can use whatever kale you prefer. Or whatever your store has that day!

Ingredients:
1/4 bunch kale leaves, cleaned and de-stemmed
1 avocado
2 limes
1 tablespoon of honey
Salt
Pepper

Directions:

Slice your avocado lengthwise and remove the pit. Scoop the innards out into a bowl (just use the bowl you plan to eat out of.

In the bowl, mash the avocado. Juice both limes over the avocado and drizzle in the honey. Whisk everything until the mixture is relatively smooth. Season with salt and pepper.

Thinly slice the kale leaves and add them to the dressing. You want to work the dressing into the leaves, so toss it really well (it's OK -- kale is tough, it can take it!). Taste to make sure you have enough salt and pepper.

Serve on a hot day and enjoy!

Saturday, July 7, 2012

Summer Salad Series: Brown Rice, Zucchini, and White Bean Salad with Lemon Basil Dressing

I promised a summer salad series, didn't I? Well, here's salad #2!

Scott was a fan of this salad for its heartiness. He's not always the biggest fan of citrusy or fruity salads, but this one is more substantial.

Notes: This salad turned out really well. Remember that brown rice is chewy, so cold brown rice will likewise be chewy. It's OK -- the chewy texture is great mixed in with the light veggies.

As with the last salad, this one involves the oven. If you'd rather not turn it on -- even at night -- you could leave the corn raw and just saute the zucchini.

This salad is also, like the last one, VTMK! I'm on a roll!

Ingredients:
1/2 cup brown rice
1 1/3 cups water
2 small zucchini
1 15 oz. can navy beans (or any white bean)
2 ears of corn
10-12 basil leaves
1 lemon
1 tablespoon herbs de provence
1/4 cup plus 1 1/2 tablespoons olive oil, divided
Salt
Pepper

Directions: Heat oven to 425.

Slice the zucchini into half-moon shapes. Toss on a foil-lined baking sheet with salt, pepper, and 1 1/2 tablespoons of olive oil. Pull off any dried leaves from the corn husks and slice off the tassels at the top. Bake them in the oven right on the oven rack. Bake the zucchini until it is fork tender. Both will take about 20-30 minutes.


Bring the rice and water to a boil, turn it to a simmer, and let it cook for 30-35 minutes.

While the rice is cooking, chop the basil, zest the lemon, and drain and rinse the beans.

When the zucchini, rice, and corn is done, add the rice and zucchini together. Strip the kernels off the ears of corn and add those to the pot. Add beans. Season everything with salt and pepper.

Juice the lemon and whisk the juice with the herbs de provence. Season with salt and pepper. Drizzle in 1/4 cup olive oil while whisking.

Pour the dressing over the salad, add the basil and lemon zest. Toss to combine well.


Chill for at least two hours or overnight. Serve cold and enjoy!

Summer Salad Series: Quinoa and Black Bean Salad with Honey Lime Dressing

As you might have heard from the apocalyptic tone of the weather channel, we're in a heat wave right now. So, is it hot in the professor's kitchen? Oh yeah, it's hot. It's move-your-mattress-downstairs-and-sleep-in-the-dining-room hot. It's break-down-and-buy-a-portable-AC hot. It's blow-untold-sums-of-money-on-iced-coffee hot. More importantly, it's no-I-don't-want-to-turn-the-oven-on hot.

When it's too hot to cook, it's also too hot to go out to eat, which is why you need an army of cold dishes in your cooking repertoire. As such, I bring you the first in the summer salad series.

Notes: My lone complaint for this dish is that my delicious dressing was a bit understated in the finished product. I should have made a little more so that it really shined through. Other than that, this salad is exactly what you need for a hot day!

So I'm cheating a bit when I say no oven because to prepare the squash you do have to turn the oven on. The trick to this salad is to prep it at night when the house is cooler. Pop it in the fridge so that it chills overnight and it'll be ready for you the next day. Or you could make it the day before the heat arrives, which I did. If you really don't want to use the oven, swap the squash out with a mango. That was my original plan, but there weren't any mangoes at the store.

This salad is also VTMK. Healthy and refreshing!

Ingredients:
1 cup quinoa
1 1/4 cup water
1 15 oz can black beans
1 small butternut squash
1/2 bunch kale leaves, cleaned and de-stemmed (I used red kale)
1 bunch cilantro
2 limes
1 teaspoon chili powder
1 teaspoon cumin
1 tablespoon honey
1/4 cup olive oil
1 large tablespoon of coconut oil (you could use olive oil too)
Salt
Pepper

Directions: Heat the oven to 425.

Peel the butternut squash and remove the seeds. Dice it and toss it with the coconut oil, then season it with salt and pepper. Bake for 25-30 minutes until fork tender.

Meanwhile, add water and quinoa to a sauce pan and bring to a boil. Turn it down to a simmer and let it cook for 10-15 minutes until tender and the little grain inside unfurls like a tail.

While you're waiting on the quinoa and the squash, thinly slice the kale, drain and rinse the beans, and chop the cilantro. Zest the limes and add the zest to the cilantro.

Once the quinoa and squash are cooked, add the squash to the quinoa pot. Add in the kale and beans and stir everything together. Season with salt and pepper.

In a microwaveable bowl, heat the honey for about 10 seconds. Add in the spices and whisk together. Juice both limes into the bowl and whisk again. Drizzle in the 1/4 cup olive oil while you whisk. Season with salt and pepper.

Pour the dressing over the salad, add the cilantro and lime zest, and toss everything together until well combined.


Chill for at least two hours or overnight. Serve cold and enjoy!

Wednesday, January 11, 2012

The Kale Diaries, Part Three: Kale and Pomegranate Salad

Happy 2012, everybody!

If your holidays were anything like mine, you ate a lot of crap. Crap can take many forms: too many sweets, too much fast food, or just a bunch of high processed stuff. There's no better way than to de-crapify than with a super food salad.


Notes: The only reason this isn't Q.E.D. is because of the pomegranates. Pomegranates are in season now and if you've never had one, you should. The edible part is the seeds inside the husk. They are juicy, a little crunchy, and sweet/tart. The trouble comes when you have to monkey those seeds out.

Some people employ a spanking method. I disagree. Pomegranates, like LL Cool J, need love. I make a cut all the way around the pomegranate (seen in the photo above) and gently pry it open. I take each half apart as I need to, loosening the seeds as I go. You can work right over the container you plan to store them in. It's a little time-consuming, but you'll end up with a lot more seeds than the spanking method and you won't abuse your pomegranate in the process. Be sure to wear an apron or a dark shirt. The juice stains and you'll inevitably get some on you.

 
I made a single serving of this, but you could easily double the ingredients for two servings.

Ingredients:
1/4 of a bunch kale, stemmed and cleaned
1 teaspoon balsamic vinegar
1 teaspoon honey
Pomegranate seeds to taste
salt
pepper

Directions:
Chiffonade your kale by stacking the leaves on top of each other and rolling them up like a cigar. Slice the cigar thinly to get kale ribbons. Put them in the bowl you plan to serve the salad in and set aside.

Get to work on your pomegranate. Make a cut around the whole thing and pry it open. Gently pull the seeds away from the husk and knock them off into a tupperware container. Once you have all the seeds out, set the container aside.

Whisk together the balsamic vinegar and honey. Pour it over the kale and massage it into the leaves. Let sit for 5 minutes. Season with salt and pepper and sprinkle the desired amount of pomegranate seeds on top. Give it one more toss and enjoy!

Sunday, December 4, 2011

The Kale Diaries, Part One: Easy Kale Salad

You've heard how healthy kale is for you, right? It has all sorts of vitamins and it's a good non-dairy source of calcium. If you don't eat it already, you should.

Kale can be used in the place of all sorts of greens, but let's face it: not everyone wants a giant pile of steamed or sauteed greens. I'm trying to find different ways to prep it.

I'm also trying to add more raw dishes to my arsenal. Eating raw veggies and fruits can maximize the nutritional value. Cooking often allows the vitamins to leech out of the food. Also, I am frequently lazy on my long days. Raw foods require less prep than cooking, which fits in perfectly with my laziness. Enter kale salad!

Notes: This is a great way to use up extra kale that you have. The bunches from my co-op are HUGE. Kale, like all greens, shrinks when you cook it, but if you live by yourself, it's still hard to use it all up.

You could easily make this animal by-product free if you omitted the yogurt. It tasted great with both ingredients, but I think each one on its own would be equally good.

To prep your kale, here's what you do: fill up a big bowl of cold water. De-stem the kale by holding it by the bottom part of the stem in one hand. Put the kale between the index and middle finger of your other hand and pull from the bottom of the leaf to the top. You want to strip the leafy part off the stem. Put the leafy parts into the bowl of water. When you de-stem the whole bunch, swish the kale around in the cold water like washing machine. The dirt will fall to the bottom of the bowl. Lift the kale out and lay it out on a clean kitchen towel. Pat it dry and store it wrapped in a paper towel in the fridge (I put mine in a food storage bag in my veggie drawer).

Ingredients:
1/2 a bunch of kale (I had Lactino), torn into small pieces
1/4 cup of plain yogurt
2 tablespoons of unsweetened applesauce
2 tablespoons of golden raisins
Sprinkle of cinnamon

Directions:

Add the yogurt and applesauce to a bowl and mix together. Add in the kale and stir to coat the leaves. Let it sit for about 5 minutes. Top it with raisins and cinnamon. Enjoy!


Saturday, August 20, 2011

Macaroni Salad

Macaroni salad is one of our classic family dishes. It's a summer time food for us and a staple at cook outs. Every time I make it, it reminds me of my childhood in the warm, humid climate of the coast.

I have never been able to recreate the version my mom makes. That and her famous brown eggs are two things I can't get to taste exactly like hers. I think there's some mom voodoo going on there, but I can't confirm that. So rather than be faithful, I decided to be innovative. I've tried to make a healthier version of it.

I tested this on my mother while she was visiting and she actually liked it! I figure if it has the original maker's seal of approval it can't be all that bad.

Notes: Normally, this recipe calls for celery. I have a hard time using up celery, so I went with cucumber instead. This is a mayonnaise-based salad. I'm afraid it just wouldn't taste the same without it.

The only reason this isn't Q.E.D is because it has to chill overnight or for at least six hours.

Ingredients:
1 box whole wheat shells or elbow macaroni
1 small can of tuna (I used wild caught)
1/2 greens (I used microgreens, but you could use chopped spinach or kale)
1/4 cup of mayonnaise
3 tablespoons whole grain mustard
1/4 cup chopped dill pickle
3 shallots
1 English cucumber
Salt
Pepper

Directions:

Bring a stock pot of water to a boil, add two small handfuls of salt, and cook pasta according to the directions. When it's done, strain it and allow it to cool to room temperature before you add your veggies.


Stir the pasta periodically to help it cool.


Chop all your veggies while you're waiting.

Add everything to your pasta, season with salt and pepper.


Mix well and chill in the fridge. Enjoy in a warm summer day (any time you want to relive one!)

Monday, August 8, 2011

Tiger Slaw

I came up with this dish as part of my ongoing series "Finding Non-meat Things to Put Inside Various Forms of Flat Bread."

I used to dislike radishes. I think it's because they have kind of a harsh bite to them. I'm not one to just slice up a radish and eat it raw. I know radishes and herb butter are a classic French combination, and that sounded good to me. But anything I make has to be eaten as leftovers throughout the week. Eating herb butter multiple days in a row is probably not the best nutrition plan.

Since radishes have a kind of bite to them, I figured putting them in some kind of salad or slaw-like preparation where you would normally use something like onions seemed like a logical step. Enter tiger slaw! Get it? Because the radishes have a bite? And it's black and orange? Yeah, not funny, I know.

I love the combination of black beans and cumin. I'm trying to find alternatives to mayo-based salads, so I opted for sour cream, which I think goes great with the smoky cumin.  You don't need much sour cream, so it's not nearly as gloppy (technical term) as a regular may-based slaw would be.

Notes: Grated carrots and radishes will end up containing a lot of water. If you don't want your slaw to be on the wet side, line a fine-mesh strainer with some paper towels or coffee filters and let the shredded veggies drain for a few minutes. That will help get rid of some of the excess liquid.

If you like cilantro (and you really should because it's delicious), that would work really well here. I didn't have any at the time or else I would have added it myself.

As an aside, this would be a totally fun dish to serve at a Halloween pot luck.

Ingredients:
4 small carrots
5 or six radishes
1 15 oz. can of black beans
2 tablespoons of sour cream
1 teaspoon cumin
1 1/2 teaspoons chopped fresh tarragon
Salt
Pepper

Directions:

First, rinse your beans with cold water in a fine-mesh strainer. Drain while you're grating your veggies.


Peel the carrots and trim the rough ends off the radishes.

 
Grate them with a box grater (using the medium sized holes). I just grated mine right into the container I used to store the slaw. This step requires elbow grease.

Pretty colors
Add the black beans and mix. Next add the sour cream and sprinkle the tarragon and cumin on top. Season with salt and pepper.


Mix well and store in an air-tight container in the fridge


Serve in a pita pocket or a wheat wrap. Or, just eat it like a regular slaw. Enjoy!

Monday, July 11, 2011

Chickpea and Cucumber Salad

I'm trying to cut most of the meat out of my diet. This isn't proving terribly difficult, except when it comes to lunch.

You see, I am something of a sandwich fanatic.

I appreciate sandwiches on a level that borders on obsessive. When I order a sandwich, I judge it on a variety of factors: flavor combination, bread choice, construction, moisture content. I annoy my loved ones (mostly Scott) either raving about the great ones or (somewhat more frequently) complaining about the bad ones. I *ahem* inform others (mostly Scott) when they are improperly constructing a sandwich and have been known to wrest cutlery from people's (Scott's) hands. You get the idea.

Most sandwiches contain meat. I love deli meat, but the good stuff is expensive. Plus, it doesn't stay fresh long. And let's not talk about the sodium content. So, I think I will leave the great deli sandwiches to the pros (actual delis). But how to continue making sandwiches I love without the meat? Well, here's one way.

Notes: My giddiness for slow cooker beans continues, so I made dried chickpeas in my crock pot. You could easily adapt this to be  Q.E.D. if you use canned beans instead.

If you wanted to bind this a little, you could add a little plain or greek yogurt. I like it just as it is.

Ingredients:
1/2 batch of Slow Cooker Chickpeas (recipe below) or 2 15 oz. cans of chickpeas
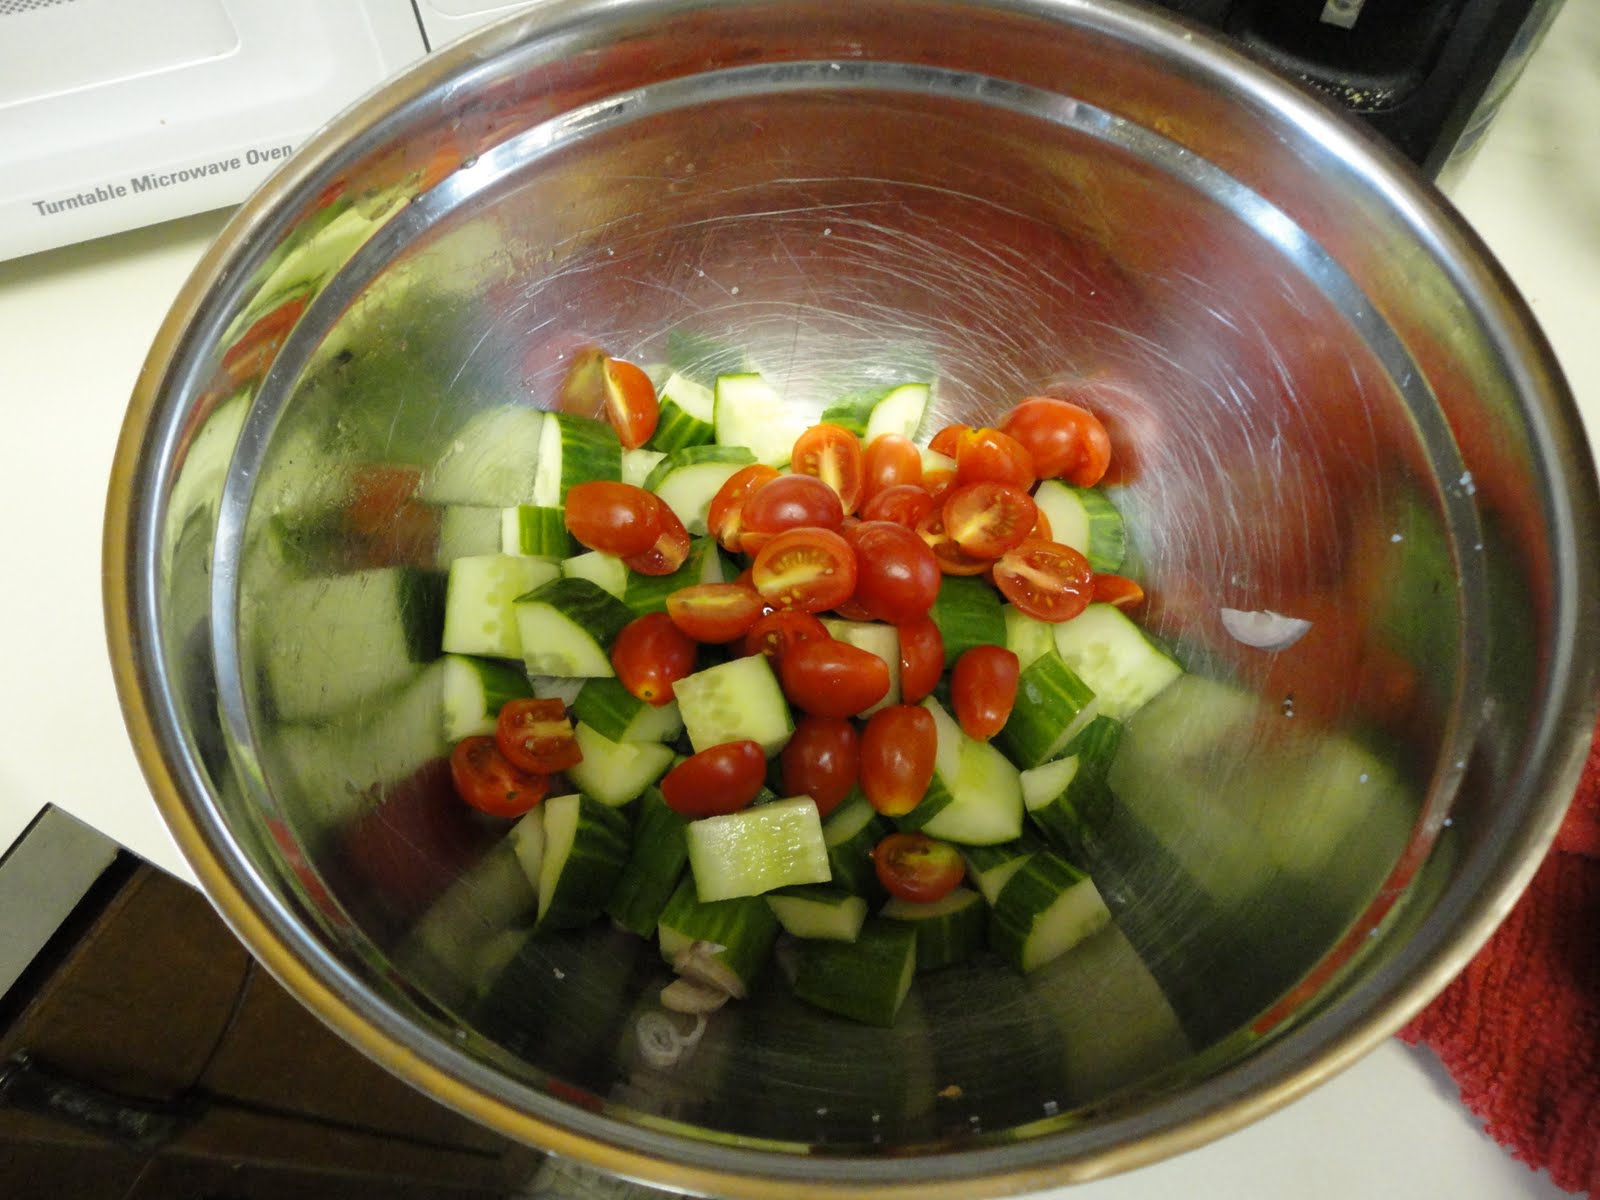
1 English cucumber or 2 regular cucumbers, diced
2 shallots, thinly sliced
1 bunch of fresh dill, chopped
2 tablespoons of olive oil
2 teaspoons kosher salt
1 teaspoon black pepper

Directions:

If you used canned chickpeas, pour them into a strainer, rinse them under cold water, and let them drain. If you used the slow cooker beans, make sure they are cool.


While draining the chickpeas, dice the cucumber roughly the same size as the chickpeas. Slice the shallots thin and chop the fresh dill.


Mix all the ingredients in a bowl. Add salt and pepper, drizzle with olive oil, and toss well.


Chill for a few hours in the fridge and serve in a pita pocket or over mixed greens. Enjoy!

For slow cooker chickpeas:
1 bag of dried chickpeas
6 cups hot tap water
10 drops Tabasco
2 tablespoons Worcestershire sauce
2 tablespoons kosher salt
2 tablespoons onion powder
1 tablespoon garlic powder
1 tablespoon cumin
2 teaspoons black pepper
3 teaspoons ground thyme

Rinse chickpeas in a colander. Pick out any broken or shriveled beans. Add everything to the slow cooker, stir, and cook on high for 4 hours. When the chickpeas are done, drain them and then spread them on a baking sheet to cool down before you add them to the salad. Freeze what you don't use or save the other half in the fridge to use in a later meal.

Sunday, July 10, 2011

Sourdough Panzanella with Citrus Dressing

In case you were wondering, July in Louisiana is hot. Like, triple digits hot. Like, the sun reading over your shoulder hot.

And nothing beats the heat like a nice salad.

I've never made a panzanella before so I was excited to try it. I found some nice sourdough at the store. Croutons? Check.

But what to do for the dressing? I was determined to do something different. Then, it hit me (not literally, because that would have smarted). Instead of a lemon, I'd use a grapefruit. Genius!

Notes:
You can pretty much add whatever you want to a panzanella, so feel free to play with the ingredients. I went with the standard cucumber, tomato, and onion.

Most recipes call for "day old bread." I never have day old bread at my house. I just have bread that I keep in the fridge. I bought the sourdough a few days before I made the salad. Since you toast the bread in the oven, I think it matters not how old your bread is.

Ingredients:
1 boule sized loaf of sourdough bread
1 English cucumber or 2 regular cucumbers
1 package of grape tomatoes
3 shallots
1/4 cup of olive oil
1 tablespoon herb de provence
2 garlic cloves, minced
Salt
Pepper

For dressing:
1/4 cup of freshly squeezed grapefruit juice (I used 1/2 of a grapefruit)
1/4 cup olive oil
Salt

Directions:

Preheat the oven to 400.

Cut your bread into 1-inch cubes and toss them into a big bowl.


Add herb de provence, garlic, about 2 teaspoons of salt, and 1 teaspoon of black pepper. Pour 1/4 cup of olive oil and toss well (I just used my hands).

Spread bread cubes out on a cookie sheet and bake for about 15 minutes. Turn or stir the cubes half way through cooking.

While your bread is toasting, chop your veggies.

I sliced the shallots thin
Large dice for the cucumber
Tomatoes cut in half
Now for the dressing!

Squeeze the grapefruit into a measuring cup. Add just a pinch of salt. Drizzle your 1/4 cup of olive oil into the juice while you whisk.


Add the bread cubes to your veggies and pour over your dressing. Toss well and chill in the fridge for about 30 minutes.

Serve it up, chill out, and enjoy!

Monday, June 6, 2011

Tarragon Tuna Salad

Tuna salad is a classic that we eat a lot at my house. It's a budget-friendly lunch staple, but let's be honest. Tuna salad isn't exactly the most exciting thing to ever grace a plate. I decided to try to add some pizzazz to it.


Notes: This makes a small batch of tuna salad. It fed the two of us for two days. If you need to feed more people, I think doubling it would be no problem.

Normally tuna salad is heavy on the mayo. My husband is not a mayo guy. Ergo, my goal was to use a smaller amount of mayo and use something else as a binder. For me, the clear choice is mustard. I'll confess: I'm anti-yellow mustard (unless we're talking hot dogs). Too plain, not enough depth of flavor. There are so many different kinds of mustard out there, squirting out some French's just seems like a waste. My favorite mustard is whole grain, but we had some sweet and hot on hand, so I used that.

I had some leftover tarragon from my brown rice risotto and I thought the mild licorice flavor would round out the sharpness of the mustard. 

I planned to make tuna salad wraps, but the Louisiana humidity plus Target's subpar packaging resulted in an entire package of wheat wraps that were fused together. So, I served it over spinach instead -- a tuna salad salad, if you will.

Ingredients:
1 large can of tuna or 2 small cans, drained
1 tablespoon of mustard
1 tablespoon of mayo
1 tablespoon sweet relish
3 celery stalks, diced
1/4 cup tarragon, chopped
Zest of one lemon
Pinch of salt and pepper

Directions: Combine all ingredients in a bowl (you can even make it right in your storage container to save time). Mix well. Refrigerate overnight.


Summer makes me naturally nostalgic, so I ate my tuna salad with a classic childhood snack:

Ants on a log, anyone?

 I plan to test out more versions of snazzier tuna salad, so you'll likely be seeing more posts like this in the future.