The professor is getting a new kitchen!
This week I'm moving up to Pennsylvania, so you won't be seeing many posts until I get settled. Rest assured I will return once my pots and pans are out of the box.
Until next time,
Enjoy!
Tuesday, July 19, 2011
Q.E.D.: Thai Style Red Curry Chickpeas over Quinoa
This post is brought to you by the letter 'q' -- for quinoa! Quinoa is the little ancient grain that could: packed with protein and lots of easily-digestible fiber, it's all the rage nutritionally. Good thing it's also delicious.
I have been meaning to make quinoa forever. I've had it a few times in restaurants, usually in cold pasta salad sorts of preparations. I wanted to try it hot in place of rice. I got Scott on board not just with the quinoa, but with vegetable curry.
Curry is one of those unspeakably comforting foods. I know it's traditionally eaten in warm places like Thailand and India, but nothing warms the bones like a big bowl of curry when there's a foot of snow on the ground. We were lucky to have lots of Thai restaurants in Urbana. And boy howdy did we need the warming power of curry.
Notes: I like my curry just shy of uncomfortably hot. You know the level of heat where you need to sit for a minute in between bites? That kind of heat. The amount of curry paste recommended was not enough. I ended up using a teaspoon and a half, but I should have used AT LEAST a tablespoon, probably more. I'm leaving it at a tablespoon. If you like your curry mild, by all means use less.
I originally intended to use roasted veggies, but the ones I bought were further along than I thought and ended up spoiling in the fridge. So I just used the frozen veggie I had on hand.
The quinoa was delicious: nutty and tender. I think I liked it better than rice. I made this Q.E.D, but if you want to let your curry mixture simmer for awhile, it would be much deeper in flavor.
Ingredients:
1 cup quinoa
2 cups chicken stock
2 tablespoons of butter
1 small onion
5 cloves garlic
1 tablespoon dried basil
1 can coconut milk
1/2 bag of frozen thin cut green beans
15-20 oz. of chickpeas (I used some that I had frozen, but you could use a can)
1 tablespoon red curry paste
Salt
Directions:
Start by rinsing your quinoa under cold water in a fine-mesh strainer.
 Let it drain while you start the curry.
Slice the onion and mince the garlic.
 Put butter in a pan on medium heat. When the butter melts add the onions and garlic.

Next add your coconut milk, basil, and curry paste (the paste will dissolve better with fewer ingredients in the pan -- learned that the hard way!)
Next add your chickpeas and green beans.

Season with salt and let it simmer with the lid on for 20 minutes.
Once the curry mix is going, add your chicken stock and quinoa to a 2-quart sauce pot. Bring it to a boil and then turn the heat to low. Cover and simmer for 10-15 minutes.
When it's done, the quinoa will look semi-translucent, it will be tender, and the little curly grain inside it will unfurl like a little tail.
Dish some quinoa up in a bowl and ladle the curry on top.

Enjoy!
I have been meaning to make quinoa forever. I've had it a few times in restaurants, usually in cold pasta salad sorts of preparations. I wanted to try it hot in place of rice. I got Scott on board not just with the quinoa, but with vegetable curry.
Curry is one of those unspeakably comforting foods. I know it's traditionally eaten in warm places like Thailand and India, but nothing warms the bones like a big bowl of curry when there's a foot of snow on the ground. We were lucky to have lots of Thai restaurants in Urbana. And boy howdy did we need the warming power of curry.
Notes: I like my curry just shy of uncomfortably hot. You know the level of heat where you need to sit for a minute in between bites? That kind of heat. The amount of curry paste recommended was not enough. I ended up using a teaspoon and a half, but I should have used AT LEAST a tablespoon, probably more. I'm leaving it at a tablespoon. If you like your curry mild, by all means use less.
I originally intended to use roasted veggies, but the ones I bought were further along than I thought and ended up spoiling in the fridge. So I just used the frozen veggie I had on hand.
The quinoa was delicious: nutty and tender. I think I liked it better than rice. I made this Q.E.D, but if you want to let your curry mixture simmer for awhile, it would be much deeper in flavor.
Ingredients:
1 cup quinoa
2 cups chicken stock
2 tablespoons of butter
1 small onion
5 cloves garlic
1 tablespoon dried basil
1 can coconut milk
1/2 bag of frozen thin cut green beans
15-20 oz. of chickpeas (I used some that I had frozen, but you could use a can)
1 tablespoon red curry paste
Salt
Directions:
Start by rinsing your quinoa under cold water in a fine-mesh strainer.

 |
| Quinoa is ready for its close-up |


Next add your coconut milk, basil, and curry paste (the paste will dissolve better with fewer ingredients in the pan -- learned that the hard way!)
 |
| The coconut milk with start out looking very thick, but it will thin out |

Season with salt and let it simmer with the lid on for 20 minutes.
Once the curry mix is going, add your chicken stock and quinoa to a 2-quart sauce pot. Bring it to a boil and then turn the heat to low. Cover and simmer for 10-15 minutes.
When it's done, the quinoa will look semi-translucent, it will be tender, and the little curly grain inside it will unfurl like a little tail.
 |
| All done! |

Enjoy!
Monday, July 18, 2011
Q.E.D: Green Monstah Pasta Salad
There wasn't a lot I liked about living in Western Massachusetts. New England is devoid of many things: good drivers, sunshine, people who care if you live or die. It did, however, have two saving graces. The first was an overabundance of locally grown, sustainable organic produce. I could get all the local grass-fed beef, fiddleheads, and quinoa a person could want.
The other was NESN.
The New England Sports Network. You see, I was surrounded by baseball fanatics in graduate school. I was never a huge baseball fan (being from NC, no hometown teams to love), but being around knowledgeable fans changes one's perspective. My friend Aaron would explain elements of the game to me while we ate lunch and watched whatever games were being broadcast in the restaurants. A big gang of us took a weekend trip to Chicago where we watched the heated rivalry between the Cubs and the Cardinals in a Wrigleyville bar (with two people wearing Cardinals shirts, I might add). Baseball became associated with lots of my happy memories -- with the people I loved and left behind in the corn fields. When I left to take my first job in Texas, I watched the Astros for awhile, but they just didn't quite click. I was still looking for a team to call my own.
Enter NESN and the Boston Red Sox.
NESN was, for a time, the only real friend I had in New England. While baseball season was still going during the summer I moved, every night I would tune into NESN while I unpacked boxes. When I got home from the office and was tired from working on class stuff or grading papers, I knew I could watch the Red Sox while I was eating dinner. At a time when everything in my life felt different and strange, NESN was the constant. I would watch the Red Sox and remember the endless baseball conversations I had heard among my friends. Plus, the Red Sox fan base is huge and really strong in New England. Watching and following the games made me feel like there was at least one thing I had in common with all these strangers I was living with. Watching the Red Sox made me feel less alone. And they're just so darn loveable, I couldn't help myself.
Baseball season ended and I found myself missing the games badly. At that time, I was hating New England even more: a hard winter followed by rainy spring, a bad job experience, and still terrible driving everywhere. But finally spring training started. And I read the NESN website everyday following the news. I marked days on my calendar: opening day, the first game between the Red Sox and the Yankees, etc. It is not an overstatement to say that the Red Sox helped me make it from day to day. No matter what had gone wrong, there was a game waiting for me when I got home. It provided a kind of stability at the very time my life was turned upside down.
I'm glad to no longer be living in New England, but luckily I can take my favorite thing about it with me. Especially since I have MLB.TV.
Why the baseball soliloquy? It explains the name of the dish! My tribute to the Red Sox in pasta form.
Notes: If you're tired of mayonnaise-based pasta salads, try this one on for size. This can easily be served hot or cold.
If you really wanted to go all the way, using spinach pasta would be awesome. In fact, next time I make it, I think I'll do that.
This dish is so Q.E.D., it's almost like not cooking at all. If you wanted to make your own pesto, that would be fabulous. Since I am sans food processor, I went with the store bought stuff.
I didn't bother thawing my peas, but if you did, just toss them in with the spinach.
Ingredients:
1 tub store bought pesto (about 1/2 cup if you're using homemade)
1 box whole wheat pasta
1 small bag or box of frozen peas
1/2 bag fresh baby spinach
Salt
Pepper
Pinch red pepper flakes
Directions:
Fill a stock pot with water and set it on to boil.
Chop your spinach while you wait for the water to boil.

When the water boils, add two small handfuls of salt (whole wheat pasta needs it). Toss in the pasta and cook according to the directions on the box. When your pasta is has about a minute left on the cooking time, toss in your frozen peas.

When the pasta is finished, drain it and the peas. Return them to the hot pot. Toss in the spinach and the whole container of pesto. Season with salt, pepper, and red pepper flake. Toss well so that the spinach is slightly wilted and the pasta and peas are well-coated.

Serve immediately for a hot dish. If you're making pasta salad, chill in the fridge until you're ready to serve.
It's wicked good, so enjoy!
The other was NESN.
The New England Sports Network. You see, I was surrounded by baseball fanatics in graduate school. I was never a huge baseball fan (being from NC, no hometown teams to love), but being around knowledgeable fans changes one's perspective. My friend Aaron would explain elements of the game to me while we ate lunch and watched whatever games were being broadcast in the restaurants. A big gang of us took a weekend trip to Chicago where we watched the heated rivalry between the Cubs and the Cardinals in a Wrigleyville bar (with two people wearing Cardinals shirts, I might add). Baseball became associated with lots of my happy memories -- with the people I loved and left behind in the corn fields. When I left to take my first job in Texas, I watched the Astros for awhile, but they just didn't quite click. I was still looking for a team to call my own.
Enter NESN and the Boston Red Sox.
NESN was, for a time, the only real friend I had in New England. While baseball season was still going during the summer I moved, every night I would tune into NESN while I unpacked boxes. When I got home from the office and was tired from working on class stuff or grading papers, I knew I could watch the Red Sox while I was eating dinner. At a time when everything in my life felt different and strange, NESN was the constant. I would watch the Red Sox and remember the endless baseball conversations I had heard among my friends. Plus, the Red Sox fan base is huge and really strong in New England. Watching and following the games made me feel like there was at least one thing I had in common with all these strangers I was living with. Watching the Red Sox made me feel less alone. And they're just so darn loveable, I couldn't help myself.
Baseball season ended and I found myself missing the games badly. At that time, I was hating New England even more: a hard winter followed by rainy spring, a bad job experience, and still terrible driving everywhere. But finally spring training started. And I read the NESN website everyday following the news. I marked days on my calendar: opening day, the first game between the Red Sox and the Yankees, etc. It is not an overstatement to say that the Red Sox helped me make it from day to day. No matter what had gone wrong, there was a game waiting for me when I got home. It provided a kind of stability at the very time my life was turned upside down.
I'm glad to no longer be living in New England, but luckily I can take my favorite thing about it with me. Especially since I have MLB.TV.
Why the baseball soliloquy? It explains the name of the dish! My tribute to the Red Sox in pasta form.
Notes: If you're tired of mayonnaise-based pasta salads, try this one on for size. This can easily be served hot or cold.
If you really wanted to go all the way, using spinach pasta would be awesome. In fact, next time I make it, I think I'll do that.
This dish is so Q.E.D., it's almost like not cooking at all. If you wanted to make your own pesto, that would be fabulous. Since I am sans food processor, I went with the store bought stuff.
I didn't bother thawing my peas, but if you did, just toss them in with the spinach.
Ingredients:
1 tub store bought pesto (about 1/2 cup if you're using homemade)
1 box whole wheat pasta
1 small bag or box of frozen peas
1/2 bag fresh baby spinach
Salt
Pepper
Pinch red pepper flakes
Directions:
 |
| The cast |
Fill a stock pot with water and set it on to boil.
Chop your spinach while you wait for the water to boil.

When the water boils, add two small handfuls of salt (whole wheat pasta needs it). Toss in the pasta and cook according to the directions on the box. When your pasta is has about a minute left on the cooking time, toss in your frozen peas.

When the pasta is finished, drain it and the peas. Return them to the hot pot. Toss in the spinach and the whole container of pesto. Season with salt, pepper, and red pepper flake. Toss well so that the spinach is slightly wilted and the pasta and peas are well-coated.

Serve immediately for a hot dish. If you're making pasta salad, chill in the fridge until you're ready to serve.
It's wicked good, so enjoy!
Sunday, July 17, 2011
Vegetable Lasagna
I heart lasagna. I always felt a little closer to Garfield than most other cartoons because I could see myself just as readily shoving handfuls of it into my mouth the same way he did.
Vegetable lasagna has quickly overtaken meat lasagna as my favorite. While we were visiting family this summer, I made it for my in-laws using the produce they had on hand. I managed to chock it full of even more vegetables than I had in the past. My in-laws enjoyed it, which is a good sign, because they both tend to have bland palates. If they like it, I'm pretty sure the picky eater in your life might at least give it a shot.
Notes: This dish admits of a lot of variation, so use whatever veggies you like. You need some combination of (a) veggies that you can slice thinly (eggplant, squash, zucchini, carrots, turnips, beets, etc.) and (b) some form of leafy green (spinach, swiss chard, mustard greens, turnip greens, kale, arugula, etc.). Other than that, there are no rules.
My slicing was made infinitely easier by my new favorite kitchen friend:
I love this tool. It's a pain to clean, but it makes thin slices, it makes french fries, and it can julienne like nobody's business. It cut (haha) my slicing time in half. But if you don't have one, a slow and careful knife will work just as well. I've done it both ways and the lasagna turned out great both times.
I have made this dish with sauce from a jar and with sauce from scratch. I rarely just use the sauce from a jar straight; I like to jazz it up a little to get rid of the jarred flavor. Whatever sauce you use, just be sure you have about 5 or 6 cups of it.
Lasagna isn't complex, there are just a lot of steps. Most of the work goes into prepping the ingredients so that you can assemble them all. The thing I love most about it is that once your assemble it and get it in the oven, you can clean up all your prep mess and just wait for it bake.
If you're a busy person, you can do a lot of stuff in advance. Do all or some of the prep the night before, leave everything in the fridge, and then put it all together before you're ready to bake.
Ingredients:
-1 box no-boil lasagna noodles
-2 small yellow squash
-2 large carrots
-1/2 pound baby spinach
-15 oz. ricotta cheese
-2 tablespoons butter or olive oil
-1 small ball of mozzarella
-6 cups pre-made pasta sauce, homemade sauce, or can of crushed tomatoes (all 26 oz. to 28 oz.)
-1 leek, cleaned
-6 garlic cloves
-10 fresh basil leaves, chopped and divided
-1 tablespoon each of dried onion, garlic, basil, and parsley
-1 teaspoon dried oregano
-Pinch red pepper flakes
-Salt
-Pepper
Directions:
Heat oven to 375.
Start by prepping your veggies. Peel your carrots and slice them into 1/4-1/8 inch rounds. Do the same with the squash and set them aside.
Next, chop your leeks and garlic. Add butter or oil to a skillet with high sides. Turn the heat to medium-low and let the butter melt. Add the leeks and garlic to the pan, season with salt and pepper, and saute until tender.

Add your jar of sauce (or crushed tomatoes) and all your dried herbs. Season again with salt and pepper. Stir, reduce the heat to simmer. The sauce can sit as long as it needs to until you're ready to use it. Right before you do the assembly, remove it from the heat and stir in half the fresh basil.

Empty your ricotta cheese into a bowl and season with salt and pepper. Add half the fresh basil.

Chop the baby spinach and add that too.

Stir until the mixture is well-combined.
Now you're ready to assemble!
Follow this layering formula:
1 cup sauce
4 sheets pasta
1/3 ricotta mixture
Layer of sliced veggies
1 cup sauce

Follow that layering formula two more times (three times total). For the last layer, add the pasta sheets, then pour the rest of your sauce on top.
To finish it up, slice your ball of fresh mozzarella and cover the top with the thin slices.

Cover the dish with foil and bake for 45 minutes. After the 40 minutes, take the foil off and finish the cooking. The cheese will get slightly browned. I forgot to take a reveal photo, but trust me it's beautiful.
Let it stand for 10 minutes (or however long you can possibly wait). Serve and enjoy!
Vegetable lasagna has quickly overtaken meat lasagna as my favorite. While we were visiting family this summer, I made it for my in-laws using the produce they had on hand. I managed to chock it full of even more vegetables than I had in the past. My in-laws enjoyed it, which is a good sign, because they both tend to have bland palates. If they like it, I'm pretty sure the picky eater in your life might at least give it a shot.
Notes: This dish admits of a lot of variation, so use whatever veggies you like. You need some combination of (a) veggies that you can slice thinly (eggplant, squash, zucchini, carrots, turnips, beets, etc.) and (b) some form of leafy green (spinach, swiss chard, mustard greens, turnip greens, kale, arugula, etc.). Other than that, there are no rules.
My slicing was made infinitely easier by my new favorite kitchen friend:
 |
| Hello, mandolin! |
I have made this dish with sauce from a jar and with sauce from scratch. I rarely just use the sauce from a jar straight; I like to jazz it up a little to get rid of the jarred flavor. Whatever sauce you use, just be sure you have about 5 or 6 cups of it.
Lasagna isn't complex, there are just a lot of steps. Most of the work goes into prepping the ingredients so that you can assemble them all. The thing I love most about it is that once your assemble it and get it in the oven, you can clean up all your prep mess and just wait for it bake.
If you're a busy person, you can do a lot of stuff in advance. Do all or some of the prep the night before, leave everything in the fridge, and then put it all together before you're ready to bake.
Ingredients:
-1 box no-boil lasagna noodles
-2 small yellow squash
-2 large carrots
-1/2 pound baby spinach
-15 oz. ricotta cheese
-2 tablespoons butter or olive oil
-1 small ball of mozzarella
-6 cups pre-made pasta sauce, homemade sauce, or can of crushed tomatoes (all 26 oz. to 28 oz.)
-1 leek, cleaned
-6 garlic cloves
-10 fresh basil leaves, chopped and divided
-1 tablespoon each of dried onion, garlic, basil, and parsley
-1 teaspoon dried oregano
-Pinch red pepper flakes
-Salt
-Pepper
Directions:
Heat oven to 375.
Start by prepping your veggies. Peel your carrots and slice them into 1/4-1/8 inch rounds. Do the same with the squash and set them aside.
 |
| Pretty colors |

Add your jar of sauce (or crushed tomatoes) and all your dried herbs. Season again with salt and pepper. Stir, reduce the heat to simmer. The sauce can sit as long as it needs to until you're ready to use it. Right before you do the assembly, remove it from the heat and stir in half the fresh basil.

Empty your ricotta cheese into a bowl and season with salt and pepper. Add half the fresh basil.

Chop the baby spinach and add that too.

Stir until the mixture is well-combined.
Now you're ready to assemble!
Follow this layering formula:
1 cup sauce
4 sheets pasta
1/3 ricotta mixture
Layer of sliced veggies
1 cup sauce

Follow that layering formula two more times (three times total). For the last layer, add the pasta sheets, then pour the rest of your sauce on top.
To finish it up, slice your ball of fresh mozzarella and cover the top with the thin slices.

Cover the dish with foil and bake for 45 minutes. After the 40 minutes, take the foil off and finish the cooking. The cheese will get slightly browned. I forgot to take a reveal photo, but trust me it's beautiful.
Let it stand for 10 minutes (or however long you can possibly wait). Serve and enjoy!
Q.E.D: Roasted Grapes with Honey Vanilla Yogurt
Scott and I had some friends over for dinner the other night. I bought a few things to nibble on before dinner was ready. "Who doesn't love sweet, delicious grapes," I thought, as I put some green grapes in my shopping basket. I brought them home, washed them, and laid them out to dry. "Ah, a couple came off the stem. I'll just eat those," I thought, sampling the goods.
ACK! They were sour.
I tried a couple more, just to be sure, but it turned out the first few hadn't lied. The whole bunch was sour.
Now, I'm no Ms. Manners, but I know you don't serve sour grapes to your guests. "How," I said to myself, "can I salvage this sorry produce?"
I remembered once seeing a recipe for roasted grapes. Hm, let's see: if you roast a tomato, it tastes sweeter. Could it work with grapes as well? I decided a little experiment was in order. The grapes were already sour, so even if they didn't turn out, it wouldn't be a loss.
Much to my surprise, they were good! They were sweet, but still a little tart, a little nutty, warm and really juicy. I had turned my appetizer blunder into a appetizer wonder.
Notes: These are Q.E.D if ever there was. I decided to deck mine out in some toasted sesame seeds, but your could use several different things. I think any finely chopped nut would do. If I had had any cinnamon, I would have used that in addition to my seeds. I contemplated dusting them with a little cocoa powder, just to see. I think I might try that with some red grapes. I think I'll experiment with the dipping sauce, too.
These made a great cocktail snack/appetizer. They'd go great with a cheese plate. I put them back in the fridge and had them leftover as a side dish as well. They were great cold! If you were serving them as an appetizer, I think they're best slightly warm or at room temperature.
These are so fast, you could whip them up totally last minute.
Ingredients:
1 tablespoon peanut oil
1 pound grapes
2 teaspoons sesame seeds
Pinch salt
Dipping sauce (recipe follows)
Heat your oven to 450.
Line a baking sheet with foil. Remove the grapes from the stem and scatter in one layer on the baking sheet.
Drizzle with oil and roast for 10 minutes. Halfway through, shake the baking sheet to turn the grapes over so they cook on both sides. They'll be ready when they are plump, sizzling, and just slightly browned.
When they are finished, sprinkle them with salt and sesame seeds.
Serve them with some dipping sauce!
Ingredients:
2 tablespoons plain yogurt (I used Greek yogurt because that's what I had)
1 teaspoon honey
1/2 teaspoon vanilla extract
Stir all ingredients together in a small bowl. Serve immediately or chill in the fridge until you're ready to serve.
ACK! They were sour.
I tried a couple more, just to be sure, but it turned out the first few hadn't lied. The whole bunch was sour.
Now, I'm no Ms. Manners, but I know you don't serve sour grapes to your guests. "How," I said to myself, "can I salvage this sorry produce?"
I remembered once seeing a recipe for roasted grapes. Hm, let's see: if you roast a tomato, it tastes sweeter. Could it work with grapes as well? I decided a little experiment was in order. The grapes were already sour, so even if they didn't turn out, it wouldn't be a loss.
Much to my surprise, they were good! They were sweet, but still a little tart, a little nutty, warm and really juicy. I had turned my appetizer blunder into a appetizer wonder.
Notes: These are Q.E.D if ever there was. I decided to deck mine out in some toasted sesame seeds, but your could use several different things. I think any finely chopped nut would do. If I had had any cinnamon, I would have used that in addition to my seeds. I contemplated dusting them with a little cocoa powder, just to see. I think I might try that with some red grapes. I think I'll experiment with the dipping sauce, too.
These made a great cocktail snack/appetizer. They'd go great with a cheese plate. I put them back in the fridge and had them leftover as a side dish as well. They were great cold! If you were serving them as an appetizer, I think they're best slightly warm or at room temperature.
These are so fast, you could whip them up totally last minute.
Ingredients:
1 tablespoon peanut oil
1 pound grapes
2 teaspoons sesame seeds
Pinch salt
Dipping sauce (recipe follows)
Heat your oven to 450.
Line a baking sheet with foil. Remove the grapes from the stem and scatter in one layer on the baking sheet.
Drizzle with oil and roast for 10 minutes. Halfway through, shake the baking sheet to turn the grapes over so they cook on both sides. They'll be ready when they are plump, sizzling, and just slightly browned.
When they are finished, sprinkle them with salt and sesame seeds.
 |
| The miracle |
Ingredients:
2 tablespoons plain yogurt (I used Greek yogurt because that's what I had)
1 teaspoon honey
1/2 teaspoon vanilla extract
Stir all ingredients together in a small bowl. Serve immediately or chill in the fridge until you're ready to serve.
Saturday, July 16, 2011
Adventures in Dough, Part 3: Pork Empanadas
Remember when I said I was trying to cut back on meat? Well, that's true, but not for this particular dish.
There was an empanada joint in Urbana that we used to frequent in graduate school. Warm, toasty savory hand pies were perfect on those chilly days (which, in Urbana, were plentiful). When I saw this recipe from Smitten Kitchen for empanada dough, I knew what my next baking challenge would be.
I intended to make them with beef, but our local grocery store had small pork roasts on sale by one get one free. I have trouble passing up that kind of a deal.
My summer fling with my slow cooker continues, so I decided that nothing would be better than shredded pork empanadas.
Notes: The meat-free efforts should have continued. Although I was happy with this dish overall, I was unhappy with the meat filling. I wanted something much saucier than what I got. The pork was pretty sad as well. It only needed three hours in the slow cooker, but I set it for four. It was definitely overdone and under-seasoned. I'm leaving the seasonings I used as is and I'll let you play with the spice level. Or change the filling entirely. I think I will.
This batch was supposed to make 24 empanadas. I only got 16 out of my batch. 8 was plenty for the two of us and we had some leftover. I froze the other 8 for Scott to eat later. He liked the filling better than I did.
Ingredients:
For the filling and wet rub:
2 small pork loin roasts (2 lbs of pork total)
1 small onion
6 garlic cloves
1/2 bag of frozen corn
1/2 bag of dried black beans, pre-soaked
1 chipotle pepper plus 1 tablespoon of adobo sauce
1 tablespoon whole grain mustard
1 tablespoon cumin
1 teaspoon chili powder
1 teaspoon paprika
1 teaspoon honey
1 cup water
Salt
Pepper
For the dough (altered slightly from this recipe):
4 1/2 cups of flour (3 1/2 white, 1 wheat)
2 sticks unsalted butter, cubed and cold
3 teaspoons salt
2 large eggs (plus one for egg wash)
3/4 cup of ice water
2 tablespoons apple cider vinegar
Directions:
Start your filling first. Place your pork roasts in the slow cooker.
Get your spices together for your wet rub.

Add the honey, mustard, cumin, chili powder, and paprika to a small bowl and stir it until you end up with a paste.

Rub your pork roasts with the paste so that they are both well-coated.

Add one cup of water to your slow cooker. Add your chipotle pepper and adobo sauce to the water. Add onions and garlic. Stir and set for 3 hours on high.

While the meat is cooking, make your empanada dough.
Add your flour and salt to a large bowl. Sprinkle your cold butter on top and start working it into the flour with your pastry blender (or your hands).

Blend until the mixture has the look of coarse corn meal and the consistency of damp sand.

Mix the wet ingredients together and then add them to the flour/butter mixture. Stir until the dough comes together.

Knead it once or twice in the bowl, turn it out on a floured surface. Divide the dough in half and shape it into flat rectangles.
Chill the dough for least an hour and up to six.
When the filling is an hour away from being finished, shred the pork and add in the black beans and corn. Return to the slow cooker to finish.
Once the dough is chilled and the filling is done, take the dough out of the fridge and divide it into eight equal pieces. Roll each one out into a 5 inch round.
Add three tablespoons of filling in the center of the round.

Wet the edge of the round with water (just wet your finger and trace the edge of the dough), fold it in half and crimp the edges closed with a fork.
Beat 1 egg with one tablespoon of water. Brush the egg wash over the empanadas.

Place the oven racks in the bottom third and top third of the oven. Bake the empanadas at 400 for 20 minutes, 10 minutes on the bottom and 10 minutes on the top.

Serve hot and enjoy!
There was an empanada joint in Urbana that we used to frequent in graduate school. Warm, toasty savory hand pies were perfect on those chilly days (which, in Urbana, were plentiful). When I saw this recipe from Smitten Kitchen for empanada dough, I knew what my next baking challenge would be.
I intended to make them with beef, but our local grocery store had small pork roasts on sale by one get one free. I have trouble passing up that kind of a deal.
My summer fling with my slow cooker continues, so I decided that nothing would be better than shredded pork empanadas.
Notes: The meat-free efforts should have continued. Although I was happy with this dish overall, I was unhappy with the meat filling. I wanted something much saucier than what I got. The pork was pretty sad as well. It only needed three hours in the slow cooker, but I set it for four. It was definitely overdone and under-seasoned. I'm leaving the seasonings I used as is and I'll let you play with the spice level. Or change the filling entirely. I think I will.
This batch was supposed to make 24 empanadas. I only got 16 out of my batch. 8 was plenty for the two of us and we had some leftover. I froze the other 8 for Scott to eat later. He liked the filling better than I did.
Ingredients:
For the filling and wet rub:
2 small pork loin roasts (2 lbs of pork total)
1 small onion
6 garlic cloves
1/2 bag of frozen corn
1/2 bag of dried black beans, pre-soaked
1 chipotle pepper plus 1 tablespoon of adobo sauce
1 tablespoon whole grain mustard
1 tablespoon cumin
1 teaspoon chili powder
1 teaspoon paprika
1 teaspoon honey
1 cup water
Salt
Pepper
For the dough (altered slightly from this recipe):
4 1/2 cups of flour (3 1/2 white, 1 wheat)
2 sticks unsalted butter, cubed and cold
3 teaspoons salt
2 large eggs (plus one for egg wash)
3/4 cup of ice water
2 tablespoons apple cider vinegar
Directions:
Start your filling first. Place your pork roasts in the slow cooker.
 |
| Mah pork babies |

Add the honey, mustard, cumin, chili powder, and paprika to a small bowl and stir it until you end up with a paste.

Rub your pork roasts with the paste so that they are both well-coated.

Add one cup of water to your slow cooker. Add your chipotle pepper and adobo sauce to the water. Add onions and garlic. Stir and set for 3 hours on high.

While the meat is cooking, make your empanada dough.
Add your flour and salt to a large bowl. Sprinkle your cold butter on top and start working it into the flour with your pastry blender (or your hands).

Blend until the mixture has the look of coarse corn meal and the consistency of damp sand.

Mix the wet ingredients together and then add them to the flour/butter mixture. Stir until the dough comes together.

Knead it once or twice in the bowl, turn it out on a floured surface. Divide the dough in half and shape it into flat rectangles.
 | ||
| One, not so much a rectangle |
When the filling is an hour away from being finished, shred the pork and add in the black beans and corn. Return to the slow cooker to finish.
 |
| Mine is more cubed than shredded |
 |
| Round-ish |

Wet the edge of the round with water (just wet your finger and trace the edge of the dough), fold it in half and crimp the edges closed with a fork.
Beat 1 egg with one tablespoon of water. Brush the egg wash over the empanadas.

Place the oven racks in the bottom third and top third of the oven. Bake the empanadas at 400 for 20 minutes, 10 minutes on the bottom and 10 minutes on the top.

Serve hot and enjoy!
Monday, July 11, 2011
Farmer's Market Creation: Braised Eggplant over Broken Whole Wheat Noodles
The Charlestown Market rolled around again, which means it's time for another Farmer's Market Creation.
This time, the intriguing produce was Japanese eggplant.
I saw a recipe for braised eggplant in Yankee* magazine and came up with a different take on it. This is kind of a deconstructed eggplant parmesan, complete with garlicky breadcrumb topping.
Notes: As you can see, I could have used more eggplant. The eggplant will fall apart some, but that was OK with me. If you want yours to stay together, either cut the medallions larger or shorten the cooking time.
I rather liked the broken noodles. I'm not sure it would taste any differently if they were whole. If you're shy about whole wheat pasta, I think the small bites actually help it blend with the dish better.
Ingredients:
3 Japanese eggplants
6 vine-ripened tomatoes
1 box of whole wheat thin spaghetti
1 cup Panko breadcrumbs
8-10 basil leaves
4-5 garlic cloves
1 small onion
1 tablespoon onion powder
1 teaspoon garlic powder
2 tablespoons herb de provence, divided
3 tablespoons plus 1 of butter
8 drops of Tabasco
1 capful of liquid smoke
1 tablespoon olive oil
Directions:
Heat oven to 400.
Quarter the tomatoes and then slice the quarters. Lay them on a baking sheet. Sprinkle them with onion powder, garlic powder, 1 tablespoon of herb de provence. Drizzle with olive oil and season with salt and pepper. Toss to coat and roast for 25-30 minutes.
Put a large skillet over medium-low heat. Melt 3 three tablespoons of butter in the pan. Slice the onion and sweat the onion while your tomatoes roast.

Fill a stock pot with water and turn it on high.
Slice the eggplant into medallions. Mince the garlic, setting aside some for the breadcrumb topping. Chop the basil and set aside.

Once your tomatoes have finished roasting, add the eggplant to the pan with the onions. Add the tomatoes (including the roasting juices). Add garlic and basil, and put a lid on the pan. Turn it to low heat and allow to simmer for 20 minutes or until you finish the pasta and bread crumbs.
Open the spaghetti and take out a small handful. Break the noodles in half and then break each half in half again (so that each handful ends up in fourths).

Once the water boils, add a small handful of salt to the water and dump the pasta in. Cook according to the directions on the box.
While the pasta cooks, pour a cup of breadcrumbs into a bowl, season with the rest of the herb de provence, salt, and pepper.

In a small skillet, melt one tablespoon of butter over low heat. Add the reserved garlic and let it saute for a minute. Add the breadcrumbs and stir to combine. Toast for 5 minutes or until crispy and golden.

Once the pasta is done, drain it and return it to the warm pot. Dish up some pasta in a bowl. Add a ladle or two of the braised eggplant and top with the breadcrumbs.

Enjoy!
*Yes, I at one point subscribed to Yankee magazine. I was in New England and I was hoping to learn about fun things to do and see. They had New England style recipes, which were informative, although New England is not exactly known for its stellar cuisine. Yes, Scott is sufficiently ashamed of me.
This time, the intriguing produce was Japanese eggplant.
 |
| Should have gotten one more, but no matter |
Notes: As you can see, I could have used more eggplant. The eggplant will fall apart some, but that was OK with me. If you want yours to stay together, either cut the medallions larger or shorten the cooking time.
I rather liked the broken noodles. I'm not sure it would taste any differently if they were whole. If you're shy about whole wheat pasta, I think the small bites actually help it blend with the dish better.
Ingredients:
3 Japanese eggplants
6 vine-ripened tomatoes
1 box of whole wheat thin spaghetti
1 cup Panko breadcrumbs
8-10 basil leaves
4-5 garlic cloves
1 small onion
1 tablespoon onion powder
1 teaspoon garlic powder
2 tablespoons herb de provence, divided
3 tablespoons plus 1 of butter
8 drops of Tabasco
1 capful of liquid smoke
1 tablespoon olive oil
Salt
PepperDirections:
Heat oven to 400.
 |
| Not from the market; no tomatoes this week |
Put a large skillet over medium-low heat. Melt 3 three tablespoons of butter in the pan. Slice the onion and sweat the onion while your tomatoes roast.

Fill a stock pot with water and turn it on high.
Slice the eggplant into medallions. Mince the garlic, setting aside some for the breadcrumb topping. Chop the basil and set aside.

Once your tomatoes have finished roasting, add the eggplant to the pan with the onions. Add the tomatoes (including the roasting juices). Add garlic and basil, and put a lid on the pan. Turn it to low heat and allow to simmer for 20 minutes or until you finish the pasta and bread crumbs.
Open the spaghetti and take out a small handful. Break the noodles in half and then break each half in half again (so that each handful ends up in fourths).

Once the water boils, add a small handful of salt to the water and dump the pasta in. Cook according to the directions on the box.
While the pasta cooks, pour a cup of breadcrumbs into a bowl, season with the rest of the herb de provence, salt, and pepper.

In a small skillet, melt one tablespoon of butter over low heat. Add the reserved garlic and let it saute for a minute. Add the breadcrumbs and stir to combine. Toast for 5 minutes or until crispy and golden.

Once the pasta is done, drain it and return it to the warm pot. Dish up some pasta in a bowl. Add a ladle or two of the braised eggplant and top with the breadcrumbs.

Enjoy!
*Yes, I at one point subscribed to Yankee magazine. I was in New England and I was hoping to learn about fun things to do and see. They had New England style recipes, which were informative, although New England is not exactly known for its stellar cuisine. Yes, Scott is sufficiently ashamed of me.
Chickpea and Cucumber Salad
I'm trying to cut most of the meat out of my diet. This isn't proving terribly difficult, except when it comes to lunch.
You see, I am something of a sandwich fanatic.
I appreciate sandwiches on a level that borders on obsessive. When I order a sandwich, I judge it on a variety of factors: flavor combination, bread choice, construction, moisture content. I annoy my loved ones (mostly Scott) either raving about the great ones or (somewhat more frequently) complaining about the bad ones. I *ahem* inform others (mostly Scott) when they are improperly constructing a sandwich and have been known to wrest cutlery from people's (Scott's) hands. You get the idea.
Most sandwiches contain meat. I love deli meat, but the good stuff is expensive. Plus, it doesn't stay fresh long. And let's not talk about the sodium content. So, I think I will leave the great deli sandwiches to the pros (actual delis). But how to continue making sandwiches I love without the meat? Well, here's one way.
Notes: My giddiness for slow cooker beans continues, so I made dried chickpeas in my crock pot. You could easily adapt this to be Q.E.D. if you use canned beans instead.
If you wanted to bind this a little, you could add a little plain or greek yogurt. I like it just as it is.
Ingredients:
1/2 batch of Slow Cooker Chickpeas (recipe below) or 2 15 oz. cans of chickpeas
1 English cucumber or 2 regular cucumbers, diced
2 shallots, thinly sliced
1 bunch of fresh dill, chopped
2 tablespoons of olive oil
2 teaspoons kosher salt
1 teaspoon black pepper
Directions:
If you used canned chickpeas, pour them into a strainer, rinse them under cold water, and let them drain. If you used the slow cooker beans, make sure they are cool.

While draining the chickpeas, dice the cucumber roughly the same size as the chickpeas. Slice the shallots thin and chop the fresh dill.

Mix all the ingredients in a bowl. Add salt and pepper, drizzle with olive oil, and toss well.

Chill for a few hours in the fridge and serve in a pita pocket or over mixed greens. Enjoy!
For slow cooker chickpeas:
1 bag of dried chickpeas
6 cups hot tap water
10 drops Tabasco
2 tablespoons Worcestershire sauce
2 tablespoons kosher salt
2 tablespoons onion powder
1 tablespoon garlic powder
1 tablespoon cumin
2 teaspoons black pepper
3 teaspoons ground thyme
Rinse chickpeas in a colander. Pick out any broken or shriveled beans. Add everything to the slow cooker, stir, and cook on high for 4 hours. When the chickpeas are done, drain them and then spread them on a baking sheet to cool down before you add them to the salad. Freeze what you don't use or save the other half in the fridge to use in a later meal.
Sunday, July 10, 2011
Q.E.D: Roasted Asparagus Penne
Time for a new feature here in the kichen: Q.E.D = quick, easy, delicious. I can't resist a philosophy pun.
We all need quick and easy meals in our arsenal. You know the drill: you have a long day at the office, you're tired, and you're hungry. The last thing you want to do is stand around in the kitchen waiting for dough to rise, chopping a million veggies, or gathering tons of ingredients.
Even though I love cooking, rough days are rough days. On the crummy days, not even my favorite hobby can cheer me up. Shamefully, my default desire on days like this is fast food (Wendy's is my poison of choice). But, on really bad days, you don't even want to go out.
In those cases, a nice meal that's easy to make will at least make you feel nourished, even if it can't fix everything else.
Notes: One of the keys to Q.E.D meals is timing. If you have wait for something (e.g., waiting for your water to boil), plan to do some kind of prep during that time (e.g., chopping veggies). If you maximize all your down time, you'll find yourself less rushed and more at ease. This dish takes basically 15 minutes, plus the time it takes for your oven to heat and your water to boil.
The "sauce" for this pasta is a standard olive oil base that I use all the time. It can be easily adapted to a number of different ingredients and flavor combinations. I happened to have fresh thyme that I needed to use up, but if you don't have any, the dried herb mix is perfectly fine on its own.
Ingredients:
1 bunch asparagus
1 box penne pasta
1/3 cup olive oil (you'll need an additional tablespoon for drizzling)
2 tablespoons butter (optional; I like the flavor)
4 garlic cloves
2 heaping teaspoons of dried oregano
1 heaping tablespoon of dried parsley
1 heaping tablespoon dried basil
1/4 teaspoon of red pepper flakes (optional; I like the kick)
2 teaspoons of fresh thyme (optional)
Salt
Pepper
Directions:
Preheat your oven to 400. Get a stock pot, fill it with water and turn it on high. Get out a small skillet.
While your oven is heating, snap the ends off of your asparagus: hold the asparagus stalk at both ends and bend it until it breaks. Discard the woody, light-colored ends and put the stalks on a foil-lined sheet tray.

Drizzle with 1 tablespoon of olive oil, season with salt and pepper, and toss until the stalks are coated. Roast the asparagus for 8 minutes.
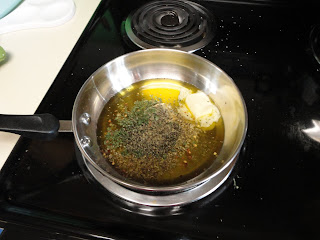
After you're finished prepping the asparagus, go ahead and mince your garlic cloves. Then chop your fresh herbs, if you used them. Once that's done, pour the 1/3 of olive oil in your small skillet. Add the butter and let it start to melt. While that's melting, gather your herbs and spices. When the butter is melted, add your herbs, red pepper, garlic, season with salt and pepper and just let it hang out over low heat until you need it. If the garlic starts to sizzle, turn the heat off and just let it sit.
At this point, your pasta water should be boiling. Add a small handful of salt to the water and drop your pasta. Cook according to the directions on the box.
Your asparagus might be done at this point. Take it out of the oven and let it cool. Once it's cool enough to handle, cut the stalks into thirds so that the pieces are roughly the same size as the penne.

Once the pasta is finished, drain it in a colander and return it back to the hot pot. Add the chopped asparagus and pour the olive oil sauce on top. Toss well.

Dish it up, relax, and enjoy!
We all need quick and easy meals in our arsenal. You know the drill: you have a long day at the office, you're tired, and you're hungry. The last thing you want to do is stand around in the kitchen waiting for dough to rise, chopping a million veggies, or gathering tons of ingredients.
Even though I love cooking, rough days are rough days. On the crummy days, not even my favorite hobby can cheer me up. Shamefully, my default desire on days like this is fast food (Wendy's is my poison of choice). But, on really bad days, you don't even want to go out.
In those cases, a nice meal that's easy to make will at least make you feel nourished, even if it can't fix everything else.
Notes: One of the keys to Q.E.D meals is timing. If you have wait for something (e.g., waiting for your water to boil), plan to do some kind of prep during that time (e.g., chopping veggies). If you maximize all your down time, you'll find yourself less rushed and more at ease. This dish takes basically 15 minutes, plus the time it takes for your oven to heat and your water to boil.
The "sauce" for this pasta is a standard olive oil base that I use all the time. It can be easily adapted to a number of different ingredients and flavor combinations. I happened to have fresh thyme that I needed to use up, but if you don't have any, the dried herb mix is perfectly fine on its own.
Ingredients:
1 bunch asparagus
1 box penne pasta
1/3 cup olive oil (you'll need an additional tablespoon for drizzling)
2 tablespoons butter (optional; I like the flavor)
4 garlic cloves
2 heaping teaspoons of dried oregano
1 heaping tablespoon of dried parsley
1 heaping tablespoon dried basil
1/4 teaspoon of red pepper flakes (optional; I like the kick)
2 teaspoons of fresh thyme (optional)
Salt
Pepper
Directions:
Preheat your oven to 400. Get a stock pot, fill it with water and turn it on high. Get out a small skillet.
While your oven is heating, snap the ends off of your asparagus: hold the asparagus stalk at both ends and bend it until it breaks. Discard the woody, light-colored ends and put the stalks on a foil-lined sheet tray.

Drizzle with 1 tablespoon of olive oil, season with salt and pepper, and toss until the stalks are coated. Roast the asparagus for 8 minutes.
After you're finished prepping the asparagus, go ahead and mince your garlic cloves. Then chop your fresh herbs, if you used them. Once that's done, pour the 1/3 of olive oil in your small skillet. Add the butter and let it start to melt. While that's melting, gather your herbs and spices. When the butter is melted, add your herbs, red pepper, garlic, season with salt and pepper and just let it hang out over low heat until you need it. If the garlic starts to sizzle, turn the heat off and just let it sit.

At this point, your pasta water should be boiling. Add a small handful of salt to the water and drop your pasta. Cook according to the directions on the box.
Your asparagus might be done at this point. Take it out of the oven and let it cool. Once it's cool enough to handle, cut the stalks into thirds so that the pieces are roughly the same size as the penne.

Once the pasta is finished, drain it in a colander and return it back to the hot pot. Add the chopped asparagus and pour the olive oil sauce on top. Toss well.

Dish it up, relax, and enjoy!
Subscribe to:
Posts (Atom)