Sadly, I am sans picture for this one. But, it was so good, I have to share.
We had our department pot luck lunch today (academics love lunch -- I have yet to figure out why) and the spread was great. There were appetizers, desserts, and someone even made two roasts! It's a good thing I brought this dish, though, because the vegetarians wanted nothing to do with the meat plate. Not to toot my own horn, but the lasagna was all gone by the end of lunch and the meat plate was half full.
Notes: This one is a little time consuming, but it's totally worth it. None of the steps are difficult, they just take patience.
Ingredients:
1 small butternut squash
1/2 bunch of kale, cleaned and stemmed
2 shallots
2 tablespoons of butter
1 box no-boil lasagna noodles
1 jar of your favorite marinara sauce
1 15 oz. tub of ricotta cheese
1 cup of grated Romano cheese
1 large or two small mozzarella balls
1 teaspoon balsamic vinegar
2 teaspoons maple syrup
1/4 cup of whole milk or heavy cream (no skimping on the fat)
2-3 sprigs of fresh rosemary
2-3 sprigs of fresh thyme
2-3 sprigs of fresh sage
salt
pepper
Directions: Heat your oven to 375.
Start by prepping the layers.
Squash: You have two options with the butternut squash: (a) roast it ahead of time and use the roasted mashed flesh or (b) slice it thin and layer the slices between the noodles. I didn't want to bother with roasting, so I opted for (b). I just cut the peel away from the squash with my kitchen knife and then cut it in half. I scoop the seeds out of the lower half and then I just slice it about 1/4-1/8 of an inch thick. Put the slices in a bowl and season with salt, pepper, maple syrup, and a heaping tablespoon of chopped sage.
Kale: Stack your kale pieces on top of each other and roll them up like a cigar. Then do thin slices chiffonade-style. Put it in a bowl and set aside.
Cheese: Dump your ricotta and Romano cheese into a bowl. Add lots of fresh black pepper, and a heaping tablespoon of chopped thyme and chopped rosemary. Mix until it's well-blended.
Put all three bowls back in the fridge while you make your sauce.
Thinly slice your shallots. Add butter to a pan and saute the shallots over medium. I lightly caramelized mine. Add the jar of sauce and the milk or heavy cream. Take your remaining herb sprigs (if you have any) and add them whole to the pan. Simmer for 15-20 minutes.
When the sauce has 5 minutes left, take all your bowls out of the fridge. Add the balsamic vinegar to the kale and mix it well (you want to massage the kale a bit). Season with salt and pepper.
Slice your mozzarella balls and fish your herb stems out of the sauce
Now it's time to assemble the lasagna! In a 13x9 pan, add:
1 cup sauce
4 lasagna noodles
1/3 ricotta mixture
1/3 squash
1/3 kale
Repeat the layer two more times. For the top layer, add the final noodles and your remaining sauce. Layer your mozzarella cheese on top. Cover it in foil and bake for 40 minutes. Take the foil off and bake for another 5-7 minutes to brown the cheese.
Let it stand for 7-10 minutes (or, if you're me, rush it to the the potluck covered in foil and nestled in towels) and enjoy!
Thursday, December 15, 2011
Saturday, December 10, 2011
Smokey Sweet Roasted Chickpeas
You're either going to love me or curse me for this dish. WARNING: these are so good, you will find it difficult to restrain yourself. I could have eaten the whole batch right off the baking sheet.
Notes: This is one of those dishes that will test your oven. It took mine 45 minutes to get crispy. I would start out with 30 and then increase the time if you need to.
You could easily make two batches of these. Just double the recipe. They would make the best party snack.
Ingredients:
1 can of chickpeas (garbanzo beans) rinsed and drained
1/2 teaspoon chili powder
1/2 teaspoon cumin
3/4 teaspoon kosher salt
1/2 teaspoon raw sugar
1/4 teaspoon black pepper
2 teaspoons olive oil
Directions: Heat your oven to 400.
After you drain and rinse your chickpeas, lay them out on a clean kitchen towel to dry. Let them dry while your oven heats. You want them as dry as you can get them.
Meanwhile, mix all your spices in a small bowl. Set aside.
Pour the chickpeas into bowl. Add olive oil and spices and toss well.
Spread the chickpeas out on a baking sheet in a single layer. Make sure they have room to grove.
Bake them for between 30-45 minutes. Give them a shake or a turn halfway through. They're done when they're light brown and crispy/crunchy. If you're not sure if they're done, just taste one (or three). Let them cool and store them in an airtight container. Enjoy!
 |
| Resistance is futile |
Q.E.D.: Pastina and Peas with Herbs and Romano
Normally you put pastina in soups. I like it on its because it has a creamy texture similar to risotto, but lighter. It takes no time at all to cook and reheats really well. This is one of those curl-up-on-the-sofa dishes -- perfect light pasta dish for a chilly week night!
Notes: The only trick to cooking pastina on its own is that you can't drain it in a normal collander: it's too small and it will drain right through. I use a fine-mesh strainer to pull it out of the boiling water.
Use whatever herbs you like, just be sure you use fresh herbs rather than dried. Because there are so few ingredients in the dish, dried herbs just wouldn't be the same.
Ingredients:
1 box pastina (any shape you like -- I used stars)
1 tablespoon chopped rosemary
1 tablespoon chopped thyme
2 or 3 garlic cloves minced
Dash red pepper flakes
1/4 cup olive oil
2 tablespoons butter
1/2 a bag of frozen peas
1/2 cup grated Romano cheese
Salt
Pepper
Directions:
Bring a stock pot of water to a boil. While your waiting for it to boil, chop your herbs and garlic.
Add the oil and butter to a large sauce pan and heat it on medium-low. Add the garlic, herbs, salt, pepper, and red pepper flakes. If they start to sizzle, turn your heat down.
Once your pasta water boils, add a small handful of salt and drop the pastina in. It should take between 4-5 minutes to cook.
When the pasta has 2 minutes of cooking time left, add your frozen peas. When the time is up, use a fine-mesh strainer to fish the pastina and peas out of the water. Add them to your warm oil and herb mixture.
Once all the pastina in in the pan, sprinkle in half the Romano cheese. Stir it in and then add the other half. Stir until everything together. Serve and sprinkle a little more cheese on top is you're feeling saucy. Enjoy!

Sunday, December 4, 2011
The Kale Diaries, Part Two: Barbeque Kale Chips
If you have more kale after you make your Easy Kale Salad, then make these!
The first time I had kale chips, I was in graduate school. One of my professors made them for a reception. I could not believe how good they were. They did not look appetizing at all -- who wants to eat something that looks like dried seaweed? I tried them (probably after a beer) and could not stop eating them! They were amazing. They are crispy and salty just like potato chips, but so much better for you. Once you try them, you'll be a convert.
Notes: I've tried making these at a lower oven temperature, but they did not get crispy enough for me. This time I bumped the temperature up to 325 and they were perfect.
You can season these however you want to. I had some Penzy's BBQ 3000, so I made barbeque chips. Delicious! Store these in an airtight container right on your counter.
Ingredients:
1/2 a bunch of kale torn into approximately 2-inch pieces
Barbeque seasoning blend of your choice
Directions: Heat your over to 325 degrees.
Arrange the kale on a sheet tray in a single layer. Give the pieces room to breathe. Sprinkle them liberally with seasoning.
Bake for 15 minutes (keep an eye on them -- your oven might be hotter than mine). Allow them to cool and enjoy!

The Kale Diaries, Part One: Easy Kale Salad
You've heard how healthy kale is for you, right? It has all sorts of vitamins and it's a good non-dairy source of calcium. If you don't eat it already, you should.
Kale can be used in the place of all sorts of greens, but let's face it: not everyone wants a giant pile of steamed or sauteed greens. I'm trying to find different ways to prep it.
I'm also trying to add more raw dishes to my arsenal. Eating raw veggies and fruits can maximize the nutritional value. Cooking often allows the vitamins to leech out of the food. Also, I am frequently lazy on my long days. Raw foods require less prep than cooking, which fits in perfectly with my laziness. Enter kale salad!
Notes: This is a great way to use up extra kale that you have. The bunches from my co-op are HUGE. Kale, like all greens, shrinks when you cook it, but if you live by yourself, it's still hard to use it all up.
You could easily make this animal by-product free if you omitted the yogurt. It tasted great with both ingredients, but I think each one on its own would be equally good.
To prep your kale, here's what you do: fill up a big bowl of cold water. De-stem the kale by holding it by the bottom part of the stem in one hand. Put the kale between the index and middle finger of your other hand and pull from the bottom of the leaf to the top. You want to strip the leafy part off the stem. Put the leafy parts into the bowl of water. When you de-stem the whole bunch, swish the kale around in the cold water like washing machine. The dirt will fall to the bottom of the bowl. Lift the kale out and lay it out on a clean kitchen towel. Pat it dry and store it wrapped in a paper towel in the fridge (I put mine in a food storage bag in my veggie drawer).
Ingredients:
1/2 a bunch of kale (I had Lactino), torn into small pieces
1/4 cup of plain yogurt
2 tablespoons of unsweetened applesauce
2 tablespoons of golden raisins
Sprinkle of cinnamon
Directions:
Add the yogurt and applesauce to a bowl and mix together. Add in the kale and stir to coat the leaves. Let it sit for about 5 minutes. Top it with raisins and cinnamon. Enjoy!

Tuesday, November 29, 2011
Hot Mess (a.k.a. Broccoli Brown Rice Casserole)
As I was making this dish, I had the following thought: "I'm going to have to throw this out at eat popcorn for dinner."
Occasionally, disasters happen. Sometimes you can foresee those disasters before you're even finished with the dish. You're looking at it thinking that you've definitely messed up somewhere and things just don't look right. You start coming up with alternatives while you're standing at the stove.
In this case, I was tweaking a recipe from Food Renegade. I thought I had read the recipe correctly, but it turns out I hadn't. I was also missing an ingredient. I did things in the wrong order. My roux looked more like a paste because I ran out of milk. I was convinced that there was no way this dish as I had prepared it would be edible. But sometimes food surprises you.
Notes: I've written the recipe the right way and not the bastardized way I actually did it. This dish isn't pretty, but it's comforting. It's also a great way to use up any vegetables you have on hand. I just included the vegetables I used, so feel free to use what you like. It would work with frozen veggies as well and you wouldn't even have to defrost them.
Ingredients:
4 cups cooked brown rice
1 head of broccoli, cut into florets
1 cup chopped or grated zucchini
8 oz. of grated cheese (I used a smoked cheddar, which was excellent), plus more for sprinkling
3 tablespoons of butter
3 tablespoons of flour
1 1/2 cups of milk
Salt
Pepper
Directions: Preheat the oven to 350 degrees.
Prepare your baking dish by buttering the bottom or spraying it with cooking spray. Add the cooked rice and vegetables to the dish and set aside.
Melt the butter in a sauce pan over medium heat. Sprinkle in the flour and whisk until your have a roux. Pour in the milk while whisking and let the mixture thicken slightly. Season with salt and pepper. Then stir in your 8 oz. of cheese and let it melt until you have a smooth cheese sauce.
Pour the cheese sauce over the rice and vegetables and mix everything together. Top it with the remaining cheese, cover it in foil, and bake for 30 minutes. After the 30 minutes is up, take the foil off and let it bake just a few more minutes to brown the cheese on top. Serve hot and enjoy!
 |
| It's a hot mess, but it sure is tasty. |
Saturday, November 26, 2011
Q.E.D.: Zucchini Chive Fritters
After overdosing on Thanksgiving or after going out to eat too much, you need a meal in your arsenal that's on the lighter side. I suppose that should mean something that isn't fried, but let's not quibble. It's made of vegetables.
I've been wanting to experiment with a variation on potato pancakes (latkes, if you want to be fancy and probably correct). Normally I make potato pancakes with mashed potatoes, but I don't make mashed potatoes much anymore. And I'm not keen on the elbow grease it takes to grate a potato. And sure, potatoes have vitamins, but vegetables have more vitamins.
Smitten Kitchen's recipe for zucchini fritters looked like the perfect way to experiment. I tweaked it a bit.
Notes: I would not use flour next time. I would definitely use a mix of flour and cornmeal or a mix of cornmeal and just grated cheese. I think I had slightly smaller zucchini than the recipe called for, so mine ended up a little on the gummy side in the middle. Not so appetizing. Something other than flour would have prevented that problem. Other than that, these were excellent. Mine yielded 8 2-2 1/2 inch fritters.
Ingredients:
2 medium zucchini
1/2 cup of flour
1/2 teaspoon baking powder
1 teaspoon kosher salt (plus more to taste)
1 tablespoon chives, chopped
1 large egg
1/4 cup of grated romano or parmesan cheese
Pepper
2-3 tablespoons frying oil of your choice
Unsweetened applesauce (for serving)
Directions:
Grate your zucchini on the large holes of a box grater directly on to a clean kitchen towel. Add the teaspoon of salt and let it sit for 10 minutes.
Meanwhile, chop your chives. Crack the egg into a bowl big enough to hold your zucchini and beat it. Add the chives and pepper.
When the 10 minutes is up, wring the excess water out of your zucchini. Taste it to check the salt levels and add more if you need to. Add the zucchini to your egg mixture and mix in flour, baking soda, and grated cheese.
Heat your oil to medium-high. Drop in a tiny piece of zucchini to test it: if it does nothing, the oil isn't hot enough. If it burns up in a fury of bubbles, the oil is too hot. It should bubble immediately, but not burn.
When the oil is ready, drop your fritters into the pan. Flatten them a little with your spatula. I have a big skillet, so I can fit four 2-inch fritters at a time. They need about 5-6 minutes on the first side and only about 4 minutes on the second side. Drain the finished ones on a paper towel.
Serve them hot with a dollop of applesauce. Enjoy!

Apple Butter Pumpkin Muffins
How can you have Thanksgiving without dessert? You can't, which is why you need these muffins.
I love pumpkin pie as much as the next person (who also loves pumpkin pie, we're assuming), but I've made a pumpkin pie nearly every Thanksgiving ever since I started cooking. A girl's gotta change it up some time.
Notes: I originally made these with less flour and they came out a little too moist, so I adjusted the amounts.
Ingredients:
2 1/3 cup of spelt flour
1 1/2 teaspoons baking soda
1 15 oz. can pumpkin puree
1 cup (8 oz.) apple butter
1/4 cup apple cider
1/2 teaspoon cinnamon
1/4 teaspoon nutmeg
1/4 teaspoon salt
2 teaspoons vanilla
1/2 cup plain or vanilla yogurt
1/4 cup honey
Directions: Heat your oven to 350.
Whisk the dry ingredients (flour, salt, spices, baking soda) together in a bowl. Set aside.
In another bowl, stir together the pumpkin, apple butter, cider, yogurt, honey, and vanilla.

Add the dry ingredients to the wet in three stages, stirring after each addition. Just stir it enough to incorporate the flour mixture.
Dish the batter into your muffin tin and bake for 15-20 minutes or until a tester comes out clean.

Enjoy!
Q.E.D.: Thanksgiving!
Hi! It's been awhile, hasn't it? The good news is I'm enjoying the new job and the new town. The bad news is that the new job and the new town don't leave me as much time for writing up recipes as I would like. I can't promise I'll be posting with the same frequency I did over the summer, but I have been cooking and I have yummy food to share.
I figured my first post in a few months had better be something impressive, so I present our Thanksgiving menu!
Scott came to visit me over his break and I love having him here. I especially love cooking for him, due in no small part to the fact that I know he eats breakfast cereal for dinner more often than I like. Thanksgiving is probably my second favorite holiday (next to Halloween, of course). It involves both food and football. What's not to love?
Since it was just the two of us, I saw no reason to make a turkey. I decided to make killer sides. Scott loves stuffing. I just made a stove top version, so I won't bother sharing that one. But it did need some delicious gravy to go with it. Add roasted brussel sprouts and roasted butternut squash and you have a delightful Thanksgiving for two

Notes: A Q.E.D Thanksgiving? Surely you jest! It qualifies due to cooking time, but prep time is only a little longer. Here's the menu:
Roasted Butternut Squash with Herbed Butter
1 butternut squash
2 tablespoons of olive oil
1 tablespoon of maple syrup
2 tablespoons of unsalted butter
1 tablespoon of fresh thyme, chopped
Salt
Pepper
Bacon Chive Roasted Brussel Sprouts
1 lb of brussel sprouts
2 tablespoons of bacon grease
1 tablespoon chives, chopped
Salt
Pepper
Mushroom Thyme Gravy
1 lb of mushrooms (I used crimini)
4 tablespoons of butter
2 tablespoons of flour
1/2 of mushroom or beef stock
3-4 thyme stems
Salt
Pepper
Directions: Preheat the oven to 400 degrees.
Peel and chop the butternut squash into 1/2 inch pieces. Trim the ends and outer leaves off the brussel sprouts and cut the larger ones in half.
Drizzle the squash with 2 tablespoons of olive oil and 1 tablespoon of maple syrup. Season with salt and pepper and spread out in a single layer on a baking sheet.
Toss the sprouts with 2 tablespoons of bacon grease. Season with black pepper and spread in a single layer on a baking sheet.
Roast the squash for 20-25 minutes and the sprouts for 25-30 minutes (I just put my baking sheets side-by-side in the oven).
While the veggies are roasting, add 2 tablespoons of butter to a skillet and heat it to medium-high. Slice the mushrooms thin and add them to the hot pan. Once the mushrooms have a little color on them, season with salt and pepper. Add the rest of the butter and once it melts whisk in the flour. Pour in the stock and let the whole mixture simmer and thicken. Add the thyme stems (just fish them out before you serve).
While you're waiting for everything to cook, add the chopped thyme to the 2 tablespoons of butter and chop the chives. When the squash comes out the oven, toss it with the thyme butter. When the sprouts come out, top them with the chives. Pour your thickened mushroom gravy over your favorite stove top stuffing and enjoy!
Sunday, August 21, 2011
Farmer's Market Creation: Spelt Blueberry Spice Muffins
I cannot tell you how proud I am of myself for making this recipe.
It is the first time I've ever made up a baking recipe. I can make things up when it comes to cooking because there aren't any exact measurements. Baking is another story: it requires at least a little knowledge of one of my worst subjects, which is chemistry.
My parents were visiting and we went to the Swarthmore farmer's market. We're big breakfast people: we love eating breakfast out and making big breakfasts at home. We decided we wanted some muffins and found some beautiful blueberries at the market.
I have lots of cookbooks with lots of muffin recipes, but none of them looked that great to me. Plus, they all required baking powder. I have yet to restock my pantry completely, so I didn't have any. This lead me on an internet quest to see what I could use as a substitute. Once I started looking around, I decided I would piece together my own muffin recipe.
Notes: I beam with pride in telling you that these were yummy. I still kind of can't believe that my Frankenmuffins turned out so well. They were moist and flavorful.
These are not vegan, but I found lots of recipes for vegan muffins in my quest. As long as you have baking powder at your disposal and you get the amount and consistency of liquid right, I think you could make them dairy free pretty easily. For instance, you could add coconut milk instead of sour cream and more almond milk in the place of the butter. You could probably add applesauce instead of eggs.
My dad was my guest photographer for the finish photo (he reads the blog -- Hi, Dad!).
Ingredients:
2 cups of spelt flour
1 cup of sour cream
1 1/2 teaspoons baking soda
1/2 cup of almond milk
2 teaspoons vanilla
1/2 cup of brown sugar
4 tablespoons of melted butter
1 egg
1/4 teaspoon of cinnamon
1/4 teaspoon of nutmeg
1/4 teaspoon of kosher salt
1/2 pint of blueberries
Directions:
Preheat your oven to 350.
In one bowl, mix together your flour, salt, spices, and baking soda. Set aside.
In another bowl, add your melted butter and whisk in your brown sugar so that the sugar dissolves a bit (it will look thick-ish like molasses). Whisk in your egg. Stir in your almond milk, sour cream, and vanilla. Stir just until the mixture is smooth.
Add your dry ingredients to the wet mixture in thirds, mixing just to combine after each third (over-mixing makes for tough muffins). Finally, fold your blueberries into the batter.
Divide the batter into your muffin tin (I use the paper cups, it makes my life easier).

Bake at 350 for 18-20 minutes.
Serve them up for the breakfast-loving people in your life and enjoy!
 |
| Copyright to Dad Photography, Inc. |
Adventures in Dough Part Four and VTMK: Spelt Oat Bread
I'm trying to whittle down the number of items I buy at the store. If there's something I can reasonably do at home that doesn't require me to become a chemist or a carpenter, I'm opting to do it. In light of that, I decided homemade bread is a good place to start.
Making bread can be time-consuming. I suppose it's made easier if you have a bread maker. But I have an aversion to extra kitchen gadgets, especially those only designed to do one thing. Those little tubes designed to remove garlic skins? Waste of material resources: it adds an extra step to your cooking and (especially if you are sans dishwasher) an extra thing to clean. I don't know if a bread machine fits into the same category, but I do know you make tasty bread without one.
Notes: This bread is delicious. It was easy to make; it took me maybe an hour and half. A very simple weekend project.
The bread is dense and crumbly. It makes nice toast, but it's not as great for sandwiches, unless you toast it beforehand. It would work better sliced thin, but my bread knife isn't sharp enough for that.
When it says "prepare the loaf pan," take it seriously. I didn't butter mine enough and had some trouble freeing the bread. You could, of course, use cooking spray.
Speaking of non-dairy items, not only is this a new adventure in dough, it's also the inaugural segment of VTMK, which stands for Vegan, To My Knowledge. I'm not vegan and I'm totally not an expert on what things are vegan and what things are not. But I know a lot of lovely people who are vegans or who are incorporating more vegan dishes into their diets. So, when I make a dish that I suspect to be vegan, I will flag it. My favorite vegans that know way more about this than I do can double check. If you're looking for vegan recipes, by the way, check out my friend Missy's lovely site: Vegan-in!
If you plan to use it like you would a regular loaf of bread, I recommend slicing it once it's cool all the way and storing the slices in a large food storage bag. If you keep the loaf whole in the fridge, it becomes more difficult to slice and will more likely fall apart on you.
Ingredients (adapted only slightly from this recipe by Heidi Swanson):
1 1/4 cups of warm water (between 105-115 degree F)
2 teaspoons of dry active yeast (1 packet)
1 tablespoon of honey (make sure it's room temperature)
2 cups spelt four
1 cup rolled oats (not instant or steel cut)
1 1/2 teaspoons kosher salt
Directions:
First, you'll need to bloom your yeast. Pour your warm water into medium-ish bowl. Stir in the yeast and the honey.
Let it sit for 10 minutes until it starts to look like more foamy and voluminous.
While your yeast blooms, add your flour, salt, and oats to a bigger bowl and mix well.
Once the yeast blooms, add the wet mix into the dry and form a dough ball. Prepare a loaf pan with cooking spray (or butter if you're not making the vegan version). Turn the dough ball out into the loaf pan.
Cover it with a damp paper towel and let it rise for 30 minutes. It will rise to the point where it fills up the loaf pan.
Heat the oven to 350 with the rack in the middle. Bake it for 35-40 minutes. When it's done, turn it out on to a rack to let it cool (if you leave it in the pan, it will steam and get soggy).

Once it's cool, slice it up and enjoy!
Making bread can be time-consuming. I suppose it's made easier if you have a bread maker. But I have an aversion to extra kitchen gadgets, especially those only designed to do one thing. Those little tubes designed to remove garlic skins? Waste of material resources: it adds an extra step to your cooking and (especially if you are sans dishwasher) an extra thing to clean. I don't know if a bread machine fits into the same category, but I do know you make tasty bread without one.
Notes: This bread is delicious. It was easy to make; it took me maybe an hour and half. A very simple weekend project.
The bread is dense and crumbly. It makes nice toast, but it's not as great for sandwiches, unless you toast it beforehand. It would work better sliced thin, but my bread knife isn't sharp enough for that.
When it says "prepare the loaf pan," take it seriously. I didn't butter mine enough and had some trouble freeing the bread. You could, of course, use cooking spray.
Speaking of non-dairy items, not only is this a new adventure in dough, it's also the inaugural segment of VTMK, which stands for Vegan, To My Knowledge. I'm not vegan and I'm totally not an expert on what things are vegan and what things are not. But I know a lot of lovely people who are vegans or who are incorporating more vegan dishes into their diets. So, when I make a dish that I suspect to be vegan, I will flag it. My favorite vegans that know way more about this than I do can double check. If you're looking for vegan recipes, by the way, check out my friend Missy's lovely site: Vegan-in!
If you plan to use it like you would a regular loaf of bread, I recommend slicing it once it's cool all the way and storing the slices in a large food storage bag. If you keep the loaf whole in the fridge, it becomes more difficult to slice and will more likely fall apart on you.
Ingredients (adapted only slightly from this recipe by Heidi Swanson):
1 1/4 cups of warm water (between 105-115 degree F)
2 teaspoons of dry active yeast (1 packet)
1 tablespoon of honey (make sure it's room temperature)
2 cups spelt four
1 cup rolled oats (not instant or steel cut)
1 1/2 teaspoons kosher salt
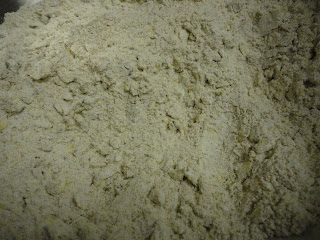
Directions:
First, you'll need to bloom your yeast. Pour your warm water into medium-ish bowl. Stir in the yeast and the honey.
 |
| Starts out looking like cloudy water |
Let it sit for 10 minutes until it starts to look like more foamy and voluminous.
 |
| Looks a little more puffy and opaque |

Once the yeast blooms, add the wet mix into the dry and form a dough ball. Prepare a loaf pan with cooking spray (or butter if you're not making the vegan version). Turn the dough ball out into the loaf pan.
 |
| Soon-to-be bread! |
Cover it with a damp paper towel and let it rise for 30 minutes. It will rise to the point where it fills up the loaf pan.
 |
| Post-bread nap |
Heat the oven to 350 with the rack in the middle. Bake it for 35-40 minutes. When it's done, turn it out on to a rack to let it cool (if you leave it in the pan, it will steam and get soggy).

Once it's cool, slice it up and enjoy!
Saturday, August 20, 2011
Macaroni Salad
Macaroni salad is one of our classic family dishes. It's a summer time food for us and a staple at cook outs. Every time I make it, it reminds me of my childhood in the warm, humid climate of the coast.
I have never been able to recreate the version my mom makes. That and her famous brown eggs are two things I can't get to taste exactly like hers. I think there's some mom voodoo going on there, but I can't confirm that. So rather than be faithful, I decided to be innovative. I've tried to make a healthier version of it.
I tested this on my mother while she was visiting and she actually liked it! I figure if it has the original maker's seal of approval it can't be all that bad.
Notes: Normally, this recipe calls for celery. I have a hard time using up celery, so I went with cucumber instead. This is a mayonnaise-based salad. I'm afraid it just wouldn't taste the same without it.
The only reason this isn't Q.E.D is because it has to chill overnight or for at least six hours.
Ingredients:
1 box whole wheat shells or elbow macaroni
1 small can of tuna (I used wild caught)
1/2 greens (I used microgreens, but you could use chopped spinach or kale)
1/4 cup of mayonnaise
3 tablespoons whole grain mustard
1/4 cup chopped dill pickle
3 shallots
1 English cucumber
Salt
Pepper
Directions:
Bring a stock pot of water to a boil, add two small handfuls of salt, and cook pasta according to the directions. When it's done, strain it and allow it to cool to room temperature before you add your veggies.

Stir the pasta periodically to help it cool.

Chop all your veggies while you're waiting.
Add everything to your pasta, season with salt and pepper.

Mix well and chill in the fridge. Enjoy in a warm summer day (any time you want to relive one!)
Split Peas with Mint-Basil Ricotta
Holy my goodness! I have a backlog of recipes to get up here. The professor has been in the kitchen, I assure you, although she has also been in her office, at the airport, over the river, and through the woods.
So, this was my first outing making homemade pesto. As you might recall, I have no blender. I also have no food processor, at least not one with a motor.
I have a pull-cord food processor. I actually love it. It's very cute and easy to use. I also feel like I have a lot of control over exactly how much processing I'm doing. The only trouble is, I can't really emulsify anything because it starts and stops rather than running continuously. But, I've wanted to make my own pesto for awhile, so I decided to give it a whirl (ha!).
Notes: A couple of things I would do differently. First, I followed the directions for cooking my peas that were on the back of the bag. It said simmer the peas for 35-45 minutes. Way too long -- mine were done after 25 minutes. That might be due to my stove. Unfortunately, I didn't check them, so mine were a little mushy. I didn't mind it so much, but I would shorten the cooking time for sure.
Also, due to my tiny processor, I should have chopped my garlic more than I did. I ended up with large chunks of garlic in my pesto. If you have a regular processor, you'd probably have no issue.
I ended up with enough pesto left over for two batches, so I froze the rest.
Ingredients:
1 lb bag of dried split peas
2-3 garlic cloves
2 cups of fresh mint leaves
2 cups of basil leaves
1/4 cup olive oil
8 oz. ricotta cheese
Salt
Pepper
Directions:
Start by rinsing the peas in a strainer. Pick out broken pieces and let the peas drain.
Bring a pot of water or stock up to a boil, stir in the peas, turn it to low, and let simmer for 25-30 minutes.
While the peas are cooking, make the pesto.


Give the garlic a rough chop and add everything (leaves, garlic, salt, pepper) except for the oil into the processor. If you have a non-motorized one, add everything in at once.

If you have a motorized processor, turn it on and stream the olive oil in until you get a paste. If you have a non-motorized one, pull the cord until you form a paste (guess which one takes longer?)
Once your peas are done, drain them and put them back in the pot. Add your ricotta and pesto.
 Serve it up, preferably next to something that highlights its beautiful color, and enjoy!
So, this was my first outing making homemade pesto. As you might recall, I have no blender. I also have no food processor, at least not one with a motor.
I have a pull-cord food processor. I actually love it. It's very cute and easy to use. I also feel like I have a lot of control over exactly how much processing I'm doing. The only trouble is, I can't really emulsify anything because it starts and stops rather than running continuously. But, I've wanted to make my own pesto for awhile, so I decided to give it a whirl (ha!).
Notes: A couple of things I would do differently. First, I followed the directions for cooking my peas that were on the back of the bag. It said simmer the peas for 35-45 minutes. Way too long -- mine were done after 25 minutes. That might be due to my stove. Unfortunately, I didn't check them, so mine were a little mushy. I didn't mind it so much, but I would shorten the cooking time for sure.
Also, due to my tiny processor, I should have chopped my garlic more than I did. I ended up with large chunks of garlic in my pesto. If you have a regular processor, you'd probably have no issue.
I ended up with enough pesto left over for two batches, so I froze the rest.
Ingredients:
1 lb bag of dried split peas
2-3 garlic cloves
2 cups of fresh mint leaves
2 cups of basil leaves
1/4 cup olive oil
8 oz. ricotta cheese
Salt
Pepper
Directions:
Start by rinsing the peas in a strainer. Pick out broken pieces and let the peas drain.
 |
| Dry peas |
While the peas are cooking, make the pesto.


Give the garlic a rough chop and add everything (leaves, garlic, salt, pepper) except for the oil into the processor. If you have a non-motorized one, add everything in at once.

If you have a motorized processor, turn it on and stream the olive oil in until you get a paste. If you have a non-motorized one, pull the cord until you form a paste (guess which one takes longer?)
 |
| Delicious paste |

 |
| Pea green is the new awesome! |
Monday, August 8, 2011
Tiger Slaw
I came up with this dish as part of my ongoing series "Finding Non-meat Things to Put Inside Various Forms of Flat Bread."
I used to dislike radishes. I think it's because they have kind of a harsh bite to them. I'm not one to just slice up a radish and eat it raw. I know radishes and herb butter are a classic French combination, and that sounded good to me. But anything I make has to be eaten as leftovers throughout the week. Eating herb butter multiple days in a row is probably not the best nutrition plan.
Since radishes have a kind of bite to them, I figured putting them in some kind of salad or slaw-like preparation where you would normally use something like onions seemed like a logical step. Enter tiger slaw! Get it? Because the radishes have a bite? And it's black and orange? Yeah, not funny, I know.
I love the combination of black beans and cumin. I'm trying to find alternatives to mayo-based salads, so I opted for sour cream, which I think goes great with the smoky cumin. You don't need much sour cream, so it's not nearly as gloppy (technical term) as a regular may-based slaw would be.
Notes: Grated carrots and radishes will end up containing a lot of water. If you don't want your slaw to be on the wet side, line a fine-mesh strainer with some paper towels or coffee filters and let the shredded veggies drain for a few minutes. That will help get rid of some of the excess liquid.
If you like cilantro (and you really should because it's delicious), that would work really well here. I didn't have any at the time or else I would have added it myself.
As an aside, this would be a totally fun dish to serve at a Halloween pot luck.
Ingredients:
4 small carrots
5 or six radishes
1 15 oz. can of black beans
2 tablespoons of sour cream
1 teaspoon cumin
1 1/2 teaspoons chopped fresh tarragon
Salt
Pepper
Directions:
First, rinse your beans with cold water in a fine-mesh strainer. Drain while you're grating your veggies.

Peel the carrots and trim the rough ends off the radishes.

Grate them with a box grater (using the medium sized holes). I just grated mine right into the container I used to store the slaw. This step requires elbow grease.
Add the black beans and mix. Next add the sour cream and sprinkle the tarragon and cumin on top. Season with salt and pepper.

Mix well and store in an air-tight container in the fridge

Serve in a pita pocket or a wheat wrap. Or, just eat it like a regular slaw. Enjoy!
I used to dislike radishes. I think it's because they have kind of a harsh bite to them. I'm not one to just slice up a radish and eat it raw. I know radishes and herb butter are a classic French combination, and that sounded good to me. But anything I make has to be eaten as leftovers throughout the week. Eating herb butter multiple days in a row is probably not the best nutrition plan.
Since radishes have a kind of bite to them, I figured putting them in some kind of salad or slaw-like preparation where you would normally use something like onions seemed like a logical step. Enter tiger slaw! Get it? Because the radishes have a bite? And it's black and orange? Yeah, not funny, I know.
I love the combination of black beans and cumin. I'm trying to find alternatives to mayo-based salads, so I opted for sour cream, which I think goes great with the smoky cumin. You don't need much sour cream, so it's not nearly as gloppy (technical term) as a regular may-based slaw would be.
Notes: Grated carrots and radishes will end up containing a lot of water. If you don't want your slaw to be on the wet side, line a fine-mesh strainer with some paper towels or coffee filters and let the shredded veggies drain for a few minutes. That will help get rid of some of the excess liquid.
If you like cilantro (and you really should because it's delicious), that would work really well here. I didn't have any at the time or else I would have added it myself.
As an aside, this would be a totally fun dish to serve at a Halloween pot luck.
Ingredients:
4 small carrots
5 or six radishes
1 15 oz. can of black beans
2 tablespoons of sour cream
1 teaspoon cumin
1 1/2 teaspoons chopped fresh tarragon
Salt
Pepper
Directions:
First, rinse your beans with cold water in a fine-mesh strainer. Drain while you're grating your veggies.

Peel the carrots and trim the rough ends off the radishes.

Grate them with a box grater (using the medium sized holes). I just grated mine right into the container I used to store the slaw. This step requires elbow grease.
 |
| Pretty colors |

Mix well and store in an air-tight container in the fridge

Serve in a pita pocket or a wheat wrap. Or, just eat it like a regular slaw. Enjoy!
Saturday, August 6, 2011
Spelt Peanut Butter Banana Bread
I have a love/hate relationship with Target. Sometimes it feels like I'm in some kind of bizarre maze. You think you know where some item is and yet it isn't there. So, then you have to start playing mind-reader. "OK, how did the person who designed this store decide to classify food storage jars? Home decor? Kitchen? Storage?" You find yourself wandering from section to section, up and down all the aisles with the ever-increasing suspicion that there someone standing over you wearing a white coat and holding stop watch.
The love part of the relationship is that Target prevents me from going to a store I have a hate/hate relationship with, which is Wal-Mart. The other thing I love about Target is that they can put on a mean clearance sale. They usually are nice enough to put the clearance items on the end caps of the aisles. So, I can walk down one side of the grocery section and find everything that's been marked down, which is how I ended up with spelt flour.
I'm still not 100% sure what spelt is. According to the source of all questionable, but quick knowledge, Wikipedia, it's a sub-class of wheat. Although it contains gluten, apparently some people with gluten issues can tolerate it better than wheat flour (I cannot confirm this). I've been trying to use more wheat flour when I bake to up the nutritional content, so I figured spelt would be similar. I found some on sale at Target and decided I would see how it worked.
Some people are impulse buyers, but I am an impulse baker. If the urge to bake hits me, I will drop what I'm doing and head for the kitchen. Scott has on one occasion had to convince me that 9:00 PM the night before a vacation is not the time to try homemade granola bars. The other day I realized I had two bordering-on-over-ripe bananas sitting on my counter. Once banana bread come to mind, there was no stopping me. And it allowed me to test drive the spelt flour.
Notes: I've made banana bread before, so I decided it was time for a twist. The combination of peanut butter and banana has always been a favorite of mine; I used to eat them together as a sandwich as a kid. Peanut butter banana bread sounded pretty cool to me.
One of the keys to this dish is a whisk. The directions I had instructed you to put the banana in first, which prevents whisking. I did not whisk in the brown sugar and I ended up with a few undissolved bits that burned on the bottom of the bread. It was still really tasty, but I'll be sure to dissolve that sugar really well next time.
The spelt flour worked well. In appearance, it's much finer than regular wheat flour. It's still drier than white flour like wheat is, but it's not as dry as wheat in the finished product. I'm going to try making pizza crust out of it and see how it works.
Ingredients (adapted from Smitten Kitchen's):
1 1/2 cups spelt flour
1/2 cup dark brown sugar
1/2 cup natural peanut butter
1 1/2 teaspoons of vanilla
1 teaspoon baking powder
1/4 teaspoon of kosher salt
2 ripe bananas
1 egg
1/2 teaspoon nutmeg
1 teaspoon cinnamon
Directions:
Preheat the oven to 350.
Melt the butter (I was lazy and did this in the microwave because I didn't want to get out a pot). Add the butter to a large bowl. Whisk in the brown sugar and peanut butter.

Add the beaten egg, vanilla, nutmeg, cinnamon, and your mashed bananas.

Sprinkle the salt, baking powder, and flour over the wet mix.

Combine them with a spoon or spatula just until it forms a batter. The batter will be slightly sticky, but wet.
Pour the batter into a loaf pan that has been buttered or sprayed with cooking spray.

Bake at for 45-50 minutes until a tester comes out clean. Cool the bread on a rack for about 30 minutes.

Once the bread is cool, turn it out of the pan. Slice off a piece and enjoy with a nice glass of milk!
Farmer's Market Creation: Three Pepper Spaghetti
Another Farmer's Market Creation! Technically, this is a co-op creation, but since my co-op sells local produce, which is what I would have been buying at a farmer's market, I think it counts.
I originally created this dish in Mass after I went to the Pepper Festival. Exactly as it sounds, they had all sorts of different peppers. I knew next to nothing about peppers at the time, so I just picked blindly. I chose well because the dish turned out great.
Now that I'm back in the northeast, I have access to grass-fed beef. Not to go back the food agenda I claim not to have, but being a vegetarian is the best choice when considering the way your eating habits affect the environment. So, as I've said, I don't cook meat home very often. But, if you are going to eat meat, grass-fed local beef is the kind to get, which is what they have at my co-op. I'm not a vegetarian and I don't believe that there's anything unethical about eating animals. I do think that if we are going to raise cows, we ought to raise them in a way that is (a) healthy for them and (b) healthy for the environment, and if we can't do that, then we ought not to raise them. But grass-fed beef does that. I don't advocate eating it all the time, but there are meat dishes that I love very much. One of the dishes is a good hearty meat sauce for spaghetti.
Notes: Rules for farmer's market creations applied here: make a dish entirely out of local ingredients that look good when you go to the store. I should have added something with a little more heat in it because I like my three pepper spaghetti a little on the hot side. It turns out the Hungarian wax pepper I used wasn't as hot as I thought it would be. The dish still came out great.
If you wanted to make this a vegetarian dish, I think some slightly mashed red kidney beans would be really nice.
Next time I will use crushed tomatoes from a can. Since I don't have a blender, I couldn't really make the tomatoes as saucy as I wanted. But, since the tomatoes were local, I figured I would make the sauce from scratch.

Ingredients:
1 box whole wheat pasta
1 lb grass-fed ground beef
4 small carrots
1 tablespoon chopped tarragon
3 peppers (2 bell, 1 hot)
2 tablespoons herb de provence, divided
7 plum tomatoes
Salt
4 or 5 garlic cloves, minced
1 onion
1/2 teaspoon liquid smoke
1 tablespoon dried basil
Olive oil
Directions:
Preheat the oven to 400. Half the tomatoes and scoop out the seeds. Drizzle them with olive oil, salt, and half the herb de provence. Roast them for 25-30 minutes.

While the tomatoes are roasting, prep all your veggies. I like my peppers in thinly sliced strips, so I cut the other veggies to match them.

Heat a large skillet to medium-high and brown your ground beef. When it's just browned, add all your other veggies and saute until they're just getting tender. Add salt and dried basil.

When the tomatoes are finished, either blend them and add them to the skillet or just chop them and add them in. Add tarragon and liquid smoke. Let the sauce simmer for at least an hour.
Fill a stock pot with water, bring it to a boil, add two small handfuls of salt, and cook the pasta according to the box. I always find that I need to cook my wheat pasta for the maximum time.
When the noodles are done, add them to the skillet where your sauce is and let them absorb some of the sauce. Toss until everything is mixed together.

Dish it up and enjoy the fruits of your (and your farmer's!) labor.
I originally created this dish in Mass after I went to the Pepper Festival. Exactly as it sounds, they had all sorts of different peppers. I knew next to nothing about peppers at the time, so I just picked blindly. I chose well because the dish turned out great.
 |
| Hungarian, Lilac, and Suntanned peppers |
Now that I'm back in the northeast, I have access to grass-fed beef. Not to go back the food agenda I claim not to have, but being a vegetarian is the best choice when considering the way your eating habits affect the environment. So, as I've said, I don't cook meat home very often. But, if you are going to eat meat, grass-fed local beef is the kind to get, which is what they have at my co-op. I'm not a vegetarian and I don't believe that there's anything unethical about eating animals. I do think that if we are going to raise cows, we ought to raise them in a way that is (a) healthy for them and (b) healthy for the environment, and if we can't do that, then we ought not to raise them. But grass-fed beef does that. I don't advocate eating it all the time, but there are meat dishes that I love very much. One of the dishes is a good hearty meat sauce for spaghetti.
Notes: Rules for farmer's market creations applied here: make a dish entirely out of local ingredients that look good when you go to the store. I should have added something with a little more heat in it because I like my three pepper spaghetti a little on the hot side. It turns out the Hungarian wax pepper I used wasn't as hot as I thought it would be. The dish still came out great.
If you wanted to make this a vegetarian dish, I think some slightly mashed red kidney beans would be really nice.
Next time I will use crushed tomatoes from a can. Since I don't have a blender, I couldn't really make the tomatoes as saucy as I wanted. But, since the tomatoes were local, I figured I would make the sauce from scratch.

Ingredients:
1 box whole wheat pasta
1 lb grass-fed ground beef
4 small carrots
1 tablespoon chopped tarragon
3 peppers (2 bell, 1 hot)
2 tablespoons herb de provence, divided
7 plum tomatoes
Salt
4 or 5 garlic cloves, minced
1 onion
1/2 teaspoon liquid smoke
1 tablespoon dried basil
Olive oil
Directions:
Preheat the oven to 400. Half the tomatoes and scoop out the seeds. Drizzle them with olive oil, salt, and half the herb de provence. Roast them for 25-30 minutes.

While the tomatoes are roasting, prep all your veggies. I like my peppers in thinly sliced strips, so I cut the other veggies to match them.

Heat a large skillet to medium-high and brown your ground beef. When it's just browned, add all your other veggies and saute until they're just getting tender. Add salt and dried basil.

When the tomatoes are finished, either blend them and add them to the skillet or just chop them and add them in. Add tarragon and liquid smoke. Let the sauce simmer for at least an hour.
Fill a stock pot with water, bring it to a boil, add two small handfuls of salt, and cook the pasta according to the box. I always find that I need to cook my wheat pasta for the maximum time.
When the noodles are done, add them to the skillet where your sauce is and let them absorb some of the sauce. Toss until everything is mixed together.

Dish it up and enjoy the fruits of your (and your farmer's!) labor.
Thursday, August 4, 2011
A Better Breakfast: Cinnamon Muesli
I have given up breakfast cereals.
This was actually a difficult decision for me. I've been eating cereal my whole life -- were it not for Cheerios, I probably wouldn't have made it past the age of four. Cold breakfast cereals are really refreshing and I still love milk as much as I did when I was a kid. But, then I started reading labels.
Ever look at a cereal box ingredients list? Those lists are long. I mean, really long. And they contain a lot of things that you might not expect: lots of different kinds of oils, various gums, colors that are identified by number. As I said when I started the blog, I don't so much have a food agenda. If I did have one, it would be probably in line with the real food movement. This fits well with my original plan: if you can't find it outside or you can't pronounce it, don't eat it.
And there's a bunch of things I can't pronounce on the back of cereal boxes.
So, now what? It's on to better breakfast food. If I do buy cereals, I go for the ones that have very short ingredients lists. Otherwise, I eat a hard boiled egg on toast or I make oatmeal. But my latest favorite breakfast food and the one I eat most often is muesli.
Muesli is one of those wonderful things that comes to us from the Swiss, along with delicious cocoa, those handy knives, and Roger Federer. There are plenty of pre-packaged kinds you can buy, but why bother? It's easy to make, cheaper, and you can experiment with your favorite stuff.
Notes: I had a hard time finding the dried fruit that I wanted. I made my batch before I had looked into the local health food store, which means I missed out on the figs and cherries I could have used. It's OK. I still love raisins and there's always next time!
You can eat your muesli either quick or "soaked." The quick version means you put muesli in a bowl and pour milk or yogurt over it just like regular cereal. I prefer the soaked version because the oats get a little soft overnight in the fridge. The trick, of course, is remembering to make it before you go to bed. It took me a few days to get into the habit, but I got the hang of it. If the absent-minded professor can remember, you can too.
This is a big batch. It will probably last me two months. You can't stretch a boxed cereal that long!
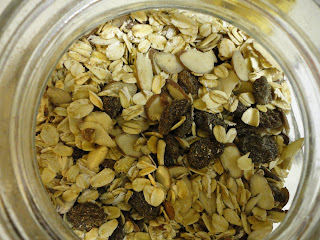
Ingredients:
4 cups rolled oats
1 cup raisins
1 1/2 cups of sliced toasted almonds
1/4 teaspoon of salt
1/2 teaspoon of cinnamon
1/2 cup of plain yogurt (for serving)
Drizzle of honey (for serving)
Directions:
Mix oats, raisins, almonds, salt, and cinnamon in a bowl. Toss until all the ingredients are coated with cinnamon.
Store in an airtight container.

To serve, mix 1/4 cup of muesli with 1/2 cup plain yogurt (I use Greek yogurt, but use what you like -- you could even use vanilla yogurt). Cover and refrigerate overnight. Drizzle with honey right before you serve it up in the morning. Enjoy a better breakfast!
This was actually a difficult decision for me. I've been eating cereal my whole life -- were it not for Cheerios, I probably wouldn't have made it past the age of four. Cold breakfast cereals are really refreshing and I still love milk as much as I did when I was a kid. But, then I started reading labels.
Ever look at a cereal box ingredients list? Those lists are long. I mean, really long. And they contain a lot of things that you might not expect: lots of different kinds of oils, various gums, colors that are identified by number. As I said when I started the blog, I don't so much have a food agenda. If I did have one, it would be probably in line with the real food movement. This fits well with my original plan: if you can't find it outside or you can't pronounce it, don't eat it.
And there's a bunch of things I can't pronounce on the back of cereal boxes.
So, now what? It's on to better breakfast food. If I do buy cereals, I go for the ones that have very short ingredients lists. Otherwise, I eat a hard boiled egg on toast or I make oatmeal. But my latest favorite breakfast food and the one I eat most often is muesli.
Muesli is one of those wonderful things that comes to us from the Swiss, along with delicious cocoa, those handy knives, and Roger Federer. There are plenty of pre-packaged kinds you can buy, but why bother? It's easy to make, cheaper, and you can experiment with your favorite stuff.
Notes: I had a hard time finding the dried fruit that I wanted. I made my batch before I had looked into the local health food store, which means I missed out on the figs and cherries I could have used. It's OK. I still love raisins and there's always next time!
You can eat your muesli either quick or "soaked." The quick version means you put muesli in a bowl and pour milk or yogurt over it just like regular cereal. I prefer the soaked version because the oats get a little soft overnight in the fridge. The trick, of course, is remembering to make it before you go to bed. It took me a few days to get into the habit, but I got the hang of it. If the absent-minded professor can remember, you can too.
This is a big batch. It will probably last me two months. You can't stretch a boxed cereal that long!
Ingredients:
4 cups rolled oats
1 cup raisins
1 1/2 cups of sliced toasted almonds
1/4 teaspoon of salt
1/2 teaspoon of cinnamon
1/2 cup of plain yogurt (for serving)
Drizzle of honey (for serving)
Directions:
Mix oats, raisins, almonds, salt, and cinnamon in a bowl. Toss until all the ingredients are coated with cinnamon.

Store in an airtight container.

To serve, mix 1/4 cup of muesli with 1/2 cup plain yogurt (I use Greek yogurt, but use what you like -- you could even use vanilla yogurt). Cover and refrigerate overnight. Drizzle with honey right before you serve it up in the morning. Enjoy a better breakfast!
(The Perfect?) Hard Boiled Egg Wrap with Microgreens
Made it to Pennsylvania safe and (mostly) sound! There are still boxes in various places around the house, but the kitchen back open for business. Speaking of which, by the looks of things I might have to change the name of this blog to A Professor's Tiny Kitchen.
It's a galley kitchen. In this picture it was missing a fridge. Apparently it's not standard for apartments in the Northeast (my place in Mass was the same way). We bought one, so now I am fully equipped and ready to cook.
The new kitchen will probably change the direction of the blog a bit. Unlike my Louisiana kitchen, I now have no dishwasher. I didn't have one in Mass either. It's not a big deal, but it does make me mindful of how many dishes I use. You might see some one-pot meals because of that. I'm also sans slow cooker at the moment. It's probably for the best right now, since I have no clue where I would put it. That might have to change soon, though. I'm not sure how long I can go without my slow-cooker beans.
The first recipe from the new kitchen is not so much a recipe as a method. It also stems from another feature in my new apartment: no central air. Now, the weather in Philly is not nearly as hot as the weather in Lake Charles, but it still gets up into the 90s. When it does, turning the oven on is not exactly the thing I want to do. As such, I've been eating some cold meals. And in my increasing efforts to cut out meat and yet still eat sandwiches, I have created this one.
Notes: I have been in search for the perfect method for hard boiling eggs for some time now. Everyone claims to have the perfect method, but only one has worked for me time after time after time. And I have tried many. I share my secret with you.
Directions for What Could Be the Perfect Hard Boiled Egg
I'm not one to insist on certain ingredients, but if you love eggs, it is 100% worth it to find yourself a farm or farmers market and buy eggs from pastured chickens. Not cruelty-free, not vegetarian fed, not even organic. All of these eggs can be fakers. I mean the eggs you can only get from a farm or farmer's market that come from chickens that still live outside. You won't find them at your local grocery store, unless you're like me and your local grocery store happens to be a hippie, granola co-op. What's that you say? You don't know how to find farms or farmer's markets that sell eggs? Oh yes you do. It. Is. Worth. It.
Once you have your delicious farm eggs:
1.) Take your eggs directly from the fridge and put them in a pot. Don't let them come to room temperature.
2.) Fill the pot up with cold tap water. Not warm, not hot. Cold tap water. Put enough water in the pot so that the eggs are covered well.
3.) Put the pot on high and let it come to a boil. At this point, most recipes tell you to turn the heat off. Don't listen to them. They lie.
4.) Let the eggs boil for approximately 15 seconds. THEN turn the heat off. Leave the pot on the same burner.
5.) Most recipes tell you to leave them in pot for 5 minutes. Don't listen to them. They lie. Set the timer for 7 minutes.
6.) When 7 minutes is up, take the eggs out of the water and let them cool completely on a kitchen towel. Once they are completely cool, remove the shell. You will have a perfectly cooked egg: the whites and yolks will be totally done, but the yolks will not have that weird greenish tint that over-cooked eggs have.
Store them in the fridge. That way they will be ready for you when you want to make the following sandwich:
Ingredients:
1 (perfect?) hard boiled egg
1 whole wheat tortilla
2 teaspoons of whole grain mustard
A small handful of microgreens
Salt
Pepper
Directions: First, spread the mustard on one edge of your tortilla leaving enough room so that you can tuck and roll later.
Slice your (perfect?) hard boiled egg and lay the slices on top of the mustard.
Sprinkle with salt and pepper. Add the microgreens.
 [Aside: I used a rainbow mix. Again, because I have a hippie grocery store, I can find things like this. If you don't, just use whatever your favorite salad greens are.]

I use a tuck and roll method for my wraps. So, pull the edge over the sandwich ingredients and tuck it under them just a little. Then tuck in the sides and roll once. Tuck in the sides again and roll one final time so that the seam is on the bottom.
You can eat as is or cut it in half on a bias. Either way, enjoy!
BONUS: Omit the greens and mustard and you'll have a tasty and healthy breakfast wrap!
 |
| Good things come in small packages, right? Guys? |
The new kitchen will probably change the direction of the blog a bit. Unlike my Louisiana kitchen, I now have no dishwasher. I didn't have one in Mass either. It's not a big deal, but it does make me mindful of how many dishes I use. You might see some one-pot meals because of that. I'm also sans slow cooker at the moment. It's probably for the best right now, since I have no clue where I would put it. That might have to change soon, though. I'm not sure how long I can go without my slow-cooker beans.
The first recipe from the new kitchen is not so much a recipe as a method. It also stems from another feature in my new apartment: no central air. Now, the weather in Philly is not nearly as hot as the weather in Lake Charles, but it still gets up into the 90s. When it does, turning the oven on is not exactly the thing I want to do. As such, I've been eating some cold meals. And in my increasing efforts to cut out meat and yet still eat sandwiches, I have created this one.
Notes: I have been in search for the perfect method for hard boiling eggs for some time now. Everyone claims to have the perfect method, but only one has worked for me time after time after time. And I have tried many. I share my secret with you.
Directions for What Could Be the Perfect Hard Boiled Egg
I'm not one to insist on certain ingredients, but if you love eggs, it is 100% worth it to find yourself a farm or farmers market and buy eggs from pastured chickens. Not cruelty-free, not vegetarian fed, not even organic. All of these eggs can be fakers. I mean the eggs you can only get from a farm or farmer's market that come from chickens that still live outside. You won't find them at your local grocery store, unless you're like me and your local grocery store happens to be a hippie, granola co-op. What's that you say? You don't know how to find farms or farmer's markets that sell eggs? Oh yes you do. It. Is. Worth. It.
Once you have your delicious farm eggs:
1.) Take your eggs directly from the fridge and put them in a pot. Don't let them come to room temperature.
2.) Fill the pot up with cold tap water. Not warm, not hot. Cold tap water. Put enough water in the pot so that the eggs are covered well.
3.) Put the pot on high and let it come to a boil. At this point, most recipes tell you to turn the heat off. Don't listen to them. They lie.
4.) Let the eggs boil for approximately 15 seconds. THEN turn the heat off. Leave the pot on the same burner.
5.) Most recipes tell you to leave them in pot for 5 minutes. Don't listen to them. They lie. Set the timer for 7 minutes.
6.) When 7 minutes is up, take the eggs out of the water and let them cool completely on a kitchen towel. Once they are completely cool, remove the shell. You will have a perfectly cooked egg: the whites and yolks will be totally done, but the yolks will not have that weird greenish tint that over-cooked eggs have.
 |
| Like so |
Store them in the fridge. That way they will be ready for you when you want to make the following sandwich:
Ingredients:
1 (perfect?) hard boiled egg
1 whole wheat tortilla
2 teaspoons of whole grain mustard
A small handful of microgreens
Salt
Pepper
Directions: First, spread the mustard on one edge of your tortilla leaving enough room so that you can tuck and roll later.
 |
| It has a face! |
 |
| Like so |


I use a tuck and roll method for my wraps. So, pull the edge over the sandwich ingredients and tuck it under them just a little. Then tuck in the sides and roll once. Tuck in the sides again and roll one final time so that the seam is on the bottom.
 |
| More or less |
BONUS: Omit the greens and mustard and you'll have a tasty and healthy breakfast wrap!
Subscribe to:
Posts (Atom)