Showing posts with label VTMK. Show all posts

Sunday, July 7, 2013

VTMK: Chocolate Zucchini Bread

I've become quite taken with vegan baking. I'm afraid this is for entirely unprincipled reasons, namely laziness and frugality. I love to bake, but I don't love having to run to the store when I realize that I don't have eggs or buttermilk (this is a problem, as you'll recall, because I am an impulse baker). I also don't love keeping eggs and buttermilk on hand because I don't use them that often and they end up spoiling (thus wasting money).


Vegan baking solves these problems. The staples in vegan baking are things I usually have either in my pantry or in my fridge already. The finished product turns out just as delicious as the non-vegan kind. It's a win-win.

Notes: I adapted the bread from this recipe. The original only calls for brown sugar, but it wasn't quite sweet enough for my taste. I wrote it with the added sugar.

This is a great way to use up extra zucchini. You could also replace the applesauce with a mashed up banana if you have one.

I will add my proviso here that this recipe is vegan to my knowledge, which is limited, so procede with caution.

Ingredients
1 1/2 cups whole wheat or spelt flour
1/3 cup unsweetened cocoa powder
1 cup grated zucchini (about one medium zucchini)
1/2 cup unsweetened applesauce
1/2 cup brown sugar
1/2 cup raw sugar
1 teaspoon cinnamon
2 teaspoons baking powder
1 teaspoon salt
1/3 cup water
1 teaspoon vanilla extract
1 tablespoon apple cider vinegar
1 chia egg (1 tablespoon of chia seeds + 4 tablespoons water)

Directions: Heat oven to 350. 

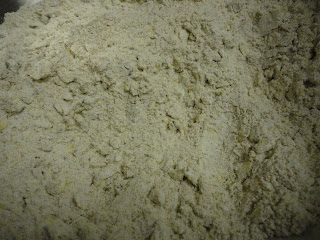
Add all the dry ingredients (flour, cocoa, sugars, baking powder, cinnamon, salt) to a large bowl and whisk to combine. 

Add the wet ingredients (water, vinegar, vanilla extract, applesauce) to a measuring cup and stir to combine. 

Mix up your chia egg in a small bowl. Add the wet ingredients, the grated zucchini, and the chia egg to the dry ingredients and stir to combine. 

Pour the batter into a greased loaf pan and bake for 40-45 minutes until a tester comes out clean. Cool in the pan for about 15 minutes then turn the loaf out on to a cooling rack to cool the rest of the way. Enjoy!

Sunday, January 20, 2013

VTMK: Applesauce Molasses Cookies

I'm teaching a seminar this semester. It's an upper level course mainly for majors and upperclass students. Seminars last four hours, which is a long time to be in class. As such, we have a tradition of "seminar breaks." Seminar breaks involve food.

Since the first day of school is tomorrow, I'm in charge of the snacks for break. I originally made some chocolate chip cookies, but Scott loves them so much, I decided to let him keep them. Instead, I decided to try some vegan cookies. A lot of my students are vegan nowadays, and even if they're not, a lot of them have food allergies. Vegan recipes leave out a lot of the things that cause people trouble. Hopefully these will go over well!

Notes: I followed this recipe pretty closely, but I spiced the cookies up a little differently. I also baked mine a little longer. If I had to do it over, I would have used regular sugar for rolling, but I only had raw sugar. You don't notice that much of a difference.

If you like gingerbread, you'll like these.

Ingredients:
1 cup unbleached all-purpose flour
1/2 cup packed dark brown sugar
1 teaspoon baking soda
1/4 teaspoon salt
1/2 teaspoon cinnamon
1/4 teaspoon ground ginger
1/4 teaspoon nutmeg
1/4 teaspoon ground cloves
1/4 cup olive oil
2 tablespoons molasses
1/4 cup applesauce
small bowl of granulated sugar for rolling

Directions:

Add the dry ingredients to a large bowl (flour, baking soda, spices, salt, brown sugar). Whisk them together. Make a well in the center. Add all the wet ingredients into the well (molasses, oil, and applesauce). Stir everything together. When it starts to form a solid mass, you may just want to switch to using your hands and gently knead it together. Chill the dough for an hour.

Heat the oven to 350. Pour some granulated sugar in a small bowl. Roll the dough into 1-inch balls and roll the balls in the sugar. Put the balls 2-3 inches apart on a cookie sheet (you'll need two sheets -- the cookies will spread).

Bake the cookies for 10-12 minutes until the sides are set and the tops are little moist. The cookies will be puffy, but they'll flatten out as they cool. Cool them on the baking sheets for 10 minutes. Move to a wire rack to finish cooling. Enjoy!


Saturday, September 8, 2012

Roasted Portabello Sandwich


This started out as 80/20's faux BLT. But, I had less time and different ingredients. It didn't taste like bacon, but it sure did taste good.

Notes: I would have marinated my 'shrooms for the full time, if I had had it. It would have made them even more flavorful.

You could probably also put these under the broiler, though you'd want to watch them to make sure they don't burn.

Ingredients:
2-4 portabello mushroom caps, cleaned and stems removed
1/3 cup soy sauce
1 large tablespoon whole grain mustard
3-5 drops of liquid smoke
1/4 cup olive oil

For topping:
Baby spinach
1 avocado
1 teaspoon prepared pesto
1/4 teaspoon of salt
Goat cheese
Tomato slices

Directions: Heat the oven to 425.

Slice the mushrooms into 1/4 inch pieces and lay them in a shallow dish (I used a pie pan). Whisk together soy sauce, liquid smoke, mustard, and oil. Pour over the mushrooms and marinate for 30 minutes.

When 30 minutes is up, lay the mushrooms on a foil-lined baking sheet. Roast for 20 minutes, flipping once halfway through.

Serve topped with baby spinach, tomato, goat cheese, and avocado pesto spread. To make the spread, halve one avocado and scoop the flesh out into a bowl. Mix together the avocado flesh, pesto sauce, and salt.

Serve and enjoy!

Wednesday, August 22, 2012

Q.E.D.: White Bean, Mushroom, and Kale Crostini

No one ever said that a Q.E.D. meal can't look and sound impressive. Quick need not equal boring!

Notes: I loved everything about this dish. It's fast, it's delicious, it's hearty, and it's pleasing to the eye. I allotted 3 pieces of bread per person, so if you need to feed more people, just keep that in mind.

This could easily be made into an appetizer if you used a small baguette. If you end up with leftover kale and mushrooms, you could mix them with rice or pasta and have a different meal the next day.

If you don't have an immersion blender or a food processor, you could just mash the beans with a fork or leave them whole and add them to the mushroom kale mixture.

Ingredients:
6-8 slices of sourdough bread
1/2 lb mushrooms
1/2 bunch kale leaves, de-stemmed
1 15 oz. can white beans
1 tablespoon cumin
1 1/2 teaspoons dried dill
Salt
Pepper
Olive Oil

Directions: Heat the oven to 350.

Thinly slice the mushrooms and kale. Drain and rinse the beans.

Put the beans in a pot with just a small amount of water and heat on medium. Season them with the dill.

Heat a skillet on medium-high and add a tablespoon or so of olive oil. When it's hot, add in the mushrooms and saute until they start to brown. Season them with the cumin and stir. Add the kale to the mushrooms and stir to combine. Season the mixture with salt and pepper and turn the heat to low.

Put the slices of bread on a baking sheet. Brush them with olive oil, season with salt and pepper, and bake for 5 minutes.

While the bread is toasting, use an immersion blender or food processor to puree the beans into a smooth mixture.

When the toasts are done, spread on a layer of beans and top with mushrooms and kale.

Enjoy!


Friday, July 13, 2012

Summer Salad Series: Kale Salad with Avocado Lime Dressing

I am sans photo for this summer salad, but I had to share anyway. It's so easy, which makes it perfect for your hottest and laziest summer day.

Notes: When I made the recipe initially, I failed to add the honey and the lime juice was pretty overpowering. You could also use agave if you'd rather. You could use sugar, but you might want to use a little less to start out with and give the dressing a taste. You can always add more.

You can double this recipe to make more salad. This makes enough for one person.

I used red kale, but you can use whatever kale you prefer. Or whatever your store has that day!

Ingredients:
1/4 bunch kale leaves, cleaned and de-stemmed
1 avocado
2 limes
1 tablespoon of honey
Salt
Pepper

Directions:

Slice your avocado lengthwise and remove the pit. Scoop the innards out into a bowl (just use the bowl you plan to eat out of.

In the bowl, mash the avocado. Juice both limes over the avocado and drizzle in the honey. Whisk everything until the mixture is relatively smooth. Season with salt and pepper.

Thinly slice the kale leaves and add them to the dressing. You want to work the dressing into the leaves, so toss it really well (it's OK -- kale is tough, it can take it!). Taste to make sure you have enough salt and pepper.

Serve on a hot day and enjoy!

Saturday, July 7, 2012

Summer Salad Series: Brown Rice, Zucchini, and White Bean Salad with Lemon Basil Dressing

I promised a summer salad series, didn't I? Well, here's salad #2!

Scott was a fan of this salad for its heartiness. He's not always the biggest fan of citrusy or fruity salads, but this one is more substantial.

Notes: This salad turned out really well. Remember that brown rice is chewy, so cold brown rice will likewise be chewy. It's OK -- the chewy texture is great mixed in with the light veggies.

As with the last salad, this one involves the oven. If you'd rather not turn it on -- even at night -- you could leave the corn raw and just saute the zucchini.

This salad is also, like the last one, VTMK! I'm on a roll!

Ingredients:
1/2 cup brown rice
1 1/3 cups water
2 small zucchini
1 15 oz. can navy beans (or any white bean)
2 ears of corn
10-12 basil leaves
1 lemon
1 tablespoon herbs de provence
1/4 cup plus 1 1/2 tablespoons olive oil, divided
Salt
Pepper

Directions: Heat oven to 425.

Slice the zucchini into half-moon shapes. Toss on a foil-lined baking sheet with salt, pepper, and 1 1/2 tablespoons of olive oil. Pull off any dried leaves from the corn husks and slice off the tassels at the top. Bake them in the oven right on the oven rack. Bake the zucchini until it is fork tender. Both will take about 20-30 minutes.


Bring the rice and water to a boil, turn it to a simmer, and let it cook for 30-35 minutes.

While the rice is cooking, chop the basil, zest the lemon, and drain and rinse the beans.

When the zucchini, rice, and corn is done, add the rice and zucchini together. Strip the kernels off the ears of corn and add those to the pot. Add beans. Season everything with salt and pepper.

Juice the lemon and whisk the juice with the herbs de provence. Season with salt and pepper. Drizzle in 1/4 cup olive oil while whisking.

Pour the dressing over the salad, add the basil and lemon zest. Toss to combine well.


Chill for at least two hours or overnight. Serve cold and enjoy!

Summer Salad Series: Quinoa and Black Bean Salad with Honey Lime Dressing

As you might have heard from the apocalyptic tone of the weather channel, we're in a heat wave right now. So, is it hot in the professor's kitchen? Oh yeah, it's hot. It's move-your-mattress-downstairs-and-sleep-in-the-dining-room hot. It's break-down-and-buy-a-portable-AC hot. It's blow-untold-sums-of-money-on-iced-coffee hot. More importantly, it's no-I-don't-want-to-turn-the-oven-on hot.

When it's too hot to cook, it's also too hot to go out to eat, which is why you need an army of cold dishes in your cooking repertoire. As such, I bring you the first in the summer salad series.

Notes: My lone complaint for this dish is that my delicious dressing was a bit understated in the finished product. I should have made a little more so that it really shined through. Other than that, this salad is exactly what you need for a hot day!

So I'm cheating a bit when I say no oven because to prepare the squash you do have to turn the oven on. The trick to this salad is to prep it at night when the house is cooler. Pop it in the fridge so that it chills overnight and it'll be ready for you the next day. Or you could make it the day before the heat arrives, which I did. If you really don't want to use the oven, swap the squash out with a mango. That was my original plan, but there weren't any mangoes at the store.

This salad is also VTMK. Healthy and refreshing!

Ingredients:
1 cup quinoa
1 1/4 cup water
1 15 oz can black beans
1 small butternut squash
1/2 bunch kale leaves, cleaned and de-stemmed (I used red kale)
1 bunch cilantro
2 limes
1 teaspoon chili powder
1 teaspoon cumin
1 tablespoon honey
1/4 cup olive oil
1 large tablespoon of coconut oil (you could use olive oil too)
Salt
Pepper

Directions: Heat the oven to 425.

Peel the butternut squash and remove the seeds. Dice it and toss it with the coconut oil, then season it with salt and pepper. Bake for 25-30 minutes until fork tender.

Meanwhile, add water and quinoa to a sauce pan and bring to a boil. Turn it down to a simmer and let it cook for 10-15 minutes until tender and the little grain inside unfurls like a tail.

While you're waiting on the quinoa and the squash, thinly slice the kale, drain and rinse the beans, and chop the cilantro. Zest the limes and add the zest to the cilantro.

Once the quinoa and squash are cooked, add the squash to the quinoa pot. Add in the kale and beans and stir everything together. Season with salt and pepper.

In a microwaveable bowl, heat the honey for about 10 seconds. Add in the spices and whisk together. Juice both limes into the bowl and whisk again. Drizzle in the 1/4 cup olive oil while you whisk. Season with salt and pepper.

Pour the dressing over the salad, add the cilantro and lime zest, and toss everything together until well combined.


Chill for at least two hours or overnight. Serve cold and enjoy!

Monday, June 18, 2012

(Almost) Vegan Gnocchi with Kale and Fava Beans

Ladies and gents, it's time for some fine dining here in the professor's kitchen!

As my cooking skills expand and improve, I find I'm getting pickier about restaurants. Don't get me wrong -- I like simple food. But if I go out to a nice restaurant, I have high expectations. If I plan to pay a lot of money for dinner, I want it to be a meal that I can't make (or make as well) myself.

Case in point: a friend arranged a lovely private dinner at a local eatery for a group of us. The food was, for the most part, quite good. One of the side dishes, however, was supposed to be gnocchi. Trust me, nothing about this dish was gnocchi. I knew I could do better myself, so I started planning this dish.

Notes: This bad boy is a labor of love, no doubt about it. It's great for a weekend or a day off, but don't plan it for week night.

My new ingredient in this dish is fava beans. I've never used them before, but the co-op had some and my curiosity triumphed. They were delicious! They take a little prep work, but they really aren't hard to use. Here is a great run down of how to prepare them. There are really only two steps.

Step one: Remove the beans from their pod.


Step two: Steam the beans in simmering water for about 3 minutes to loosen the outer casing. Remove the beans from the water and let them cool. As they cool, the outer casing will buckle and you'll be able to peel it off, revealing the emerald green bean inside.

Shelled fava beans on the plate
Once they're fully shelled, they're ready to put in whatever dish you want. Soups, dips, or in my case, pasta!

You can prepare the fava beans and the gnocchi ahead of time if you were entertaining with this dish. And boy would it be an impressive meal to show off!

The dish is "almost" vegan because I sauteed everything in butter. But it would be vegan (to my knowledge) if you used coconut oil or a vegan butter substitute. The gnocchi themselves are vegan because I used my chia seeds instead of eggs. They worked great!

I froze half of my gnocchi since I was just making dinner for two. We ended up with almost no leftovers. So I would cook the whole batch if you're cooking for four.

Ingredients for the gnocchi (adapted slightly from Smitten Kitchen's recipe):
2 pounds of Russet potatoes (I uses three large potatoes)
1 teaspoon salt
1 tablespoon chia seeds
3 tablespoons water
1 cup all purpose unbleached flour

Ingredients for pasta:
1/2 bunch of stemmed kale leaves
1 cup shelled fava beans (see notes)
3 cloves garlic
1 1/2 tablespoons fresh chopped rosemary
5 tablespoons of butter
Salt
Pepper

Directions:

Heat the oven to 400 degrees. Bake your potatoes for about an hour until they are fork tender. Let them cool some (just enough so you can handle them) and peel them. Grate the cooked potatoes over the large holes of a box grater or pass them through a ricer or food mill into a large bowl. Add salt.

In a small bowl, add three tablespoons of water to one tablespoon of chia seeds and let stand ten minutes. Add the chia mixture to the potatoes and stir to combine. A little at a time, add the flour to the potatoes. Mix to combine and keep adding flour until the dough comes together and no longer sticks to your hands.

Once the dough comes together, turn it out on to a floured surface and knead it just like bread for about three minutes. Shape the dough into a ball and then divide it into six smaller balls. Roll each ball into a rope about 3/4 of an inch thick. Using a pairing knife, cut the rope into 1 inch pieces and place them on a baking sheet (you'll fill two baking sheets).


Traditional gnocchi has little ridges. To make the ridges, roll the gnocchi pieces down the tines of a fork. Keep rolling and cutting until you use all six dough balls.

Put the gnocchi in the fridge while you prep the pasta ingredients.

Fill a stock pot with water and heat it on high. Chop the rosemary, mince the garlic, and finely slice the kale. Add the butter to a large skillet and heat it on medium. Add the rosemary, garlic, and kale, season with salt and pepper, and saute while you cook the gnocchi.

Once the water gently boils, drop the gnocchi in the water (carefully) half a baking sheet at a time. When the gnocchi floats to the top, remove it from the water and add it to the pan with the kale. Once all the gnocchi is cooked, add it all to the skillet and turn the heat up. Add in the fava beans and saute just until the gnocchi starts to brown slightly. Serve immediately and enjoy fine dining at home!


Wednesday, January 11, 2012

Carrot Fries

I am on a constant quest for non-standard ways of cooking vegetables. Roasting is by far my favorite method, but I like the idea of making fries and chips out of vegetables. I had some eggplant fries not long ago. They were so good, I wanted to try my own.

At the co-op today, I found a giant carrot. It was the size of a small yam. Even the cashier noticed it: "Wow! That's a huge carrot!" I decided to make my mutant carrot into carrot fries.


Notes: These are the consistency of sweet potato fries. They were good, but I longed for them to be really crispy like shoestring fries. I think the only way I'm going to manage that is if I actually fry them rather than bake them. I'll probably try baking them on a cooling rack next time to see if I can get them a little crispier. I'll let you know how it turns out. But if you like sweet potato fries, you'll like these just as well!

Ingredients:
1 giant carrot or 2-3 normal sized carrots, peeled.
1 tablespoon of olive oil
1 teaspoon of cumin
1 teaspoon of chili powder
1 teaspoon salt
1/2 teaspoon pepper

Directions: Preheat the oven to 425.

Cut your carrots into thick matchsticks. I slice the carrot in half and then half each piece lengthwise. Slice each of those pieces into thick slabs and then slice each slab lengthwise to get french fry pieces.

Toss the carrots with the olive oil and spices. Lay them out on a foil-lined baking sheet in a single layer. Bake for 30 minutes until browned. Enjoy!

Sunday, August 21, 2011

Adventures in Dough Part Four and VTMK: Spelt Oat Bread

I'm trying to whittle down the number of items I buy at the store. If there's something I can reasonably do at home that doesn't require me to become a chemist or a carpenter, I'm opting to do it. In light of that, I decided homemade bread is a good place to start.

Making bread can be time-consuming. I suppose it's made easier if you have a bread maker. But I have an aversion to extra kitchen gadgets, especially those only designed to do one thing. Those little tubes designed to remove garlic skins? Waste of material resources: it adds an extra step to your cooking and (especially if you are sans dishwasher) an extra thing to clean. I don't know if a bread machine fits into the same category, but I do know you make tasty bread without one.

Notes: This bread is delicious. It was easy to make; it took me maybe an hour and half. A very simple weekend project.

The bread is dense and crumbly. It makes nice toast, but it's not as great for sandwiches, unless you toast it beforehand. It would work better sliced thin, but my bread knife isn't sharp enough for that.

When it says "prepare the loaf pan," take it seriously. I didn't butter mine enough and had some trouble freeing the bread. You could, of course, use cooking spray. 

Speaking of non-dairy items, not only is this a new adventure in dough, it's also the inaugural segment of VTMK, which stands for Vegan, To My Knowledge. I'm not vegan and I'm totally not an expert on what things are vegan and what things are not. But I know a lot of lovely people who are vegans or who are incorporating more vegan dishes into their diets. So, when I make a dish that I suspect to be vegan, I will flag it. My favorite vegans that know way more about this than I do can double check. If you're looking for vegan recipes, by the way, check out my friend Missy's lovely site: Vegan-in!

If you plan to use it like you would a regular loaf of bread, I recommend slicing it once it's cool all the way and storing the slices in a large food storage bag. If you keep the loaf whole in the fridge, it becomes more difficult to slice and will more likely fall apart on you.

Ingredients (adapted only slightly from this recipe by Heidi Swanson):
1 1/4 cups of warm water (between 105-115 degree F)
2 teaspoons of dry active yeast (1 packet)
1 tablespoon of honey (make sure it's room temperature)
2 cups spelt four
1 cup rolled oats (not instant or steel cut)
1 1/2 teaspoons kosher salt

Directions:

First, you'll need to bloom your yeast. Pour your warm water into medium-ish bowl. Stir in the yeast and the honey.

Starts out looking like cloudy water

Let it sit for 10 minutes until it starts to look like more foamy and voluminous.

Looks a little more puffy and opaque
While your yeast blooms, add your flour, salt, and oats to a bigger bowl and mix well.


Once the yeast blooms, add the wet mix into the dry and form a dough ball. Prepare a loaf pan with cooking spray (or butter if you're not making the vegan version). Turn the dough ball out into the loaf pan.

Soon-to-be bread!

 Cover it with a damp paper towel and let it rise for 30 minutes. It will rise to the point where it fills up the loaf pan.

Post-bread nap

Heat the oven to 350 with the rack in the middle. Bake it for 35-40 minutes. When it's done, turn it out on to a rack to let it cool (if you leave it in the pan, it will steam and get soggy).


Once it's cool, slice it up and enjoy!

Monday, July 11, 2011

Chickpea and Cucumber Salad

I'm trying to cut most of the meat out of my diet. This isn't proving terribly difficult, except when it comes to lunch.

You see, I am something of a sandwich fanatic.

I appreciate sandwiches on a level that borders on obsessive. When I order a sandwich, I judge it on a variety of factors: flavor combination, bread choice, construction, moisture content. I annoy my loved ones (mostly Scott) either raving about the great ones or (somewhat more frequently) complaining about the bad ones. I *ahem* inform others (mostly Scott) when they are improperly constructing a sandwich and have been known to wrest cutlery from people's (Scott's) hands. You get the idea.

Most sandwiches contain meat. I love deli meat, but the good stuff is expensive. Plus, it doesn't stay fresh long. And let's not talk about the sodium content. So, I think I will leave the great deli sandwiches to the pros (actual delis). But how to continue making sandwiches I love without the meat? Well, here's one way.

Notes: My giddiness for slow cooker beans continues, so I made dried chickpeas in my crock pot. You could easily adapt this to be  Q.E.D. if you use canned beans instead.

If you wanted to bind this a little, you could add a little plain or greek yogurt. I like it just as it is.

Ingredients:
1/2 batch of Slow Cooker Chickpeas (recipe below) or 2 15 oz. cans of chickpeas
1 English cucumber or 2 regular cucumbers, diced
2 shallots, thinly sliced
1 bunch of fresh dill, chopped
2 tablespoons of olive oil
2 teaspoons kosher salt
1 teaspoon black pepper

Directions:

If you used canned chickpeas, pour them into a strainer, rinse them under cold water, and let them drain. If you used the slow cooker beans, make sure they are cool.


While draining the chickpeas, dice the cucumber roughly the same size as the chickpeas. Slice the shallots thin and chop the fresh dill.


Mix all the ingredients in a bowl. Add salt and pepper, drizzle with olive oil, and toss well.


Chill for a few hours in the fridge and serve in a pita pocket or over mixed greens. Enjoy!

For slow cooker chickpeas:
1 bag of dried chickpeas
6 cups hot tap water
10 drops Tabasco
2 tablespoons Worcestershire sauce
2 tablespoons kosher salt
2 tablespoons onion powder
1 tablespoon garlic powder
1 tablespoon cumin
2 teaspoons black pepper
3 teaspoons ground thyme

Rinse chickpeas in a colander. Pick out any broken or shriveled beans. Add everything to the slow cooker, stir, and cook on high for 4 hours. When the chickpeas are done, drain them and then spread them on a baking sheet to cool down before you add them to the salad. Freeze what you don't use or save the other half in the fridge to use in a later meal.

Sunday, July 10, 2011

Sourdough Panzanella with Citrus Dressing

In case you were wondering, July in Louisiana is hot. Like, triple digits hot. Like, the sun reading over your shoulder hot.

And nothing beats the heat like a nice salad.

I've never made a panzanella before so I was excited to try it. I found some nice sourdough at the store. Croutons? Check.

But what to do for the dressing? I was determined to do something different. Then, it hit me (not literally, because that would have smarted). Instead of a lemon, I'd use a grapefruit. Genius!

Notes:
You can pretty much add whatever you want to a panzanella, so feel free to play with the ingredients. I went with the standard cucumber, tomato, and onion.

Most recipes call for "day old bread." I never have day old bread at my house. I just have bread that I keep in the fridge. I bought the sourdough a few days before I made the salad. Since you toast the bread in the oven, I think it matters not how old your bread is.

Ingredients:
1 boule sized loaf of sourdough bread
1 English cucumber or 2 regular cucumbers
1 package of grape tomatoes
3 shallots
1/4 cup of olive oil
1 tablespoon herb de provence
2 garlic cloves, minced
Salt
Pepper

For dressing:
1/4 cup of freshly squeezed grapefruit juice (I used 1/2 of a grapefruit)
1/4 cup olive oil
Salt

Directions:

Preheat the oven to 400.

Cut your bread into 1-inch cubes and toss them into a big bowl.


Add herb de provence, garlic, about 2 teaspoons of salt, and 1 teaspoon of black pepper. Pour 1/4 cup of olive oil and toss well (I just used my hands).

Spread bread cubes out on a cookie sheet and bake for about 15 minutes. Turn or stir the cubes half way through cooking.

While your bread is toasting, chop your veggies.

I sliced the shallots thin
Large dice for the cucumber
Tomatoes cut in half
Now for the dressing!

Squeeze the grapefruit into a measuring cup. Add just a pinch of salt. Drizzle your 1/4 cup of olive oil into the juice while you whisk.


Add the bread cubes to your veggies and pour over your dressing. Toss well and chill in the fridge for about 30 minutes.

Serve it up, chill out, and enjoy!

Wednesday, June 8, 2011

Slow Cooker Black Bean Tacos

Who doesn't love tacos? Extraterrestrials? Fascists? Gargamel from the Smurfs? Probably, but you don't want to hang out with them, do you? Of course not. You want to eat delicious tacos.

I've been looking to ditch canned beans for awhile, but my one reservation was the pre-soaking step. I like flexibility -- what if I decide I don't feel like a bean dish after I've already soaked the beans? Plus, my track record for remembering to do things before I stumble off to bed isn't exactly stellar.

Enter Smitten Kitchen's recipe for black bean soup. Slow cooker beans with no pre-soaking? Now we're in business!

My favorite way to use black beans is in tacos, so I decided to make my taco filling in the slow cooker instead.

Wedding present we still use


Four hours in the slow cooker and the beans came out PERFECT. Tender, but not mushy and full of more flavor than you could ever get from a can. And no pre-soaking involved! It was cooking magic.

Notes: I like to do a black bean and corn combo for my taco filling. Since corn is in season, I used fresh ears. I like to roast them first, which is an easy task.

Cooorn, corn on the cooooob!

Preheat the oven to 350, throw the ears in there, husks and all. I don't even put them on a baking sheet. 30 minutes later, you have delicious roasted corn. Just let them cool so you can pick them up to cut off the kernels.

This recipe ended up to be accidentally vegan. I hadn't intended it to be; it just so happened that I didn't use any animal fats or byproducts.

It turns out slow cookers vary pretty widely in terms of cooking time. If you've got a small one or an old one, I would try 6 hours instead of four. Ours is relatively new and gets nice and hot, so 4 hours was just fine.

Ingredients:
1 lb dried black beans (I used the Camellia brand)
2 small onions, sliced
6 cups hot tap water
4 or 5 cloves of garlic, sliced
1 heaping tablespoon of chilli powder
1 1/2 tablespoons of cumin
2 teaspoons dried oregano
1 heaping tablespoon of kosher salt (sounds like a lot, but beans need salt)
15-20 drops of Tabasco
1 capful of liquid smoke
3 large ears of corn, roasted (see notes above)
Pepper to taste

Directions:

Dump beans into colander. Pick out any broken or shriveled beans and discard. Rinse beans and let them drain.

Put beans in the slow cooker. Assemble all other ingredients except corn and put them in the slow cooker. Stir. Set slow cooker on high for 4 hours (see notes above).

While beans are cooking, roast corn. Allow it to rest and cool. Remove kernels from cob. Add them to the slow cooker during the last hour or 30 minutes of cooking time.

Serve in your favorite taco shells and enjoy!