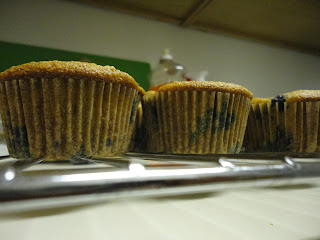
Winter has set in here in PA, so it's time for some cold weather comfort foods. There isn't much that's more comforting than a baked potato topped with veggies.
Notes: This is a dish that's easy to customize. You can use any combo of veggies that you like.
If you're not big on gravy, top the potato with cheese or salsa.
I give you my favorite potato-baking method. I think baking them this way gives the skins lots of flavor and they come out tender and perfect every time.
I wrote the recipe for two people, but you can easily double it to feed four.
Our camera battery was dead, so I don't have any terrible pictures for you.
Ingredients:
2 medium-sized Russet potatoes, scrubbed clean
1 large broccoli crown
4-5 carrots
1/2 pint of mushrooms
2 tablespoons of flour
1/3 cup of beef or mushroom broth
1/3 cup of milk
6-7 tablespoons of butter (divided)
Salt
Pepper
Directions: Heat the oven to 400.
Rub the outside of each potato with 1/2 a tablespoon of butter. Sprinkle salt on the potato. Wrap each potato in foil and bake for about an hour and half until tender.
While the potatoes are cooking, peel and dice the carrots and cut the broccoli into small florets. Add about a tablespoon of butter to a large skillet on medium-high heat. Sautee the carrots and broccoli until tender (about 10 minutes). Season with salt and pepper. Move the veggies from the pan onto a plate and set aside.
Turn the heat to high, add 2 more tablespoons of butter. Sautee the mushrooms until they start to brown. If there isn't much liquid in the pan, add in the remaining tablespoon of butter. Add in the flour and stir to coat. Whisk in the broth and milk. Season with salt and pepper. Turn the heat back to medium and let the gravy thicken. (At this point you can add the broccoli and carrots to the gravy if you want. If not, just leave them on the plate.)
When the potatoes are done, split them open and fluff the insides with a fork. Top them with veggies and then add a couple of ladles of mushroom gravy. Serve hot and enjoy!
Sunday, December 1, 2013
Saturday, October 26, 2013
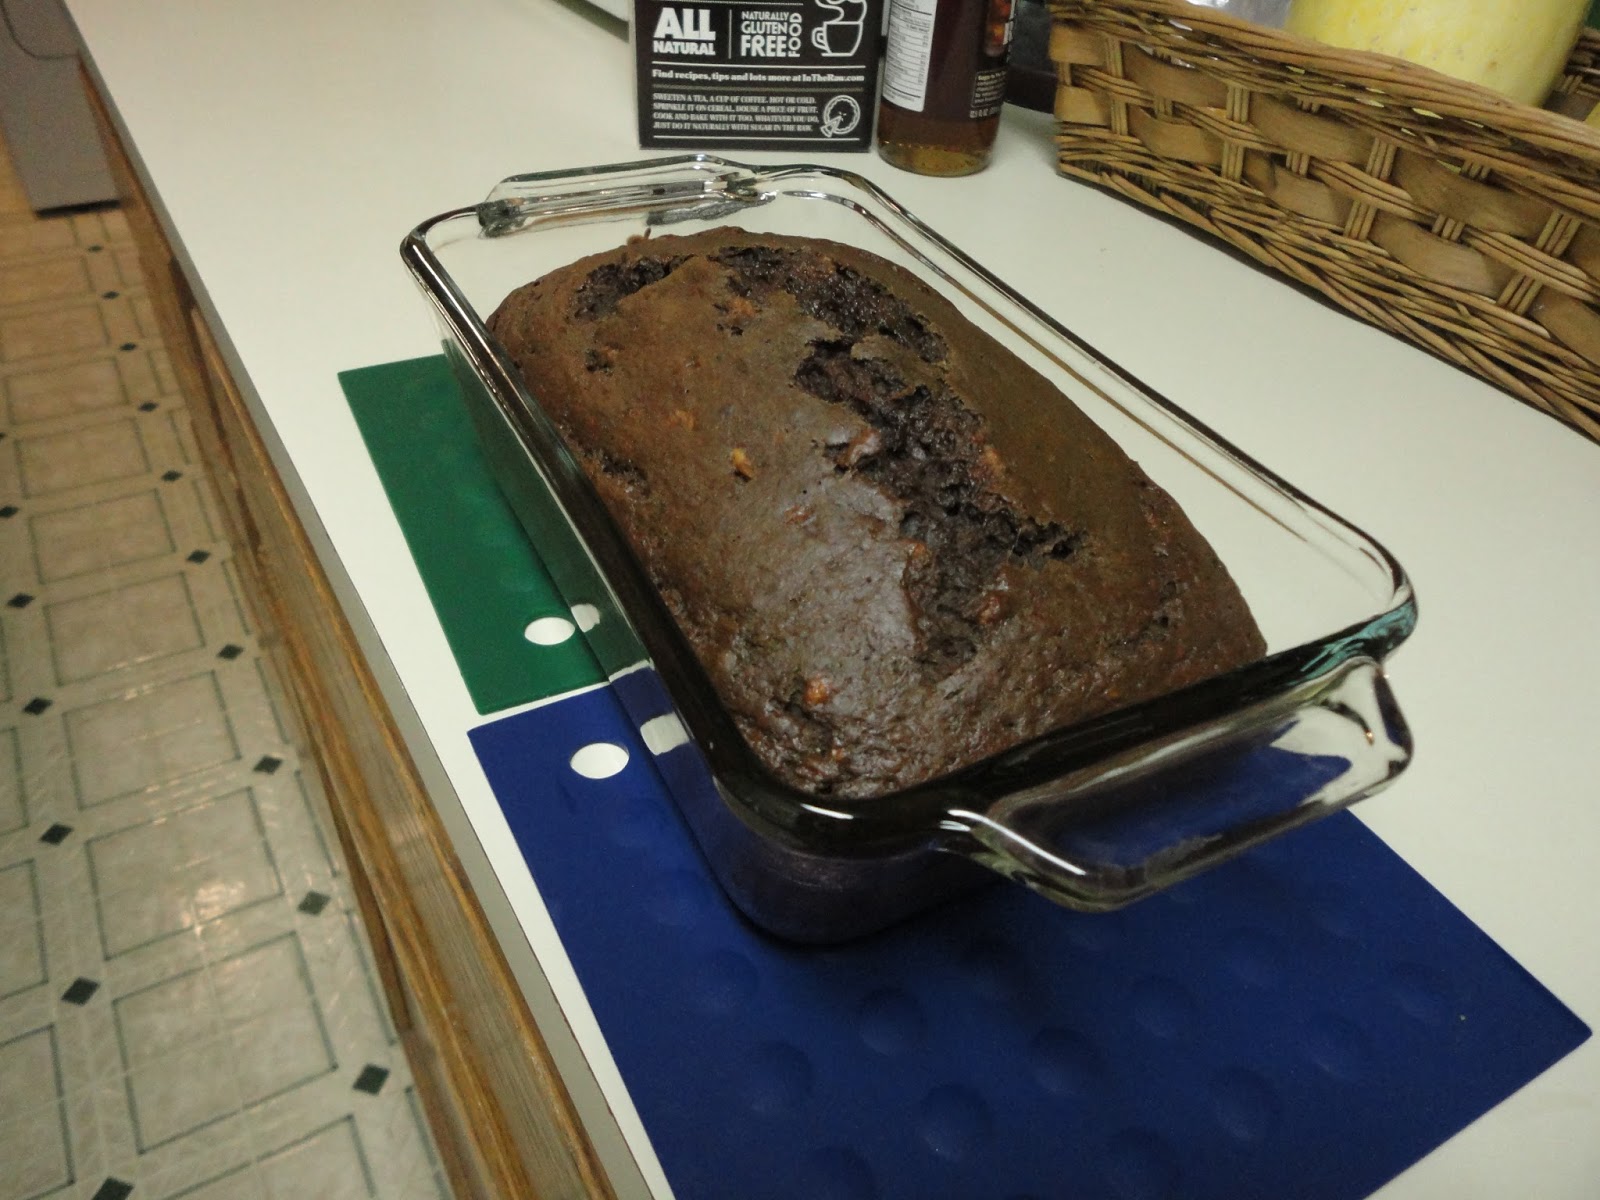
Pumpkin Bread

If you haven't read this piece from McSweeny's, you are missing out. The first time I read it, I laughed so hard I cried.
At this point, I try to keep canned pumpkin in the house at all times in case the urge to bake strikes. I was planning to make some more muffins, but Scott requested bread. Pumpkin bread, you say? Happy to oblige!
Notes: I adapted this recipe only slightly. If you're not a big fan of cloves, I'd knock it back to a 1/4 teaspoon. You can really taste them. I don't mind, so I left it as is. If you wanted a more pumpkin pie flavor, add in some ground ginger.
Make this when you're planning to have company over. Your house will smell amazing.
This bread is chewy and delicious and everything fall should be.
Ingredients:
1 2/3 cup flour
1/3 cup brown sugar
1 cup granulated sugar
1 teaspoon cinnamon
1/2 teaspoon kosher salt
1/2 teaspoon ground cloves
1/2 teaspoon ground nutmeg
1 teaspoon baking soda
1 cup pumpkin puree
1/3 cup butter, melted
Directions: Heat the oven 325.
Grease a loaf pan.
In a large bowl, whisk together all the dry ingredients. Make a well in the center and add in the butter and pumpkin. Mix with a spoon until just combined.
Pour the ingredients in the prepared loaf pan and bake for 1 hour and 15 minutes, or until a tester comes out clean. Let cool for 10 minutes, remove from loaf pan and transfer to a rack. Serve and enjoy!
Tuesday, October 15, 2013
Fall Lasagna
I usually refer to the season between summer and winter as "fall," but the word "autumn" has a nice sound. I particularly like it because when you make it an adjective, it becomes "autumnal." I thought about calling this dish "autumnal lasagna" but I thought it was too much of a mouthful. Luckily, the dish itself isn't!
Notes: There are two important tips to remember. First, slice thinly. The sprouts and squash have to cook through in the lasagna. Second, pull everything out of the fridge with enough time for it to come to room temperature. Room temperature = more even baking.
I'm not a huge fan of the combination of tomatoes and squash, so I decided to make a bechamel sauce to combine with my marinara. If you're pressed for time or don't are for bechamel, you can skip that step.
Ingredients:
1 butternut squash
1 small bunch brussel sprouts
1 box no-boil lasagna noodles
26 oz. marinara sauce
3 tablespoons butter
3 tablespoons flour
1/3 cup milk
2 teaspoons maple syrup
1 tablespoon olive oil
2 cloves garlic
2 small or 1 large fresh mozzarella balls
15 oz. ricotta cheese
1 bunch fresh sage
Salt
Pepper
Directions: Heat oven to 375.
In a large skillet, melt butter over medium heat. Add flour and whisk until it forms a smooth paste. While whisking, pour in milk. Whisk until thickened. Add in the marinara and stir together. Remove from heat and set aside.
Peel the squash. Slice it in half and scoop out the seeds. Thinly slice it. Mince the garlic and sage. Use a mandolin or sharp knife and slice the brussel sprouts as thinly as possible. In a large bowl, combine the slices sprouts with oil, half the sage, and syrup. Season with salt and pepper.
In another bowl, combine the ricotta cheese with minced garlic and other half of the sage.
In a 9x13 baking dish, add 1 cup of marinara sauce. Layer 4 noodles, 1/3 of the ricotta mixture, one layer of sliced squash, and 1/3 of brussel sprouts. Top with another cup of sauce and repeat the layers two more times. Add the last layer of noodles and top with the remaining sauce. Slice the mozzarella and lay it on top.
Cover with foil and bake 35 minutes. Remove the foil and bake for 10 more minutes. Serve and enjoy!

Monday, October 7, 2013
Pear Gingerbread
I am still on my baking kick, but as predicted, it has tapered off a bit since school started. I recently found this recipe for pear gingerbread and I knew I had to give it a try.
Notes: I tweaked the recipe a bit. I was thinking I'd like to grate the pears, but my pears were definitely too soft for that. So I just diced them.
Ingredients:
1 cup of flour
1/2 cup brown sugar
1 teaspoon baking powder
1/2 teaspoon of baking soda
1/2 teaspoon salt
Dash of cloves
1 teaspoon of grated ginger
1/2 teaspoon cinnamon
1/2 cup milk
1/4 cup olive oil
1 teaspoon vanilla
1/4 cup molasses
1 large, 2 medium, or 3 small pears
Powdered sugar for serving
Directions: Heat oven to 350.
Peel and cut the pears into a small dice.
In a large bowl, whisk together all the dry ingredients (flour, sugar, spices, salt, baking soda and powder). In another bowl, whisk together the wet ingredients (olive oil, molasses, milk, grated ginger, vanilla).
Add the dry ingredients to the wet and stir until just combined. Fold in the pears.
Butter an 8x8 baking dish and pour the batter in. Bake 30-40 minutes. Cool 10 minutes, dust with powdered sugar, and enjoy!

Roasted Kale and Mushroom Risotto
The weather has not been cooperating with my desire for it to be fall. So, I thought I would make some warm and cozy risotto to just pretend. It made me hot while I was cooking, but it was worth it.
Notes: This turned out great. I wanted a deeper flavor so I decided to roast the kale and mushrooms first. I should have cooked the kale a little longer because I like it on the crispy side, but it was still delicious.
You may need to add some water to your stock if it gets too low and your rice isn't finished. Just keep a measuring cup next to your stove while you're cooking for easy access.
If you want to time the mushrooms and kale together, wait to put them until you're halfway through the risotto cooking time.
Wondering if your rice is done? Taste a grain or two! If it's still crunchy, you need more time.
Ingredients:
1 1/2 cups uncooked arborio rice
1 pint of mushrooms (baby portobellos, shitakes, or oysters)
1 bunch kale leaves, cleaned and stemmed
4-5 garlic cloves
1 small bunch sage leaves
2 tablespoons butter
1 teapsoon olive oil
4 cups stock or water
Salt
Pepper
Directions: Heat the oven to 400.
Heat the stock or water on medium-low. Mince the garlic and chop the sage. Melt the butter in a large skillet and add in the garlic and sage. Cook for just a minute and then pour in the rice. Toss the rice to coat it with the butter and then add 4 ladles of stock. Season with salt and pepper. Stir occasionally. Continue adding ladles of stock (2 at a time) until the amount of rice doubles in size and it starts to absorb the stock more slowly. It takes about 30-40 minutes.
While the risotto is cooking, thinly slice the mushrooms and kale. Put them on separate baking sheets. Toss the mushrooms with salt, pepper, and olive oil. Season the kale with salt and pepper. Put them in the oven for about 10-15 minutes each until the mushrooms start to brown and the kale starts to get crisp. When they're done, add them to the risotto and let everything finish cooking together.

Enjoy!
Sunday, September 29, 2013
Slow Cooker Eggplant Marinara Sauce
If you have a free day on your weekend, make this batch of marinara sauce. You'll end up with enough to use that night and enough to freeze. Very handy!
Notes: I've put eggplant in pasta sauce before, but I haven't made it in the slow cooker. I like to put vegetables in my pasta sauces: more nutrition and more complex flavors.
You need two pieces of equipment for this dish: a slow cooker and an immersion blender.
You need to remember to season this well, so season each layer with salt as you put it in the slow cooker.
If you wanted to make this during the week, I'd do all the prep the night before and just store everything in the fridge overnight. Then you can just dump everything in the slow cooker in the morning. Set the cooker for 8 hours on low and it will be ready when you get home from work.
Ingredients:
2 lbs small tomatoes (I used Roma)
1 large or 2 small eggplants
1 cup of water
1 cup basil leaves
2 shallots
2 tablespoons tomato paste
6 garlic cloves
1 large tablespoon herbs de provence
3 teaspoons sugar
Salt
Pepper
Directions:
Start by dicing the shallots and the eggplant. Put those two items in the slow cooker first and season with salt, pepper, and herbs de provence.
Then dice the tomatoes, mince the garlic, and chop the basil. Add them all to the slow cooker and season once more with salt and pepper. Pour in the water and set the cooker to high for 6 hours. Stir half way through cooking.
When the sauce is done, blend with an immersion blender until smooth. If it seems too thick, just add a little water. Use it just as you would use any marinara sauce. Enjoy!
Wednesday, September 25, 2013
Q.E.D.: Charred Corn, Heriloom Tomato, and Arugula Quesadilla

The old saying "necessity is the mother of invention" is never more true than in cooking. This dish came about because I had three things in my fridge that I suddenly had no use for: tomatoes, wheat tortillas, and arugula. I'd rather not let food go to waste (I'm not die-hard about it, but hey, money's money), so I came up with a way to use them all together.
Notes: I make the charred corn by setting the ears directly on my gas burner. They pop and hiss, but worry not, that's normal. Just keep turning them until the outside is nice an brown. If you don't have a gas stove, just omit this step.
You want to be careful not to overstuff the quesadilla. Make sure everything is in a nice thin and even layer.
If you cut these into smaller triangles, they might work as a nice cocktail party food. The recipe makes 4 quesadillas.
Ingredients:
2 ears of corn
2 small heirloom tomatoes (you can use Roma, too)
1 small bunch of arugula (about 2 cups), washed and dried
8 whole wheat tortillas (I had 10-inch)
2 cups grated cheese (I found a nice aged English cheddar on sale)
Salt
Pepper
Directions:
Shuck the corn and discard the husks, leaving the stalk in tact. If you're charring the corn, turn your gas burner on high and set the ears on top while you prep the rest of the ingredients. Turn occasionally.
Dice the tomatoes and put them in a strainer to let some of the liquid drain off. Grate the cheese (if you're not using pre-shredded).
Heat the oven to 400. Once the corn is charred, strip the kernels off, mix with the tomatoes, and season with salt and pepper.
To assemble the quesadillas, put a wheat tortilla on a baking sheet (you can fit two quesadillas on one normal sized baking sheet). Spread it with 1/4 of the arugula. Top with about 2 tablespoons of the corn and tomato mixture. Sprinkle with 1/4 of the cheese. Top with another tortilla. Repeat this process for all four quesadillas.
Bake for about 8-10 minutes and then flip and bake for an additional 8 minutes or so. The cheese should be melted and the quesadillas will start to brown and crisp.
Enjoy Q.E.D. quesadillas any night of the week!
Tuesday, September 10, 2013
Pumpkin Chocolate Chip Cookies

For some reason I cannot stop baking. Once the semester winds up, I'm sure I'll slow down. In the meantime, I will enjoy it while I'm in the mood!
I don't know if I've mentioned this, but I love Halloween. It's my favorite holiday BY FAR. I look forward to it every year even if I don't have anything special planned. Scott and I will often just watch classic horror movies to celebrate.
In spite of my love for Halloween, I don't have very many Halloween-themed dishes. I had some leftover pumpkin and I thought I might test these out as a Halloween dessert recipe. I think they would work.
Notes: I tried to chill the dough and make shapes using my cookie cutter. That didn't work out so well. I think the dough would have to chill for much longer than an hour for that to work. If you're game to try it, spread the dough out on a cookie sheet after it's mixed. Try chilling for 2-4 hours. See if it works for you. Otherwise, the regular shapes are fine.
These are great. Full of fall flavors!
Ingredients:
2 cups flour
1 teaspoon baking soda
1/2 teaspoon salt
1 teaspoon cinnamon
1/2 teaspoon ground ginger
1/4 teaspoon cloves
2/3 cup brown sugar
1 stick (8 tablespoons) butter, softened
1 cup canned pumpkin
1/4 cup milk
1 tablespoon vanilla
2 cups chocolate chips (I like the mini ones)
Directions:
In a mixer, cream together butter and sugar until the mixture is fluffy. Stir in the pumpkin, milk, and vanilla (it won't incorporate completely, but that's OK).
In batches, add in the dry ingredients (spices, flour, baking soda, salt) until everything is just combined. Fold in the chocolate chips. Chill the dough in the fridge for at least 1 hour.
Heat the oven to 325. Spoon large tablespoons of dough onto a cookie sheet (bake in batches if you need to). Bake for 14-17 minutes until the edges are set and the cookies look a little dry. Cool them on the cookie sheet for a few minutes and then transfer them to a cooling rack. Enjoy (on Halloween or any time)!
Friday, September 6, 2013
Baked Mushroom and Spinach Polenta
I tried regular polenta a few weeks back and promised you a baked polenta recipe. So here goes!
Notes: One excellent thing to do is make this with leftovers. You can make the regular polenta and then put the leftovers into a baking dish. You can store it right in the fridge in the baking dish. Just pull it out on the night you want to bake it and let it come to room temperature before you put it in the oven. Brilliant!
Take note that the polenta won't brown or get crispy when you bake it. It will just look a little dry and it will be firm.
Polenta requires whisking. It needs your full attention. Be sure to whisk while your pour the polenta into the liquid.
This time I mixed everything in the polenta instead of just putting it on top of the polenta. I liked it both ways.
Ingredients:
1 cup cornmeal
4 cups of stock or water
1 pint fresh mushrooms, sliced
1 bag or bunch of spinach
3-4 cloves garlic
1 small bunch fresh rosemary
Butter or olive oil
Salt
Pepper
Directions: Heat oven to 350.
In a stock pot, heat the water or stock to a boil.
In a large skillet, heat olive oil or butter on high. Put in the mushrooms and let them brown. While you're waiting, mince the garlic and rosemary and chop the spinach.
When the mushrooms have started brown, add in the garlic and half of the rosemary and cook until tender. Add in the spinach and wilt. Season with salt and pepper. Turn the heat down to low.
When the stock boils, whisk in the cornmeal. Whisk frequently until it's thickened, about 10-15 minutes. Add in the rest of the rosemary and two tablespoons of butter (optional). Stir.
Add the mushroom and spinach mixture to the polenta and stir to combine. Pour into a buttered or oiled 9 x 13 baking dish or casserole dish. Bake for 30 minutes. Cut into squares (or whatever shape you like) and enjoy!

Tuesday, September 3, 2013
Chocolate Chocolate Chip Cookies
I've been on quite the baking kick, but I haven't made any cookies. We can't have that, now can we?
Notes: I have to make these in two batches. I can fit about 6 cookies on a baking sheet (don't want to crowd them) and I put two baking sheets in the over at once. Just stick the batter back in the fridge while you're waiting for the first batch to cook.
I had a little bit of coffee leftover from this morning's brew, so I just used that. You could try just whipping up a little instant if you have it. Otherwise, just omit it.
These came out so light and fluffy in the middle. I have no idea how I did that, but they were delicious!
Ingredients:
1 2/3 cup of flour
1/3 cup unsweetened cocoa powder
1/2 teaspoon salt
1 teaspoon baking soda
1/3 cup brown sugar
1 teaspoon cinnamon
1/3 cup white or raw sugar
1 tablespoon vanilla
4 tablespoons milk
3 tablespoons prepared coffee
2 sticks of butter, softened
2 cups mini bitter sweet or semi-sweet chocolate chips.
Directions:
Cream the butter and sugar together in the mixer. Add in milk, coffee, and vanilla and stir (it won't really incorporate, but that's OK). Add in the dry ingredients and stir until just combined. Add in the chocolate chips and fold them into the batter.
Refrigerate the dough for 1-2 hours.
Heat the oven to 325. Spoon the dough (in over-sized tablespoon balls) onto two cookie sheets and bake for 14-17 minutes until the edges look dry and are set. Cool on the sheet for 5 minutes and then transfer to a cooling rack. Enjoy!
 |
| Photo courtesy of Scott Photography |
Notes: I have to make these in two batches. I can fit about 6 cookies on a baking sheet (don't want to crowd them) and I put two baking sheets in the over at once. Just stick the batter back in the fridge while you're waiting for the first batch to cook.
I had a little bit of coffee leftover from this morning's brew, so I just used that. You could try just whipping up a little instant if you have it. Otherwise, just omit it.
These came out so light and fluffy in the middle. I have no idea how I did that, but they were delicious!
Ingredients:
1 2/3 cup of flour
1/3 cup unsweetened cocoa powder
1/2 teaspoon salt
1 teaspoon baking soda
1/3 cup brown sugar
1 teaspoon cinnamon
1/3 cup white or raw sugar
1 tablespoon vanilla
4 tablespoons milk
3 tablespoons prepared coffee
2 sticks of butter, softened
2 cups mini bitter sweet or semi-sweet chocolate chips.
Directions:
Cream the butter and sugar together in the mixer. Add in milk, coffee, and vanilla and stir (it won't really incorporate, but that's OK). Add in the dry ingredients and stir until just combined. Add in the chocolate chips and fold them into the batter.
Refrigerate the dough for 1-2 hours.
Heat the oven to 325. Spoon the dough (in over-sized tablespoon balls) onto two cookie sheets and bake for 14-17 minutes until the edges look dry and are set. Cool on the sheet for 5 minutes and then transfer to a cooling rack. Enjoy!
Saturday, August 31, 2013
Pesto Spaghetti Squash with Bacon and Peas
Ever had gluten-free pasta? I tried some once. Um, it got a less than stellar review. I may have just tried the wrong brand, but I'm not exactly itching to give it another try.
I've seen the trick of using spaghetti squash in the place of pasta and I thought that might be a better bet than the gluten-free version.
Notes: Spaghetti squash does not taste like pasta. It's reminiscent of pasta and it looks like pasta, but if you're expecting it to mimic spaghetti exactly, you'll be disappointed.
Spaghetti squash is also a bit bland, so it needs flavor help. I thought the bacon grease would do the trick, but that wasn't enough. Neither was the pesto. It needs salt. So, be sure to salt the squash before you add in the pesto and peas.
I love that you can roast the squash ahead of time (thanks to Martha Stewart for the tip). You could roast it on the weekend and make this a Q.E.D. weeknight meal.
Ingredients
1 large spaghetti squash
5-6 slices of bacon
1/2 bag frozen peas
2 tablespoons (homemade) pesto
Salt
Pepper
Directions:
Heat oven to 375. Using a small knife, prick the squash all over. Put it on a baking sheet and bake for 1 hour and 20 minutes, flipping once halfway through. Allow the squash to cool and cut it open. Scoop out the seeds and discard. Using a fork, scrape out the strands of squash into a large bowl. This step can be done up to 2 days ahead. You can keep the squash in an airtight container in the fridge.
In a large skillet, fry bacon until crisp. Set the slices on a plate lined with a paper towel. Add the squash to the bacon grease and toss to coat and warm through. Season with salt and pepper (don't be shy). Add the peas and toss enough to heat the peas. Turn off the heat, add the pesto, and stir to combine.
Dish it up, crumble the bacon on top, and enjoy!
 |
| Pictured here with optional parmesan cheese! |
Wednesday, August 28, 2013
Chocolate Banana Bread
Ever have one of those disagreements about when a fruit is ripe? My mother and are this way about bananas. She likes her bananas yellow with no or very few spots. I can't stand underripe bananas, so I like mine with several spots. I'll eat them long past the point that my mom has deemed them unfit.
But the bananas that were still on my counter after we got back from out of town were past their prime even by my standards. Banana bread it is then!
Notes: I modified this recipe from Joy of Baking.
I don't have many notes here. It's chocolate and bananas. What's left to say?
Ingredients:
1 2/3 cups of flour
1/3 cup of unsweetened cocoa powder
2/3 cup of brown sugar
1 teaspoon baking powder
1/4 teaspoon baking soda
1/2 teaspoon salt
1 teaspoon cinnamon
1/2 cup plain yogurt
2 eggs
3 bananas
3 tablespoons prepared coffee
Directions: Heat oven to 350
In a large bowl, whisk together flour, sugar, cocoa powder, salt, baking soda, baking powder, and cinnamon.
In another bowl, beat eggs. Mash the bananas. Stir in yogurt and coffee. Add the dry ingredients to the wet. Stir until just combined.
Pour batter into a buttered loaf pan and bake between 55-65 minutes until a tester comes out clean. Let cool, slice, and enjoy!
Shaved Asparagus Pizza with Roasted Garlic Oil
Our plans were a bit thrown off last week when our landlords decided they would update our furnace, duct work, and water heater with only 15 hours notice. The dogs can't be in the house when workmen are here, so we had to go out of town very quickly. Home is just about the only place you can go on such short notice, so that's where we went.

While we were at home, I made a pizza crust for my dad. It looked so good, I decided I needed to make pizza when we got home.
Notes: I tried a different method for making pizza crust this time that I learned from Smitten Kitchen: pizza crust in the fridge. It worked great, with a big caveat: make sure you let it sit out on the counter for at least an hour before you deflate it and bake it. Mine didn't come to room temperature before I baked it and it did not get as crispy as I like it. Otherwise, it's a nice method. You can make the crust in the morning before you go to work, put it in the fridge, and it's ready when you get home.
Shaving asparagus is a bit difficult. It works a little easier if you lay the asparagus on the cutting board and run your peeler over it. It'll break and some pieces will be thicker than others, but no worries.
I tweaked this recipe from Smitten Kitchen only slightly.
Ingredients
1/2 bunch of asparagus spears
1 large or 2 small balls of fresh mozzarella
Roasted garlic oil (recipe follows)
1 homemade pizza crust (recipe here)
Salt
Pepper
Olive oil
Directions:
If you're using the fridge pizza dough method, in the morning, make the pizza crust as normal. After you put the dough in the oiled bowl, instead of placing it on the counter, put it in the fridge for about 8 hours. When you're ready to bake, let the bowl sit out on the counter for an hour before you deflate it and roll it out.
When you're ready to bake, heat the over to 475. Arrange the racks in the oven with one at the top and one at the bottom.
While you're waiting for the dough to rest, shave the asparagus by laying the spears on a cutting board and "peeling" them like you would a carrot or potato. Put the shaved pieces in a bowl, season them with salt and pepper, drizzle them with olive oil and toss. Set aside.
Dice the mozzarella into small cubes. Roll out the pizza dough and brush it with roasted garlic oil. Spread the cheese out and then spread the asparagus on top. Bake for 8-10 minutes on top rack and them transfer to the bottom rack and bake 8-10 more minutes until crispy and bubbly. Slice up and enjoy!
Roasted garlic oil:
1 head garlic
1/4 cup olive oil plus more for drizzling
salt
pepper
Heat oven to 400. Slice the top off the head of garlic. Drizzle with olive oil and season with salt and pepper. Wrap the head in foil and bake directly on the oven rack for 1 hour.
Pour 1/4 cup of oil in a small skillet and heat on medium. Squeeze the roasted garlic out the skin and into the skillet. Stir, breaking up the large chunks of garlic. Heat the oil for about 10 minutes. Use as desired.
Sunday, August 18, 2013
Brown Sugar Pound Cake
People disagree about which version of Van Halen is the best: David Lee Roth as front man or Sammy Hagar as front man.
I don't care because I hate them both.
For some reason, Greensboro LOVED Van Halen (I think they loved both versions). When we lived there, you would hear them on the radio constantly. Van Halen actually opened their tours in Greensboro because they knew they would sell out. Van Halen was everywhere and I couldn't stand it.
That said, there is exactly one and only one occasion where I will allow Van Halen to be played in my house: when I'm baking poundcake.
Notes: Scott's birthday is this week, so I was looking for cake recipes. I stumbled on this one from Pioneer Woman. Before you could say "happy birthday," I decided I needed to make poundcake TONITE.
I tweaked it a bit. I used brown sugar instead of white and ginger ale instead of lemon-lime soda. I also replaced the flavorings with vanilla. I baked it in two loaf pans rather than a Bundt pan. It. Was. Amazing.
Ingredients:
3 sticks of butter, softened
3 cups of brown sugar
3 cups of flour
1 tablespoon of vanilla
1 cup (8 oz.) of ginger ale
5 eggs
Directions: Heat oven to 325.
With the mixer on medium, cream the butter. Add the sugar one cup at a time, allowing it to incorporate. Cream together until lighter and fluffy.
Drop the mixer speed down and add in one egg at a time. Mix in vanilla.
Add the flour one cup at a time until it's blended in. Scrape the bowl down and add in the ginger ale. Mix everything until is just combined.
Divide batter into two greased loaf pans. Bake for 1 hour until the top of the cake is set. When they're done, allow them to cool in the pans for 10 minutes. Loosen the sides with a thin spatula or knife and turn the cakes out onto a cooling rack. Cool for five more minutes, slice, serve, and enjoy!

Q.E.D.: Kale, Sausage, and Mushrooms Over Rosemary Polenta
You remember my affinity for kale and sausage.
I was thinking about polenta the other day and I decided it would taste great with some kale and sausage on top of it. I was not wrong.
Notes: "Polenta" is the Italian word for cooked cornmeal. If you like grits (and you should), you'll like polenta.
If I had to do it over, I think I would finely chop some spinach, saute the mushrooms, and just stir it all into the polenta, but this is crazy good.
You can bake, fry, or grill leftover polenta. I had some leftover and I'm going to try baking it, so I'll let you know how it turns out.
Want a vegetarian version? Leave out the sausage. You can make it as is or add some more mushrooms.
Ingredients:
1 lb kielbasa
1 large or 2 medium bunches of kale, cleaned and stemmed
2 pints shitake mushrooms
1 quart water or stock
1 cup cornmeal
3 tablespoons butter
1 small bunch fresh rosemary
Salt
Pepper
Directions:
In a large sauce pan or stock pot, bring water or stock to a boil.
While you're waiting for it to boil, clean and slice the mushrooms and slice the sausage. Chop the kale into bite-sized pieces. Mince the rosemary.
Heat a large skillet on medium high. Add in the sausage and cook for a few minutes until it gives off a little fat. Add the mushrooms and cook a few more minutes. Add in half the minced rosemary. Add in the kale and saute until the kale is dark green and tender.
When the water or stock is boiling, whisk in the cornmeal and turn the heat back to medium-low. Whisk frequently until the mixture is thickened (the consistency of grits or oatmeal). Add in the other half of the rosemary and season with salt and pepper. Stir in the butter.
To serve, spoon polenta into the bottom of a wide-mouthed bowl and top with kale mixture. Enjoy!

Saturday, August 17, 2013
Roasted Summer Squash and Tomatoes with Roasted Garlic Chive Toast
Here in the northeast, summer in waning, which means we have to savor summer food while we can. What better way to do that than with a big ol' bowl of summer vegetables?
Notes: The only people who wouldn't like this dish are people who hate delicious things (and I guess people who hate vegetables). Roasting the tomatoes gives them a deep, sweet flavor. Roasted broccoli has a nutty taste. And I don't know about you, but I could eat summer squash any old time.
You could easily make this as a side dish if you need to feed a crowd. I love it as is. If you have a garden with a boatload of summer squash, this is a great way to use it up.
Don't skimp on the fresh herbs here. They make a huge difference. If you're not a fan of garlic, do me a solid and just try it. Roasted garlic doesn't have the bite that raw garlic does.
Ingredients:
For squash:
1 large or 2 medium yellow squash
1 large or 2 medium zucchini
2 small heads of broccoli
2 pints of cherry or grape tomatoes
4 tablespoons of olive oil (divided)
1 head of garlic
1 tablespoon herbs de provence
1/2 bunch cilantro
Salt
Pepper
For toasts:
2-4 slices of bread (I used sourdough)
1 small bunch chives
3 tablespoons butter
Directions: Heat oven to 425.
Dice the squash and zucchini into 1-inch pieces. Cut the broccoli into small florets. Split up the head of garlic keeping the skin on each of the cloves. Leave the tomatoes whole.
Using two baking sheets, spread out the squash, zucchini, tomatoes, garlic cloves, and broccoli into one layer (I put the squash on one sheet and the broccoli and tomatoes on the other. I split the garlic between the two). Drizzle each tray with 2 tablespoons of olive oil. Sprinkle the herbs de provence over the squash. Season with salt and pepper. Toss the veggies around with your hands until they're all coated with oil. Bake for 25-30 minutes.
Chop the fresh herbs. Put butter in a small bowl and let it come to room temperature (it needs to be softened) while the veggies are roasting.
Right before the veggies are done, pull the garlic cloves out of the oven. Peel them and make a paste with your knife: slice the cloves and then using the wide end of the knife, mush (technical term) them around on the cutting board. Add the paste and half of your chopped chives to the butter and mash everything together with a fork. Spread half the butter on the bread.
When the veggies are done, pull them out and put the bread in (it takes about 5 minutes). Put the remaining butter and cilantro on the veggies and toss together. Serve the veggies in bowl alongside the toast. Enjoy!

Pumpkin Pie Cornmeal Muffins
After I made my enchiladas, I had some leftover pumpkin. What better way to use it than in pumpkin muffins?

Notes: You can see I'm on a bit of a cornmeal muffin kick. I'm trying to keep muffins around because they are great for a snack or a sweet treat after dinner, but they aren't as sugary as cookies or ice cream. Plus, they're homemade. They keep well in the fridge. Just nuke one in the mircowave for a few seconds and you have warm baked goods any ol' time.
These are delicious. They aren't too sweet. If you wanted to add a layer of flavor (and some more sweetness), add a 1/2 of maple syrup.
You say pumpkin in only for fall, I say pish posh! That's why we can things.
Ingredients:
1 cup flour
1 cup cornmeal
2 teaspoons baking soda
1/2 teaspoon salt
1/2 tablespoon cinnamon
1/2 teaspoon nutmeg
1/4 teaspoon cloves
1/4 teaspoon ground ginger
1 cup canned pumpkin
1 cup plain yogurt
1 cup brown sugar
Directions: Heat oven to 350.
Add the flour, cornmeal, baking soda, salt, sugar, and spices into a large bowl and whisk together until blended.
Add in yogurt and pumpkin and stir everything together until just combined.
Spoon batter into muffin tin and bake for 18-20 minutes. Allow muffins to cool for 5 minutes before transferring them to a cooling rack. Serve warm and enjoy!
Sunday, August 11, 2013
Q.E.D.: Charred Corn and Black Bean Enchiladas
Scott and I just got back from visiting his brother, sister-in-law, and their twin girls. Their family has recently gone gluten free. Lots of people are doing that these days and many of them find it helps with a number of common problems. I'm all for experimenting with your diet in order to make life changes. Since I've cut out a lot of processed foods, I know I've felt better.
I decided I might try writing a recipe that could be made gluten free if you needed one. Everyone needs recipes in their arsenal that can please people with dietary restrictions. And if it's quick to make, all the better!
Notes: The ingredients I used were likely not all gluten free, so be sure you read the labels carefully.
Smitten Kitchen has more detailed directions for the charred corn and it was that recipe that was my inspiration for this one. If you don't have a gas stove, just skip this step. They won't be charred corn enchiladas, but they will still be delicious.
The brown rice tortillas, as it turns out, were not as pliable as the wheat tortillas, but heating them would have helped that. I wrote that step in the recipe. If you split a tortilla, no biggie. You'll cover it with sauce and cheese.
You don't taste the pumpkin in these, but it gives the texture of refried beans (without the work or the fat) and it pumps up the nutritional content. Perfection.
Trader Joe's enchilada sauce was pretty good. If you're feeling industrious, you can make your own, but it wouldn't be Q.E.D. for sure.
Ingredients:
1 can black beans
1/2 can pumpkin puree
2 ears corn
6 brown rice tortillas
1 jar/can of your favorite enchilada sauce
3 teaspoons cumin
1/2 tablespoon chili power
1/2 bunch of fresh cilantro
2 cups shredded cheese (colby jack works great)
Salt
Pepper
Directions: Heat oven to 375.
Open the beans, drain and rinse them under cold water, and set aside.
Shuck the ears of corn leaving the stem on for a handle. If you have a gas stove, turn on a burner to medium high. Hold the ears over the burner (you can rest them on it -- just watch them) and turn them until they start to char, pop, and turn brown.
Keep an eye on the corn, but go ahead and chop the cilantro. Add the pumpkin to a large bowl. Season with cumin, chili power, salt, and pepper. Add in the beans. When the corn is done, strip the kernels off into the bowl with a sharp knife. Add in the chopped cilantro and mix everything together. Add in 1/2 cup of cheese and stir.
Warm your tortillas by wrapping them in a moist paper towel and zapping them in the mircowave for about 15-20 seconds.
In a 9x13 baking dish, pour about a tablespoon of the enchilada sauce in the bottom of the pan to coat it (alternatively, you can butter the dish). Assemble the enchiladas by adding about 3 tablespoons or 1/4 cup of filling in the tortilla, toward the bottom of the round. Roll the tortilla up from the bottom and set it in the dish seam side down.
When you're finished assembling, pour the rest of the sauce over all the tortillas and top with remaining cheese. Bake for 15-20 minutes until bubbly and the cheese starts to brown.

Serve and enjoy!
Tuesday, August 6, 2013
Q.E.D.: Mushroom and Broccoli Fried Rice
One of the things that people aren't up front about when you start learning how to cook is how often you'll screw up. When I first started cooking, I definitely screwed up. A LOT.
That time I tried to substitute a cup of dried herbs for a cup of fresh herbs in an herb sauce and it was like eating confetti? Totally.
Or that time I tried to use frozen vegetables in a stir fry and none of them cooked? You bet.
And the time I didn't chill my oatmeal cookie dough and ended up with one huge half baked cookie mass? Not pretty.
There were times we had to toss it all and order pizza. And there were times we ate some things that just weren't that tasty. But that's OK. Just because things don't turn out right at the beginning, it doesn't mean you should throw in the towel and give up on cooking.
And here's the other dirty secret that you might not learn from reading food blogs with pretty pictures (unlike mine) and perfect recipes: you STILL screw up, even if you've been cooking a long time.
This dish? It was a screw up. I originally made beef and broccoli fried rice. Trouble is, I thought using stew beef would work out just fine. Boy was I wrong. The beef was well-seasoned, but it was like biting into an inner tube. So, I did what any cook would do. I picked the beef out, fed some to the dogs, tossed the rest, and rewrote the recipe. For every good recipe, there's one that didn't turn out so well.
Notes: If I had my druthers, I'd make this with scallions instead of regular onions, but regular onions is what I had. I would have also used wild mushrooms, but again, crimini was all I had.
If you don't have or can't find toasted sesame oil, you could just use some sesame seeds.
You can make the rice ahead of time and chill it in fridge or just use some plain leftover rice if you have it. This is still Q.E.D. even if you don't have the rice already made. If you can find the veggies pre-cut, it's even quicker.
Ingredients:
1 cup white or brown uncooked minute rice
1 cup water
1 pound of mushrooms
1 small onion or 1 bunch scallions
2 cups broccoli florets (about 2 small broccoli crowns)
1/4 cup soy sauce
1 teaspoon toasted sesame oil
2 cloves garlic
2-inch piece of ginger
Salt
Pepper
Red pepper flakes
High-temp oil like vegetable oil or coconut oil
Directions:
Start with the minute rice. Bring water to a boil, stir in the rice, take off the heat and let sit for 5 minutes. When it cools a bit, put it in the fridge and let it chill while you do everything else.
Dice the onion, slice the mushrooms, and chop the broccoli florets. Heat a skillet on high with a tablespoon of oil. Mince the garlic and ginger while the oil heats.
Add the garlic, ginger, and onion to the skillet and stir one minute. Add the mushrooms and let them brown (about 2-3 minutes). Season with salt and pepper. Add the broccoli and cook 2-3 more minutes (if the broccoli pieces are larger, you might want to throw the skillet lid on it and steam it for about a minute).
Pull the rice out of the fridge and add it the pan. Let it sit for a minute, then stir. Add in the soy sauce and stir for 2 minutes. Add in the sesame oil and red pepper flakes (to taste) and stir to combine.
Serve and enjoy!

Saturday, August 3, 2013
Blueberry Banana Cornmeal Muffins
I decided to experiment with some muffins.
I had a over-ripe banana and some blueberries. I've made banana muffins. I've made blueberry muffins. I've made banana and blueberry muffins. But I have not made blueberry banana cornmeal muffins! Well, until now.
Notes: These came out nicely. They were a little flat. I think I added too much liquid, so I wrote the recipe without the extra 1/2 cup of milk. But they're sweet and a little dense. The blueberries add a nice little sweet/tart burst.
Ingredients:
1 cup flour
1 cup cornmeal
1/2 teaspoon salt
2 teaspoons baking soda
1 cup yogurt (or sour cream if you have it)
1/2 cup brown sugar
1/2 cup maple syrup
1-2 small bananas
1 cup blueberries
Directions: Heat the oven to 350.
Mash up the banana in a large bowl. Add in the yogurt and maple syrup.
In a separate bowl, whisk together the flour, cornmeal, salt, sugar, and baking soda. Add the dry ingredients to the wet and stir until just combined. Fold the blueberries in gently.
Bake for 18-20 minutes, cool and enjoy!
I had a over-ripe banana and some blueberries. I've made banana muffins. I've made blueberry muffins. I've made banana and blueberry muffins. But I have not made blueberry banana cornmeal muffins! Well, until now.

Notes: These came out nicely. They were a little flat. I think I added too much liquid, so I wrote the recipe without the extra 1/2 cup of milk. But they're sweet and a little dense. The blueberries add a nice little sweet/tart burst.
Ingredients:
1 cup flour
1 cup cornmeal
1/2 teaspoon salt
2 teaspoons baking soda
1 cup yogurt (or sour cream if you have it)
1/2 cup brown sugar
1/2 cup maple syrup
1-2 small bananas
1 cup blueberries
Directions: Heat the oven to 350.
Mash up the banana in a large bowl. Add in the yogurt and maple syrup.
In a separate bowl, whisk together the flour, cornmeal, salt, sugar, and baking soda. Add the dry ingredients to the wet and stir until just combined. Fold the blueberries in gently.
Bake for 18-20 minutes, cool and enjoy!
Monday, July 29, 2013
Peach Crisp
I feel sort of sorry for the other seasons because they cannot compare to summer when it comes to fruit.
All the exciting fruits are ripe in the summer: strawberries, blueberries, raspberries, nectarines, plums, watermelons, peaches -- come on! Poor fall has figs and apples. Winter has the citrus fruits. Spring basically only has cherries. Summer has all the fruit fun. I guess that means we just have to enjoy it while we can.
Notes: This weekend my grocery store had local peaches on sale. I eyeballed them the whole time I was shopping. I finally caved and decided that a peach crisp was in order.
I modified this recipe from Smitten Kitchen. It was so good, Scott had three helpings.
You can assemble the crisp and keep it in the fridge for about 12 hours, so it's a nice make-ahead dessert.
Ingredients:
Topping:
1 cup flour
1/4 cup brown sugar
1/2 teaspoon kosher salt
3/4 stick (6 tablespoons) butter, melted and cooled
Filling:
6 fresh peaches (about 2 lbs)
1/4 cup brown sugar
2 tablespoons raw sugar
1/2 tablespoon cinnamon
1 teaspoon vanilla extract
1 tablespoon flour
1/2 stick butter, melted and cooled
Directions:
Start with the topping. Add all the dry ingredients to a bowl and whisk together. Add in the melted butter and mix (I find using your clean hands works best) until it has the texture of wet sand. Set it aside.
Peel and slice the peaches. In a glass baking dish (I used an oval one), add the dry ingredients for the filling (sugar, flour, cinnamon) and mix to combine. Add in the peaches, butter, and vanilla and stir everything together so that the peaches are coated. Sprinkle the topping on top of the filling. Put the dish in the fridge and let it chill for about 15-30 minutes.
Heat the oven to 425. Let the crisp come to room temperature before you put it in the oven. Bake it for 30 minutes until bubbly.

Enjoy the fruits (ha!) of summer!
Q.E.D.: Aglio e Olio with Arugula

Back in college, I tried the Atkins diet for about 48 hours. Going cold turkey on carbs made me feel terrible. I decided then and there that no amount of weight loss was worth feeling that bad. So I happily went back to my bread and pasta.
Next time you get the urge to try a fad diet that asks you to eat only one thing, just don't. There's no magic food to get you healthy or make you lose weight. Getting healthy isn't the product; it's the process. It isn't something you achieve and then sit back and enjoy, like building a deck or washing a car. It's more like gardening: you never quit gardening. Sometimes its easier and sometimes it's harder, but it's something you have to commit to doing.
Healthy living means a balanced diet, not a perfect diet. So, don't give up the carbs. Just don't eat only carbs.
Notes: This dish is light on effort and big on flavor. Traditional aglio e oilo ("garlic and oil") doesn't have any greens, but (going back to the balanced diet thing) I needed some greens. Arugula is a great complement to the spicy garlic and red pepper flakes. It's got a mustard/pepper flavor.
If you can find pre-washed arugula, this dish is as easy as boiling water.
Ingredients:
1 box thin spaghetti
1 bunch arugula, washed (about 2 cups or 8 oz.)
1/4 - 1/3 cup olive oil
2 tablespoons butter (optional)
4-5 garlic cloves
Salt
Pepper
Red pepper flakes (1/4-1/2 teaspoon, but more if you like it hot)
Directions: Fill a stock pot with water and set it on high heat.
In a large skillet, add olive oil and butter and turn to medium low. Mince the garlic and add it to the pan along with the red pepper flakes. Season with salt and pepper.
Once the water boils, add a small handful of salt and drop the pasta. Boil for about 6 minutes.
When the pasta is almost done, turn the heat up on your skillet to medium. Put your arugula in the skillet and then using a pair of tongs move the pasta from the stock pot to the skillet (just drop it right on top of the arugula). When you've transferred all the pasta, use the tongs to mix it with the arugula and the olive oil sauce.
Once everything is combined, heated, and coated with sauce, serve and enjoy!
Sunday, July 28, 2013
Cornmeal Brioche French Toast
Scott and I have been lucky to be able to live in several different places. In every town we've lived in, we've had our favorite restaurants. Hands down, the best breakfast belongs to the The Courier in Urbana, IL. I was particularly in love with their almond french toast. Someday I will try to recreate it, but until then, every time I eat french toast, I think of the many happy breakfasts we had at The Courier.
Notes: I make french toast next to never, but we had an older loaf of brioche in the fridge this weekend and I decided to try it out. It came out pretty well.
I made a cornmeal batter because I like the crunch. I should have whisked it together in a bowl first and then poured the batter into a flat dish to dunk the bread because the cornmeal settled to the bottom. Live and learn! It was still tasty.
Keep your butter or other fat handy while you're cooking. If the pan starts to look dry, add more. A couple of my pieces wanted to stick to the pan.

You will notice that MY french toast has bananas on it because I enjoy fruit in my breakfast bread products, unlike some other benighted person that lives in my household.
Ingredients:
1/2 cup cornmeal
1/4 cup of flour
1/2 cup sugar
1 cup milk
1 tablespoon vanilla extract
1 tablespoon cinnamon
4-6 slices of brioche
Butter or coconut oil for the pan
Confectioners sugar, fruit, and/or maple syrup for topping
Directions:
Heat a large skillet or griddle on medium-high.
In a bowl, whisk together cornmeal, sugar, cinnamon, and flour. Add in the milk and vanilla and whisk. Transfer the batter to a flat dish like a pie plate, cake pan, or 8x8 glass baking dish.
Drop a pat of butter into the pan and swirl it around to coat the bottom. Take a slice of bread, lay one side in the batter, flip it over and lay the other side in the batter, and then add it to the hot skillet. Let it brown on one side and the flip and let it brown on the other side. Add more butter if the pan starts to look dry.
When the slices are done, dust them with confectioner's sugar and/or fruit and enjoy!
Wild Mushroom Risotto with Pesto and Peas
Our weather has gotten cooler and it's hard to believe it's still July. I was able to comfortably wear jeans the other night, which is pretty unheard of. Since it's not so hot, a nice steamy bowl of risotto did not sound like the torture it otherwise would in the heat of summer.
Notes: Risotto gets a bad rep for being a fussy dish, but it's really not that fussy. The idea is just to let the rice absorb the liquid slowly so that it produces a creamy texture. That's why you add the liquid a little at a time rather than all at once.
Arborio rice isn't always easy to hunt down, but I've seen the bigger chain stores like Wal-Mart and Target carrying it lately. It's a bit expensive, but if you're in the mood to splurge, it's definitely worth it.
I used "wild" mushrooms (in quotes because most mushrooms in the US are cultivated rather than foraged), but you could use whatever mushrooms you like. If the store has a pre-sliced pack, all the better.
How do you know when risotto is nearly done? Two things: (1) it will basically double in volume and (2) just taste it! If the rice is still crunchy, it needs a few more minutes.
Ingredients:
1 1/2 cups uncooked arborio rice
4 cups chicken, vegetable, or mushroom stock
1 heaping tablespoon pesto (homemade if you have it!)
1/2 bag of frozen peas
8-10 oz. of assorted sliced mushrooms (baby portobellos, shitake, oyster)
2-3 garlic cloves
Salt
Pepper
Butter or olive oil
Directions:
Pour stock in to a medium sauce pan and heat to just below a simmer. Keep it at that temperature.
Mince the garlic cloves, clean and slice the mushrooms.
Heat the fat of your choice in a large skillet over medium high. Add the mushrooms and sautee until the edges just start to turn a little brown. At the garlic and cook another minute. Add the rice and toast it in the pan with the mushrooms and garlic for just a minute. Season with salt and pepper.
Add 4 ladles of stock and stir. When the mixture starts to look dry and sticky, add two more ladles of stock and stir. Repeat this process until the rice is tender and most of your stock is gone. The whole process takes between 35-40 minutes depending on the brand and age of your rice. If you run out of liquid before the rice is done, just add warm tap water to your sauce pan and use that.
Once the rice is tender, stir in the pesto and frozen peas (no need to thaw). Allow the peas to just heat through. Serve and enjoy!

Tuesday, July 23, 2013
Eggplant Caprese
This dish is a cross between a caprese salad (featuring tomatoes, fresh mozzarella, and basil) and eggplant parmesan (featuring fried eggplant). It came about mostly because I saw some very pretty eggplants in my grocery store and wanted to make something with them. Since it's hot, though, I didn't want to make eggplant parm because I didn't want to turn the oven on. And so eggplant caprese was born.
Notes: Everything about this dish celebrates the flavors of summer. Use the freshest eggplants and tomatoes you can find. And don't skimp on the fresh mozzarella! Nothing substitutes for it. The beauty of this dish is its simplicity. When you use few ingredients, make sure they're good ones.
This recipe serves two people, but it could be easily doubled to feed four. It will just take a little longer to fry all the eggplant.
Traditional caprese salad calls for basil leaves, but since I had homemade pesto, I figured a little play on the original wouldn't hurt.
It's a show stopper, so if you want to impress you friends, make them this dish!
Ingredients:
1 medium eggplant
1/2 cup flour
1/2 cup milk
1 cup cornmeal
1 tablespoon dried oregano
2 large tomatoes
1 ball fresh mozzarella
2-3 teaspoons of pesto (use homemade if you have it!)
Salt
Pepper
Olive oil for frying
Directions:
In a medium bowl, whisk together milk and flour to make a wet batter. Pour the cornmeal into a pie plate or cake pan. Add salt, pepper, and oregano to the cornmeal and mix to combine.
Slice the eggplant into 1/2-1/4 inch rounds. Dunk each round into the wet batter, shake off the excess, then coat the round with cornmeal. Put the breaded eggplant rounds on either a large plate or cooling rack. When all the rounds are breaded, put them in the fridge for about 10 minutes.
While the eggplant is chilling, slice the tomatoes into thick slices. Pour oil into a large skillet and heat on medium high. Test the oil by sprinkling a little cornmeal in it. If if floats and starts to bubble, the oil is the right temperature. Take the eggplant out of the fridge and fry a few slices at a time, approximately 3 minutes on each side, until they are golden brown. Drain the rounds by laying them on a plate lined with a paper towel.
When you put the last batch of eggplant in the pan, slice the mozzarella and pull the pesto out of the fridge. When the eggplant is done, layer the cheese, eggplant, and tomatoes on a plate and top with pesto. Serve and enjoy!
Notes: Everything about this dish celebrates the flavors of summer. Use the freshest eggplants and tomatoes you can find. And don't skimp on the fresh mozzarella! Nothing substitutes for it. The beauty of this dish is its simplicity. When you use few ingredients, make sure they're good ones.
This recipe serves two people, but it could be easily doubled to feed four. It will just take a little longer to fry all the eggplant.
Traditional caprese salad calls for basil leaves, but since I had homemade pesto, I figured a little play on the original wouldn't hurt.
It's a show stopper, so if you want to impress you friends, make them this dish!
 |
| Food as fashion |
Ingredients:
1 medium eggplant
1/2 cup flour
1/2 cup milk
1 cup cornmeal
1 tablespoon dried oregano
2 large tomatoes
1 ball fresh mozzarella
2-3 teaspoons of pesto (use homemade if you have it!)
Salt
Pepper
Olive oil for frying
Directions:
In a medium bowl, whisk together milk and flour to make a wet batter. Pour the cornmeal into a pie plate or cake pan. Add salt, pepper, and oregano to the cornmeal and mix to combine.
Slice the eggplant into 1/2-1/4 inch rounds. Dunk each round into the wet batter, shake off the excess, then coat the round with cornmeal. Put the breaded eggplant rounds on either a large plate or cooling rack. When all the rounds are breaded, put them in the fridge for about 10 minutes.
While the eggplant is chilling, slice the tomatoes into thick slices. Pour oil into a large skillet and heat on medium high. Test the oil by sprinkling a little cornmeal in it. If if floats and starts to bubble, the oil is the right temperature. Take the eggplant out of the fridge and fry a few slices at a time, approximately 3 minutes on each side, until they are golden brown. Drain the rounds by laying them on a plate lined with a paper towel.
When you put the last batch of eggplant in the pan, slice the mozzarella and pull the pesto out of the fridge. When the eggplant is done, layer the cheese, eggplant, and tomatoes on a plate and top with pesto. Serve and enjoy!
Sunday, July 21, 2013
Q.E.D: Homemade Pesto
Consider this another edition of eat food, save money.
If you're like me, you love pesto. You have made countless pesto pastas. You have put pesto in rice. You have contemplated eating pesto with a spoon. But you have yet to break your habit of buying pre-made pesto. It's easier, you'll say.
And you would be wrong.
If you have a food processor or an emersion blender, you can make homemade pesto and it is just as easy as store-bought pesto. And it's cheaper to boot.
Store-bought pesto, depending on the kind you get, can be anywhere from $3-$5. If you buy fresh basil and garlic, it'll cost you about a $1.50, maybe $2. You will have delicious, fresh pesto anytime you want.

Notes: I have Dorot frozen garlic on hand in my freezer all the time (I find mine at Trader Joe's. I'm being compensated by neither Trader Joe's nor Dorot for this plug). I often forget to buy fresh garlic and there are times when I feel beyond lazy and don't want to haul out my cutting board to mince it. It works great in this dish. You just have to take a couple of cubes out of the freezer a few minutes before you're ready to whir.
Bear in mind that your pesto will turn a little brown if you store it in the fridge. Worry not -- just stir it and you will reveal the bright green pesto underneath.
Some people bother streaming the olive oil carefully in the food processor while it's running. These are people who cannot really appreciate (a) the Q.E.D. or (b) the sheer force of my laziness. I throw everything in at once and start 'er up. It comes out fine every time.
Ingredients:
2 cups (or 4 oz.) of fresh basil leaves
2-3 smashed garlic cloves (or 2-3 frozen garlic cubes: see notes)
1/4 cup olive oil
Salt
Pepper
Directions:
If you're using an emersion blender, pull out the plastic cup it came with. Alternatively, use any wide-mouth plastic cup you have on hand.
Smash your garlic cloves by laying the wide side of your knife on top of each clove and whacking it hard with your hand (no need to mince). Remove the skin and discard.
Add your basil leaves to either the plastic cup or your food processor. Throw in garlic cloves, about a 1/2 teaspoon of pepper and about 3/4 teaspoon of salt (depending on your tastes). Pour in the olive oil and whir the whole mixture around until it's blended.
Store in the fridge (it keeps about a week). Add a tablespoon or two to pasta or rice. Add a teaspoon to sauteed veggies or soups. Enjoy the fruits of your very minimal labor!
Sunday, July 7, 2013
VTMK: Chocolate Zucchini Bread
I've become quite taken with vegan baking. I'm afraid this is for entirely unprincipled reasons, namely laziness and frugality. I love to bake, but I don't love having to run to the store when I realize that I don't have eggs or buttermilk (this is a problem, as you'll recall, because I am an impulse baker). I also don't love keeping eggs and buttermilk on hand because I don't use them that often and they end up spoiling (thus wasting money).

Vegan baking solves these problems. The staples in vegan baking are things I usually have either in my pantry or in my fridge already. The finished product turns out just as delicious as the non-vegan kind. It's a win-win.
Notes: I adapted the bread from this recipe. The original only calls for brown sugar, but it wasn't quite sweet enough for my taste. I wrote it with the added sugar.
This is a great way to use up extra zucchini. You could also replace the applesauce with a mashed up banana if you have one.
I will add my proviso here that this recipe is vegan to my knowledge, which is limited, so procede with caution.
Ingredients
1 1/2 cups whole wheat or spelt flour
1/3 cup unsweetened cocoa powder
1 cup grated zucchini (about one medium zucchini)
1/2 cup unsweetened applesauce
1/2 cup brown sugar
1/2 cup raw sugar
1 teaspoon cinnamon
2 teaspoons baking powder
1 teaspoon salt
1/3 cup water
1 teaspoon vanilla extract
1 tablespoon apple cider vinegar
1 chia egg (1 tablespoon of chia seeds + 4 tablespoons water)
Directions: Heat oven to 350.
Add all the dry ingredients (flour, cocoa, sugars, baking powder, cinnamon, salt) to a large bowl and whisk to combine.
Add the wet ingredients (water, vinegar, vanilla extract, applesauce) to a measuring cup and stir to combine.
Mix up your chia egg in a small bowl. Add the wet ingredients, the grated zucchini, and the chia egg to the dry ingredients and stir to combine.
Pour the batter into a greased loaf pan and bake for 40-45 minutes until a tester comes out clean. Cool in the pan for about 15 minutes then turn the loaf out on to a cooling rack to cool the rest of the way. Enjoy!
Saturday, July 6, 2013
Black Bean and Mango Tacos with Avocado Broccoli Slaw
Hello friends! Needless to say, it's been awhile (since January -- yikes!). I cannot promise that this marks the resuming of my regular posts, but I am certainly going to try.
So, how about a summer-y taco recipe?
Notes: I'm sans photo for this one. I thought I downloaded it, but I didn't.
I recommend that you allow the lime juice to soften the broccoli slaw while you're prepping everything else. It can be crunchy, which is part of the appeal, but it's easier to stir if it's not so stiff.
This slaw would be great on a burger or as a side dish. If you have someone in your life who is not a fan of mayo, avocado gives you the creamy texture to replace it.
Ingredients:
1 ripe mango
1 15 oz can black beans
2 ears fresh corn or half a bag of frozen
1 sweet onion
1/2 bag of broccoli slaw
1 lime
1 1/2 tablespoons honey
1 avocado
1 bunch cilantro
1 1/2 tablespoons chili powder
2 tablespoons cumin
2-3 garlic cloves
2 tablespoons butter or oil
Salt
Pepper
Your favorite box of taco shells
Your favorite taco cheese (I used a gouda blend)
Directions:
In a medium bowl, squeeze half a lime over the broccoli slaw. Season with salt and pepper. Put it in the fridge to let it marinate while you prep everything else.
Dice the mango and onion, strip the kernels off the ears of corn, and mince the garlic. Rinse and drain the beans. Add butter or oil to a medium-heat skillet and toss in the chili powder, cumin, and garlic. Let them heat in the pan until they become fragrant. Add in the onion and cook until soft. Add in the black beans and mango, season with salt and pepper, and stir. If the mixture looks dry, add about a 1/2 cup of water. Let all the ingredients simmer (stir occasionally) while you finish the other prep.
Heat your oven to 350. Chop the cilantro. Slice the avocado, remove the pit, and empty the flesh into a small bowl. Squeeze the other half of the lime over it and add in the honey. Season with salt and pepper and mash it together with a fork.
Bake your taco shells (between 3-5 minutes). Grate the cheese (if you don't have pre-shredded) and toss the avocado dressing with the broccoli slaw. Add the cilantro to the black beans. Spoon the black bean mixture in the taco shells, add cheese, and top with crunchy slaw. Enjoy!
Thursday, January 31, 2013
Eat Food, Save Money: Breakfast Edition
This is not so much a recipe, but more of a suggestion. Ok, it's probably more like a rant, but whatever. It's my blog.

Uncle Sam (read: the professor) wants you to stop buying those silly single-serving envelopes of oatmeal. You're wasting money and paper, and chances are you are consuming more junk than you need to.
First of all, buying in bulk saves you money. How much are those little packets costing? Maybe $3 or $4? You can get a big ol' canister of oatmeal for about a $1.50. You get more servings and it's cheaper, so why don't you do it?
I know, I know. The little packets are convenient. They're already pre-flavored and pre-measured, you'll say.
Look, I don't mean to sound like a jerk, but you do know how to use a measuring cup, right? What's more, the canister has the measurements and the water amounts written right there on the side! You have to measure the water when you use the packets anyway, so how much more time and energy does it take to measure out the oats, too? If you have a microwaveable bowl, you can make the canister oats in the microwave, too -- it literally takes the same amount of time.
Also, do you really want the pre-flavored oatmeal? Have you read the back of the box? How many terms in the ingredient list do you recognize as food? Yeah, I thought so.
Chances are the flavors you like in your oatmeal are things you already have in your kitchen. Cinnamon? Most people have that. Brown sugar? Most people have that too. Better yet, if you buy the canister of oats, you can have WHATEVER FLAVOR YOU WANT! Heck, you could throw some leftover pumpkin pie spice in there! Or how about some peanut butter? Buy yourself some dried fruit and some nuts out the (very economical) bulk bin and get creative.
You can eat real food AND save money. Ditch the packets. Go for the can.
Q.E.D.: Roasted Broccoli Flower Pasta with Pesto
You may have noticed that there is dearth of cauliflower recipes on this blog. There's a good reason for that, namely that I hate cauliflower.
I know, it's a failing.
There are two vegetables that I simply cannot get on board with: cauliflower and beets. You've never seen a beet recipe on this blog because I have only made one recipe with them in my life. To my palate, they have a kind of vinegar aftertaste that I just can't handle.
My dislike of cauliflower is slightly weirder. I think it looks like a brain.
This is not the only reason I don't eat it. It's very crunchy and somewhat bitter and there's something about that particular combination that I don't care for. But add to it that I feel like I'm munching on tiny brains -- well, you can see why I might avoid it.
But, as a grown human being and someone who loves cooking, I feel committed to trying things multiple times. Different preparations can make all the difference. I'm sure I'll try beets again sometime and in this recipe I gave the brain-liflower another go. It turned out very tasty.
Notes: It's been a few posts since we've done a Q.E.D meal. If your weeks are anything like mine, you need good food and you need it fast. Look no further, my friends!
The name of this recipe is not literal in that I did not use the actual hybrid vegetable broccoliflower to make it. I just used a combination of broccoli and cauliflower.
I roasted the veggies because I wanted the depth of flavor. If you really didn't want to turn your oven on, you could always just toss the veggies into the pasta water during the last few minutes of cooking time. It's no fuss and it gets you a one-pot meal. The two downsides to that method are losing the roasted flavor and losing some of the vitamin content of the veggies (water leeches some of the nutrients out of them).
Ingredients:
1 pound short cut pasta like medium-sized shells, orecchiette, or bowties
1 head of broccoli
1 head of cauliflower
2-3 tablespoons of prepared pesto sauce (I used my favorite brand from the grocery store)
Salt
Pepper
1 tablespoon of olive oil
Directions: Heat the oven to 425.
Chop the broccoli and cauliflower into bite-sized pieces. Put them on a baking sheet in one layer. Toss with salt, pepper, and olive oil. Roast them for 15-20 minutes until you can pierce the pieces with a fork, but they're still tender-crisp.
While the veggies are roasting, fill a stock pot with water and bring to a boil. Cook the pasta according to the directions, but short cut pastas usually take between 10-12 minutes to cook.
When the pasta finishes, drain it and return it to the pot. Add in the veggies and pesto. Stir to combine. Serve and enjoy!
 |
| BRAAAAIIINNNNNS |
Sunday, January 20, 2013
Meatball Sandwiches with Brown Butter Kale

I know, there's no sandwich in that picture. I decided at the last minute that I just wanted the meatballs. Scott assured me that the sandwiches were good.
Now, meatballs.
People have a lot of theories about how to make a good meatball. For me, it's all method. What do you really want out of meatball? You want a tender, flavorful meatball bathed lovingly in sauce, right? Does that mean you fry the living daylights out of it or bake it into a hockey puck? No, it does not. It means you steam it.
That's right, I said steam it.
The only downside to steaming is that you don't get the pretty brown crust on the outside. But, look, do you want the meatball to be tender or do you want it to be pretty? It's going to be bathed lovingly in sauce anyway, so you won't be able to see the color! Trust me on this one. If you want a melt-in-your-mouth meatballs, steam them.
Notes: The only reason this isn't Q.E.D. is because you have to give the meat about 10 minutes to come to room temperature. Otherwise, meatballs are just not that complicated.
You want a decent fat content in these (they're meatballs, not a salad). I like a meatball mix with beef, pork, and veal. I couldn't find that in the store today, so I just got beef and pork.
Use your favorite cheese on the sandwiches. Provolone is a favorite for cheesesteaks in Philly, so we went we that.
If you feel bad about eating meatballs, just serve it with kale and it will make you feel better.
Ingredients:
1/2 pound ground beef, chuck, or sirloin
1/2 pound ground pork
1 cup panko bread crumbs
2 tablespoons of herbs de provence
Salt
Pepper
1/3 cup grated parmesean cheese
3-4 tablespoons milk
1 bunch kale
4 tablespoons butter
Hoagie rolls
Provolone cheese
26 oz. jar of your favorite marinara sauce (or homemade!)
Directions:
Heat the oven to 400. Take the meat out of the fridge and let it sit for about 10 mintes.
While you're waiting, thinly slice the kale. Add the bread crumbs, herbs, and parmesean cheese to a large bowl. Stir them together just to mix them evenly. Slice open your hoagie rolls.
Add water to a large skillet (just enough to cover the bottom of the pan). Heat it on medium. You want the water to simmer, not boil.
Add the meat and the milk to your bowl. Season with salt and pepper. Mix the meat into the dry ingredients. You don't want to knead it like dough, so use a gentle touch. Just make sure everything is evenly mixed.
Roll the mixture into 1 1/2 inch balls and put them in your simmering skillet. Put the lid on it and steam the meatballs for 25 minutes.
When the meatballs are done, pour off any excess liquid. Pour the sauce over the meatballs and put the lid back on. Turn the heat back to medium-low and let the meatballs simmer in the sauce.
While the meatballs are simmering, add the butter to another skillet and heat on medium-high. When the butter browns and starts to smell nutty, add in the kale. It'll pop and crackle, but don't worry. Toss the kale in the butter for about five minutes until it's wilted and emerald green. Season with salt.
Right before you put the kale in the pan, put your hoagie rolls on a baking sheet and put a slice or two of provolone inside. Heat in the oven for 5 minutes until the cheese melts and the bread toasts. Nestle your meatballs and sauce into the rolls and enjoy!
VTMK: Applesauce Molasses Cookies
I'm teaching a seminar this semester. It's an upper level course mainly for majors and upperclass students. Seminars last four hours, which is a long time to be in class. As such, we have a tradition of "seminar breaks." Seminar breaks involve food.
Since the first day of school is tomorrow, I'm in charge of the snacks for break. I originally made some chocolate chip cookies, but Scott loves them so much, I decided to let him keep them. Instead, I decided to try some vegan cookies. A lot of my students are vegan nowadays, and even if they're not, a lot of them have food allergies. Vegan recipes leave out a lot of the things that cause people trouble. Hopefully these will go over well!
Notes: I followed this recipe pretty closely, but I spiced the cookies up a little differently. I also baked mine a little longer. If I had to do it over, I would have used regular sugar for rolling, but I only had raw sugar. You don't notice that much of a difference.
If you like gingerbread, you'll like these.
Ingredients:
1 cup unbleached all-purpose flour
1/2 cup packed dark brown sugar
1 teaspoon baking soda
1/4 teaspoon salt
1/2 teaspoon cinnamon
1/4 teaspoon ground ginger
1/4 teaspoon nutmeg
1/4 teaspoon ground cloves
1/4 cup olive oil
2 tablespoons molasses
1/4 cup applesauce
small bowl of granulated sugar for rolling
Directions:
Add the dry ingredients to a large bowl (flour, baking soda, spices, salt, brown sugar). Whisk them together. Make a well in the center. Add all the wet ingredients into the well (molasses, oil, and applesauce). Stir everything together. When it starts to form a solid mass, you may just want to switch to using your hands and gently knead it together. Chill the dough for an hour.
Heat the oven to 350. Pour some granulated sugar in a small bowl. Roll the dough into 1-inch balls and roll the balls in the sugar. Put the balls 2-3 inches apart on a cookie sheet (you'll need two sheets -- the cookies will spread).
Bake the cookies for 10-12 minutes until the sides are set and the tops are little moist. The cookies will be puffy, but they'll flatten out as they cool. Cool them on the baking sheets for 10 minutes. Move to a wire rack to finish cooling. Enjoy!

Sunday, January 13, 2013
Pineapple Fried Rice

Continuing with the trend of healthy new year eating, what could be healthier than whole grains and veggies?
Notes: If you've never made fried rice before, never fear. The two things you need to remember are (1) high heat and (2) be prepared. Be sure your skillet is nice and hot before you start and have all your ingredients ready by the stove. Add the ingredients to the pan in order from longest cooking time to shortest cooking time: thicker, denser ingredients go in first, more delicate ingredients go in later.
You could use fresh pineapple if it's in season, but the canned works just as well (plus you don't have to chop it). You'll need to drain the juice out of the can, but you can reserve it for the fried rice. If the veggies get too hot and start to cook too fast, just pour a little bit of the juice over them.
The rice will have a better texture if you chill it for few hours or even overnight.
The great thing about fried rice is that you can put in it whatever veggies you like.
Ingredients:
2 cups cooked brown rice
1 15-20 oz. can of pineapple chunks (in juice, not syrup)
1 cup matchstick carrots
1 cup snow peas
1 small bunch of bok choy, cleaned and root end removed
1 small bunch of scallions
1/3 cup of soy sauce (low sodium preferred)
2-3 garlic cloves
2 teaspoons fresh ginger
1 small bunch cilantro
Dash red pepper flakes
Salt
Pepper
Oil for frying
Directions:
Before you start heating the pan, prep all your ingredients. Drain the liquid from the pineapple and reserve it in a measuring cup. Chop the bok choy and cut the snow peas in half. Mince the garlic and ginger. Slice the scallions and chop the cilantro
Turn the pan to just below high and add a tablespoon of oil (I used coconut oil). Arrange all your ingredients by the stove. When the pan is hot and the oil starts to shimmer and disappear, add the garlic and ginger and stir for 30 seconds. Add the carrots and snow peas and stir for about a minute. Add the bok choy and stir for a minute. Add the scallions and pineapple and stir for a minutes. If at any point the veggies start to get too brown, add a little bit of the pineapple juice to the pan. Season with salt and pepper each time you add new ingredients.
Make a hole in the middle of the veggies and add in the rice. Flatten the rice with your spoon so that as much of the rice as possible touches the bottom of the pan. Let it sit for 30 seconds and then start stirring it. After 30 more seconds, add the soy sauce. Add the red pepper flakes. Stir everything together for about two minutes.
Take the pan off the heat and add the cilantro. Stir to incorporate. Serve hot and enjoy!
Wednesday, January 9, 2013
Pomegranate and Goat Cheese Salad with Cranberry Mustard Dressing
I'm sure many of you have a new year's resolution to eat healthier. There's no rule that says your healthy eating can't be delicious too.
I take my lunch to work most of the time and I'm always looking for things to take that aren't sandwiches. Don't get me wrong; I love sandwiches. But you need to shake up the routine and a salad fits the bill.
Incidentally, if you're looking for a handy salad container that fits in a lunch box, this is the one I have (Rubbermaid is giving me no money for the plug, by the way). I love it.
Notes: I think the flavors in this salad are perfectly balanced. The goat cheese is smooth and tangy while the pomegranate seeds are sweet and fresh. The dressing adds a nice depth without overpowering the other ingredients.
This salad is enough just for a single serving, but you could easily double it for two if you need to. If you don't happen to have cranberry mustard, you could use your favorite mustard. Or you could just mix the olive oil and vinegar and make a basic balsamic vinaigrette.
Perplexed by pomegranates? Worry not! Hop on over to this post to jog your memory.
Ingredients:
2 cups washed salad greens
2-3 tablespoons of crumbled goat cheese
2 tablespoons of pomegranate seeds
1/4 teaspoon cranberry mustard
Splash of balsamic vinegar
1/2 tablespoon olive oil
Salt
Pepper
Directions:
To your salad bowl (the bowl you're going to eat out of), add the mustard, balsamic vinegar, and olive oil. Whisk together until the mixture is emulsified.
Add your salad greens to the bowl and toss them in the dressing to coat (you can just use your hands -- it's easier). Top with goat cheese and pomegranate seeds and toss lightly to mix. Season with a sprinkle of salt and pepper.
If you plan to take your salad to work, pack your dressing in a separate container and just lay the goat cheese and pomegranates on top of the greens. When you get ready to eat lunch, shake the container to mix the dressing and then pour it over the salad.
Enjoy!
I take my lunch to work most of the time and I'm always looking for things to take that aren't sandwiches. Don't get me wrong; I love sandwiches. But you need to shake up the routine and a salad fits the bill.
Incidentally, if you're looking for a handy salad container that fits in a lunch box, this is the one I have (Rubbermaid is giving me no money for the plug, by the way). I love it.
Notes: I think the flavors in this salad are perfectly balanced. The goat cheese is smooth and tangy while the pomegranate seeds are sweet and fresh. The dressing adds a nice depth without overpowering the other ingredients.
This salad is enough just for a single serving, but you could easily double it for two if you need to. If you don't happen to have cranberry mustard, you could use your favorite mustard. Or you could just mix the olive oil and vinegar and make a basic balsamic vinaigrette.
Perplexed by pomegranates? Worry not! Hop on over to this post to jog your memory.
Ingredients:
2 cups washed salad greens
2-3 tablespoons of crumbled goat cheese
2 tablespoons of pomegranate seeds
1/4 teaspoon cranberry mustard
Splash of balsamic vinegar
1/2 tablespoon olive oil
Salt
Pepper
Directions:
To your salad bowl (the bowl you're going to eat out of), add the mustard, balsamic vinegar, and olive oil. Whisk together until the mixture is emulsified.
Add your salad greens to the bowl and toss them in the dressing to coat (you can just use your hands -- it's easier). Top with goat cheese and pomegranate seeds and toss lightly to mix. Season with a sprinkle of salt and pepper.
If you plan to take your salad to work, pack your dressing in a separate container and just lay the goat cheese and pomegranates on top of the greens. When you get ready to eat lunch, shake the container to mix the dressing and then pour it over the salad.
 |
| Pretty AND delicious |
Subscribe to:
Posts (Atom)