Showing posts with label breakfast. Show all posts

Sunday, January 24, 2016

Greens and Goat Cheese Scramble

Boy do we have a snow day today. We've got a foot on the ground already and more is coming down as we speak!


Sassy is not impressed with the snow.

What better way to keep your snow day occupied than cooking?

Notes: I made this for lunch, but it could be a nice weekend breakfast.

It actually happens that I end up with small amounts of greens that I need to use up and this is a great way of doing that. I also happened to have some fresh herbs because I was making some spaghetti sauce.

The key to a nice scramble is to keep the heat low. Not really low, but low enough so that the eggs cook slowly.

Ingredients:
2 large eggs or 3 medium eggs
1/2 cup of fresh arugula leaves
1/2 cup of fresh spinach leaves
1 tablespoon fresh herbs (oregano, chives, or basil would all work well)
Goat cheese (to taste)
Salt
Pepper
Butter

Directions:

Give your greens a rough chop and mince the herbs. Crumble your goat cheese into small pieces.

Put the herbs in a bowl big enough for your eggs. Crack the eggs into the bowl and beat together with the herbs until well combined. Season with salt and pepper.

Heat a small amount of butter in a skillet on medium heat. Once the butter is melted, add the greens and cook until just tender. Turn the heat down. Pour the eggs over the greens. Start to stir the eggs around in the pan. When the eggs still look wet, but are mostly cooked, add the goat cheese. Gently fold the goat cheese into the eggs.


Serve hot and enjoy!

Monday, October 26, 2015

My Favorite Buttermilk Biscuits + Pepper Fried Egg and Bacon Breakfast Sandwich

After many attempts at making buttermilk biscuits, I have perfected my recipe. Fluffy on the inside and golden brown on the outside---they're perfect for biscuits and gravy or a pepper fried egg and bacon breakfast sandwich!

Notes: I do one thing that all the biscuit recipes will tell you not to do: knead. Everyone says it will make your biscuits tough. But every Southern lady I've ever known kneads her biscuits. Once I started kneading, I finally got the consistency I was looking for. My biscuits also starting rising correctly. As long as you don't knead them like bread, it won't make them tough.

I think a pastry blender is incredibly helpful, so if you plan on making these a lot, I would invest in one. You can also use a dinner fork, but it will take you a little longer.

This is also my favorite way to make a fried egg. The whites are fully cooked, the bottom is a little brown and crispy, and the yolk is still runny. If you don't like your yolk runny, poke it before you flip it over.

Ingredients:
2 cups all purpose flour
1 1/2 tablespoons baking powder
1 teaspoon baking soda
2 teaspoons kosher salt
1 cup buttermilk, cold
1 stick butter, cold

For the sandwich:
1 egg
1-2 strips of bacon
Pepper
Salt
Cheese of your choosing (optional)

Directions:

Heat the oven to 400. In a large bowl, stir together the flour, baking powder, baking soda, and salt. Cut the cold butter into small cubes. Work the butter into the flour mixture with a pastry blender or a fork until the butter is the size of large peas.

Stir in the buttermilk. Once the dough comes together, knead it in the bowl for just a minute. Pat the dough out on to a floured service. Pat it into a circle that's about a 1/2 inch thick. Use a round cookie cutter (or an empty aluminum can) and cut out rounds. When you work your way through the circle, gather the scraps and reshape into a ball. Pat the dough out again and repeat until you use up all the dough (should make about 8-10 biscuits).

Bake for 18-20 minutes until golden brown.

While the biscuits are cooling, heat a skillet on medium. Cook the bacon. When the strips are done, put them on a plate lined with paper towel. Crack your egg right into the bacon grease. Sprinkle a liberal amount of pepper on the top and season with a little salt. Cook the egg on one side until the edges are a little crisp and brown and the whites are mostly set. Gently flip it over and turn the heat off. Let is sit for about 20 seconds. If you want cheese, lay it on top of the egg now.


Slice open a biscuit. Slide the egg from the skillet onto one of the halves. Top with bacon and make a sandwich. Enjoy!

Monday, July 13, 2015

Salami and Swiss Scrambled Eggs (for One)

I might have mentioned this a few dozen times, but my husband is not a breakfast person. He doesn't have many flaws, but his lackluster attitude toward breakfast food is one of them. So when I'm in the mood to make something for breakfast, I'm usually flying solo (unless it's biscuits and gravy).

Too bad for him, because this was delicious!

Notes: This dish was born because I had leftover deli meat and cheese in my fridge. The cooking muse speaks to you for different reasons and one of those is using things up.

I used a pizza cutter to make small pieces of salami and cheese, which worked out fabulously.

Ingredients:
2 eggs
3 thin slices of salami
2 slices Swiss cheese
Salt
Pepper


Directions:

Cut the salami and cheese slices into small pieces. Crack your eggs in a bowl, season with salt and pepper, and beat them lightly with a fork.

Heat a small non-stick skillet on medium. Add in the salami and allow some of its fat to render in the pan. Once it starts to get a little crisp, add in your eggs and stir gently.

When the eggs are almost done, put the cheese on top. Turn off the heat and cover the pan either with the plate you're planning to use or a piece of foil. Let the cheese melt, then serve and enjoy your single-serving salami and swiss scramble!

Sunday, January 25, 2015

Flourless Banana Pancakes

This weekend I had a craving for pancakes. I don't crave them often, which is why I recently tossed out an old container of pancake mix. Oops.

Luckily, I had just seen a recipe for 2-ingredient banana pancakes. I was skeptical. Could these really be good? As it turns out, they were.

Notes: This batter is thin, so you'll have thin pancakes. This recipe made 6 small pancakes, so if you need to feed more people, definitely double the recipe.

I think I would have liked the batter and the pancakes a little thicker. Next time I'll either add another banana or add in some oats.

The texture on these is a bit spongy---not in a bad way. They're closer to crepes than regular pancakes, so just be aware of that.

Ingredients:
1 ripe banana
2 eggs
1 teaspoon pumpkin pie spice or cinnamon
Butter (for cooking)
Syrup or honey (for serving)

Directions:

Beat the eggs in a bowl. Add in pumpkin pie spice or cinnamon. Mash up the banana with the beaten eggs and stir until combined. The batter will be lumpy, but fully incorporated.

Heat a large skillet or griddle just below high heat. Put a small pat of butter in the pan and coat the bottom. Wipe out excess with a paper towel (watch your fingers). Using a 1/4 cup measure, spoon batter into the pan. When the edges of the pancake start to look dry, flip and cook for another 30 seconds-1 minute. Repeat until the batter is used up.

Serve with syrup or honey and enjoy!


Saturday, October 11, 2014

Apple Pie Scones

It's fall break for us! Scott and I are off on a second honeymoon and I could not be more excited. But before we go, we're doing our best to use up the food we have in the house. I had about a cup of yogurt left and a rather sad looking apple. As luck would have it, I saw a recipe for apple scones from Runner's World. Even if we don't finish them before our trip, we can just pack them in a bag and have a snack for the plane.

Notes: Scones that you buy at the store or the coffee shop are hit-or-miss if you ask me. Most of them are really dry and crumbly or dense. These are light and fluffy and fresh. The key to fluffy scones is to not overwork the dough. Don't mix it too much before you transfer it to the cake pan.

Speaking of the cake pan, this is a great trick! I usually cut my scones like biscuits and make them round, but this recipe gives you the triangle shape.

The dough it really sticky, so when you pat it into the cake pan, run your hands under some lukewarm water first.

We're charging the camera battery for the trip, so I don't have a photo for you. Trust me--they are beautiful!

Ingredients (adapted from this recipe):
2 1/2 cups all purpose flour
1 1/2 tablespoons baking powder
3/4 teaspoon baking soda
1 tablespoon pumpkin pie spice
1/2 cup sugar
6 tablespoons cold butter
1 cup plain yogurt
1 tablespoon vanilla
1 apple

Directions: Heat oven to 350. Butter a 9-inch round cake pan.

Peel and dice the apple. In a large bowl, whisk together flour, sugar, pumpkin pie spice, baking soda, and baking powder.

Dice the butter and cut it into the flour mixture using either a pastry blender or your fingers. The butter should end up the size of small peas.

Add the yogurt and vanilla to the butter-flour mixture. Stir with your hands until just combined into a soft dough ball.

Move the dough into the cake pan and gently pat it evenly into the pan. Bake for 35-40 minutes until golden brown. Cut into triangles (yields 8 triangles).

Serve and enjoy the flavors of fall!

Sunday, June 22, 2014

Q.E.D.: Fried Egg and Goat Cheese Breakfast Sandwich

When we were visiting our parents a few weeks ago, my mom made me a fried egg sandwich for breakfast one morning. I had forgotten how great fried egg sandwiches are. I decided to make one this morning and put my own twist on it.


Notes: This makes a great breakfast, of course, but it could easily be a light lunch as well. Add a green salad and you'd be good to go.

I've written the directions using sight clues rather than time. Eggs vary pretty widely, so you're better off just watching to see when it's done rather than trying to time it.

I desperately wish I had used some herbed goat cheese, but I only had plain. It was still good.

You want to make sure you take the goat cheese out of the fridge well ahead of time so that it's spreadable.

This recipe makes one breakfast sandwich.

Ingredients:
1 large egg
2 slices of bread (I used multigrain)
Goat cheese for spreading
Butter for frying
Salt
Pepper

Directions:

Remove all ingredients from the fridge. Put a small amount of butter in a small skillet. Heat between medium and medium-high.

When the butter is melted, crack the egg gently in the pan. Season with salt and pepper. When the white starts to turn opaque, tuck the sides slightly in with your spatula (just so it will cook more evenly and fit on your bread). When the whites are almost totally opaque, pierce the yolk.

Put your slices of bread in the toaster. When the toast pops up, flip your egg, turn off the heat, and let the egg sit in the pan.

Spread the goat cheese on both slices of toast and slide the egg on top of one of the slices. Assemble the sandwich, serve, and enjoy!

Friday, January 24, 2014

Eat Food, Save Money: DIY Maple Almond Granola

The first post I did on eating food and saving money was about making your oatmeal from the big can rather than buying the individual packets.

For you granola fans out there, you should consider doing the same thing. If you shop in the economical bulk section, you can buy several cups of oats and nuts at once, which is pretty much all you need for making granola. If you make it yourself, you can make a lot more than you could buy in a box in the cereal aisle, which means you'll save money in the long run. Also, you can make whatever flavor combination you want.

Notes: Granola is more of a method than a specific recipe. I wrote this recipe with the stuff I used, but you can use what you want. Essentially, it's 2-to-1 oats to nuts (or seeds) ratio, sweetener, some oil to keep it from sticking, and whatever spices you like.

You can add some dried fruit after it's done if you like. Keep it in an airtight container on the counter or in the fridge. It'll keep a little longer in the fridge.

Ingredients:
4 cups of rolled oats (you can use any type of similar grain)
2 cups of raw sliced almonds
1/2 cup of maple syrup
1/2 cup of olive oil
1 teaspoon of vanilla
1 teaspoon of cinnamon
1/2 teaspoon nutmeg
1/4 teaspoon of ground ginger
1/4 teaspoon cloves
1/2 teaspoon kosher salt

Directions: Heat the over to 300.

Add the oats, nuts, spices, and salt to a bowl and stir to combine. Add in syrup, vanilla, and oil to the bowl and stir.

Pour the oats onto a greased or foil-lined baking sheet and spread out in one layer. Bake for 30 minutes, stirring every 10 minutes or so, until the granola is fragrant and darker in color.

Allow it to cool on the baking sheet. If you want clusters, let it cool completely and then break it up into the size pieces you want. If you like flakier granola, stir it a few times while it's cooling to keep it from clumping.


You can eat it like cereal with milk or you can serve it on top of some yogurt. Eat food, save money, and enjoy!

Sunday, July 28, 2013

Cornmeal Brioche French Toast

Scott and I have been lucky to be able to live in several different places. In every town we've lived in, we've had our favorite restaurants. Hands down, the best breakfast belongs to the The Courier in Urbana, IL. I was particularly in love with their almond french toast. Someday I will try to recreate it, but until then, every time I eat french toast, I think of the many happy breakfasts we had at The Courier.

Notes: I make french toast next to never, but we had an older loaf of brioche in the fridge this weekend and I decided to try it out. It came out pretty well.

I made a cornmeal batter because I like the crunch. I should have whisked it together in a bowl first and then poured the batter into a flat dish to dunk the bread because the cornmeal settled to the bottom. Live and learn! It was still tasty.

Keep your butter or other fat handy while you're cooking. If the pan starts to look dry, add more. A couple of my pieces wanted to stick to the pan.


You will notice that MY french toast has bananas on it because I enjoy fruit in my breakfast bread products, unlike some other benighted person that lives in my household.

Ingredients:
1/2 cup cornmeal
1/4 cup of flour
1/2 cup sugar
1 cup milk
1 tablespoon vanilla extract
1 tablespoon cinnamon
4-6 slices of brioche
Butter or coconut oil for the pan
Confectioners sugar, fruit, and/or maple syrup for topping

Directions:

Heat a large skillet or griddle on medium-high.

In a bowl, whisk together cornmeal, sugar, cinnamon, and flour. Add in the milk and vanilla and whisk. Transfer the batter to a flat dish like a pie plate, cake pan, or 8x8 glass baking dish.

Drop a pat of butter into the pan and swirl it around to coat the bottom. Take a slice of bread, lay one side in the batter, flip it over and lay the other side in the batter, and then add it to the hot skillet. Let it brown on one side and the flip and let it brown on the other side. Add more butter if the pan starts to look dry.

When the slices are done, dust them with confectioner's sugar and/or fruit and enjoy!


Thursday, January 31, 2013

Eat Food, Save Money: Breakfast Edition

This is not so much a recipe, but more of a suggestion. Ok, it's probably more like a rant, but whatever. It's my blog.


Uncle Sam (read: the professor) wants you to stop buying those silly single-serving envelopes of oatmeal. You're wasting money and paper, and chances are you are consuming more junk than you need to.

First of all, buying in bulk saves you money. How much are those little packets costing? Maybe $3 or $4? You can get a big ol' canister of oatmeal for about a $1.50. You get more servings and it's cheaper, so why don't you do it?

I know, I know. The little packets are convenient. They're already pre-flavored and pre-measured, you'll say.

Look, I don't mean to sound like a jerk, but you do know how to use a measuring cup, right? What's more, the canister has the measurements and the water amounts written right there on the side! You have to measure the water when you use the packets anyway, so how much more time and energy does it take to measure out the oats, too? If you have a microwaveable bowl, you can make the canister oats in the microwave, too -- it literally takes the same amount of time.

Also, do you really want the pre-flavored oatmeal? Have you read the back of the box? How many terms in the ingredient list do you recognize as food? Yeah, I thought so.

Chances are the flavors you like in your oatmeal are things you already have in your kitchen. Cinnamon? Most people have that. Brown sugar? Most people have that too. Better yet, if you buy the canister of oats, you can have WHATEVER FLAVOR YOU WANT! Heck, you could throw some leftover pumpkin pie spice in there! Or how about some peanut butter? Buy yourself some dried fruit and some nuts out the (very economical) bulk bin and get creative.

You can eat real food AND save money. Ditch the packets. Go for the can.

Sunday, October 28, 2012

Pumpkin Cinnamon Rolls

Do you love yourself? Because if you do, you should do something very nice for yourself. You should make these cinnamon rolls.

I followed Smitten Kitchen's recipe exactly, so I won't retype it here. I put everything together the night before and just baked them up the next morning. They're made from scratch, so it's a bit of work, but the results are so worth it. These would be a great Thanksgiving breakfast or dessert.

Just make them. You won't regret it, I promise.


Sunday, June 17, 2012

Adventures in Dough, Part Five: Homemade Biscuits and Gravy

Scott's grandmother (Maw Maw) was a traditional Southern cook. She had a large repitore of Southern classics and, depending on which grandchild you ask, a different one will be the favorite: fried chicken, banana cake, greens beans. For Scott, it was her biscuits and gravy.

Try as I might, I have never been able to recreate her recipe. I have it in a family cookbook my mother-in-law gave me. But, as it is with most Southern cooks, Maw Maw had brand loyalty. She made her biscuits always with Red Band self-rising flour, which you can only find in certain places in North Carolina. Different ingredients yield different results. And I have come to believe that only Maw Maw's hands could have produced the legendary food she made.

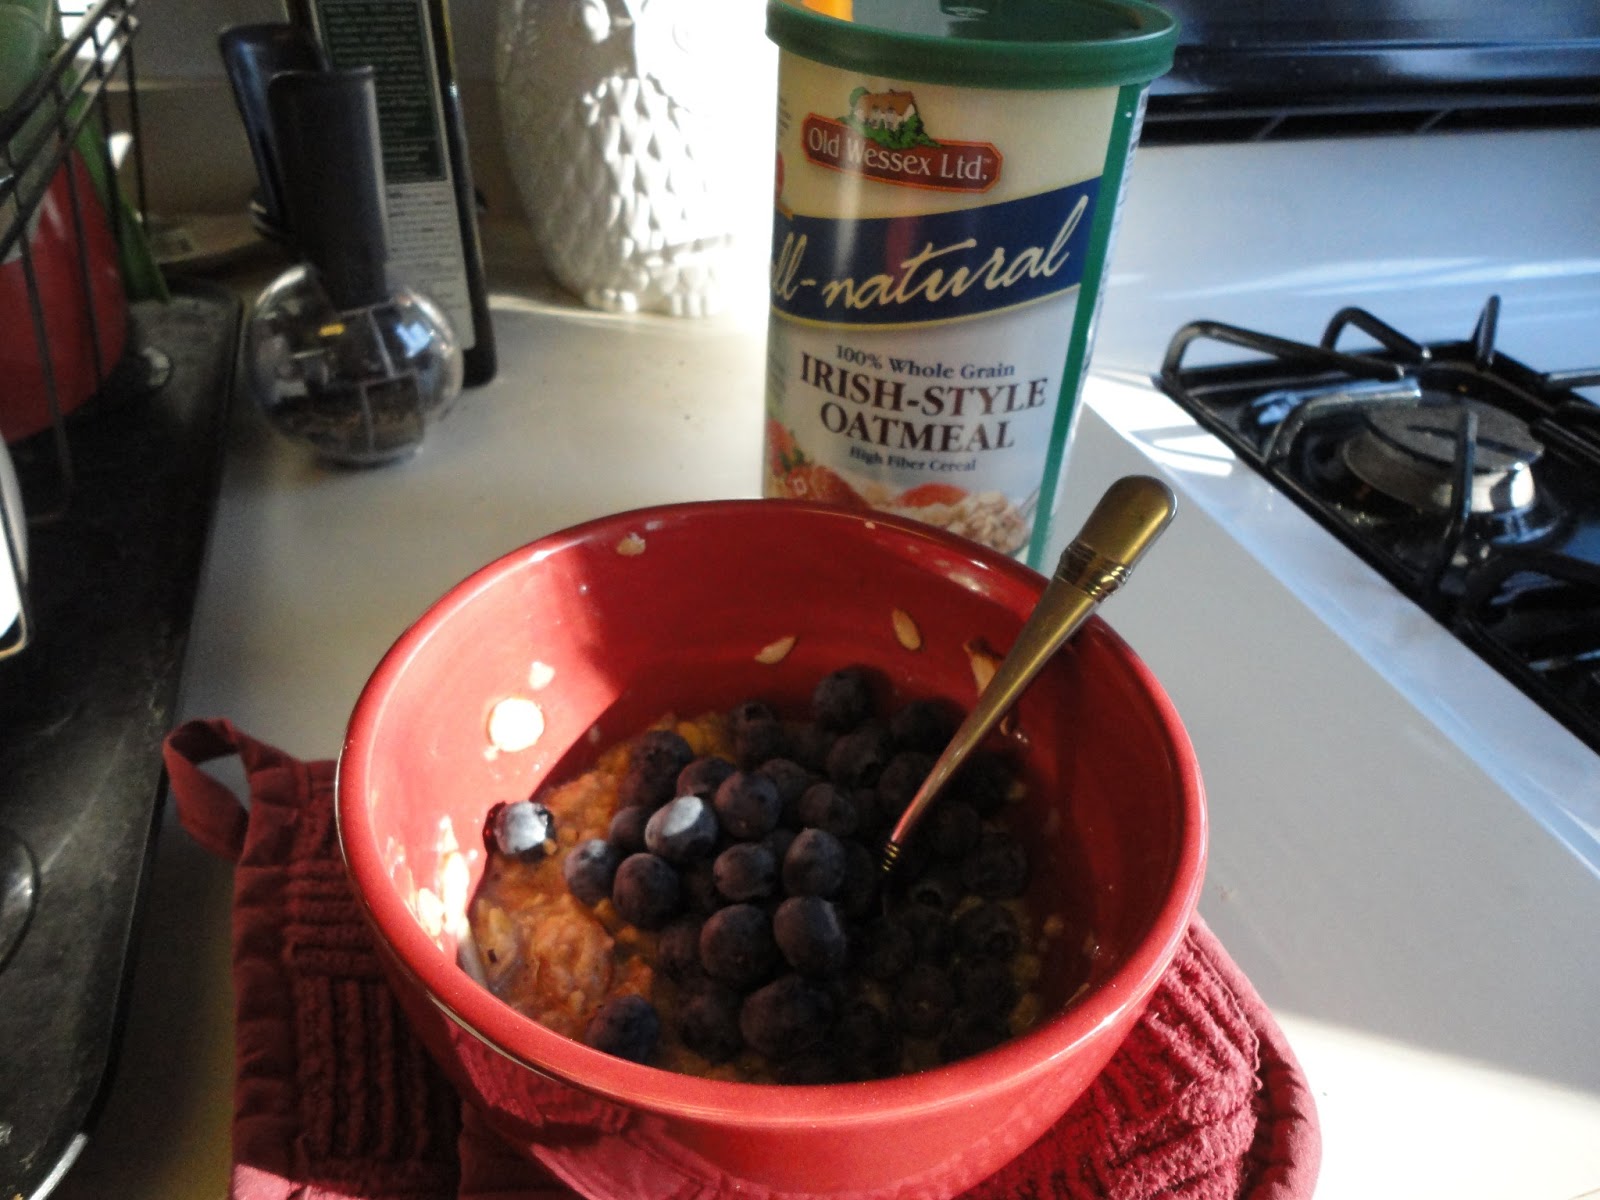
So while I can't recreate her biscuits and gravy, I can make them my own way. I've been making them for years, but I usually use frozen biscuits. Not this time!

Notes: As with most Southern dishes, time and measurements are never exact. A lot of these ingredients are approximate and my directions will involve descriptions of how things should look or feel.

Biscuits take some practice, so if yours don't quite turn out right the first time, don't worry. Getting the dough just right requires experience with how the dough feels and there's no way to get that unless you make it a few times.

The important thing is to not work the dough too much. You don't want to knead it or roll it like bread. The dough will be sticky, so have some extra flour around to sprinkle over the top of the dough and on your hands.

Remember, Maw Maw made her biscuits with her hands and utensils that most people have around their kitchen. No need for fancy tools!

As for the bacon and gravy, just remember: don't rush the bacon! Flip it sparingly to start with and then flip it more once it starts to get done. Bacon cooks as its own speed, so there's no neat time table for when it will be done. Resist the urge to turn the heat up or else you'll have burnt bacon.

When you make your roux for the gravy, you want equal parts bacon fat and flour, so if it looks like you have more fat than 2-3 tablespoons, add more flour. If you want to make a vegetarian gravy (Maw Maw would disapprove, but I won't judge) just swap butter for bacon grease.

Also, gravy needs LOTS of seasoning. You'll need at least 3/4 tablespoon of salt and more cracked pepper than you think you'll need. The best thing to do is season it and then it taste it. If it still tastes like flour, add more salt and pepper. I usually use what seems like a ridiculous amount of pepper and then when I taste it, it still needs more!

Biscuits ingredients:
2 cups all-purpose flour
1 tablespoon baking powder
1 teaspoon kosher salt
1 stick of butter (approx. 8 tablespoons), cold right out of the fridge
1/2-2/3 cup of milk
1 egg

Gravy ingredients:
2-3 tablespoons of flour
3/4 (approx.) cup milk
4-6 slices of bacon
Kosher salt
Pepper

Directions: Preheat your oven to 400 degrees.

Heat a large skillet on medium low. Immediately add bacon to the pan. Wait until it starts to sizzle, then flip it over. You only need to flip it occasionally when it first starts to cook. You'll be making the biscuits at the same time, so just be sure to keep checking on the bacon. Once little brown flecks start to develop on the strips, you'll need to turn it more often. The bacon will be done when it shrinks, turns brick red, and starts to develop tiny white bubbles that almost look like foam on top of it. The whole process should take about 30 minutes.

While your bacon is cooking, gather the biscuit ingredients. Add the 2 cups of flour, salt, and baking powder to a large bowl and stir them together. Beat the egg into a small bowl and have your milk ready in a measuring cup. Cut the butter into small cubes and add it to the dry ingredients. Using a pasty blender (better -- your hands!) work the butter into the flour. The pieces of butter should be about the size small peas and the flour should feel slightly damp when you're finished.

Make a well in the center of the butter/flour mixture. Add in the egg and about half of the milk. Using your hand, stir the sides of the well into the wet center. Keep stirring until it starts to form a dough mass. If it seems too dry, add the rest of your milk. Then turn the dough mass around in the bowl a few times to give it some shape.

Dump the dough out on to a floured surface and mound it up with your hands. Dust flour on the outside of the dough and on to your hands. Press the dough out until it's about 3/4 of an inch thick (no rolling pin!). Flip it over once or twice to make sure it doesn't stick. Dust with more flour if needed.

Use a floured biscuit cutter (or, if you're me, a floured glass) to cut rounds out of the dough (you should get about 4 rounds our of the first press). Lay the rounds on a foil or parchment lined baking sheet. Gather the scraps up into a ball, press them out again and you should two more rounds out of the second press.

Bake the biscuits for 15-17 minutes at 400 degrees.

While the biscuits are baking, finish up the bacon and make the gravy. When the bacon is done, lay it on a paper towel to drain. Add 2-3 tablespoons of flour to the bacon grease and whisk it together (in other words, make a roux). Whisk constantly for about 30 seconds (the finished roux should look like a wet paste). While whisking, pour in the milk. The gravy should start out looking a little thin, but once it cooks, it will thicken. Add salt and pepper. Wait a few seconds and give it a taste. Adjust the seasoning accordingly. Turn the heat to low and stir until the biscuits are done.


Pour the gravy on top of your biscuits, add bacon, and enjoy!

Saturday, June 9, 2012

Cornmeal Pancakes

Scott and I are celebrating finals weekend at the French Open. Because of the time delay, the matches are on in the morning. What better way to celebrate than with a championship breakfast?

Notes: These pancakes are drier and heartier than you might be used to, so just be prepared for that. As you might recall, Scott and I disagree about the roll of fruit in pancakes. As such, my pancakes had blueberries in them and his were plain. They were both delicious.

Normally, I am terrible at flipping pancakes, but for some reason I was able to get through the whole batch without messing up any. This is a first in my cooking career!

Ingredients:
1/2 cup + 3 tablespoons of finely ground cornmeal
1/2 cup of "instant" pancake mix (recipe here)
1 cup milk
1 egg
2 tablespoons butter (plus more for the skillet)
1/2 teaspoon cinnamon
Fruit of your choice (optional)

Directions:

Start by melting the two tablespoons of butter. I just zap mine for about 25 seconds in the microwave.

Add the cornmeal, cinnamon, and pancake mix to the bowl and stir to combine. Crack the egg into another bowl and beat it slightly. Add both the egg and the milk to the dry ingredients. Stir to combine and then stir in the melted butter.

Heat your skillet or griddle on medium-high. Once it's hot, add a tablespoon of butter and swirl it around to coat the bottom of the skillet. When it finishes bubbling, wipe the butter out of the skillet. Use a ladle or a measuring cup to add the batter to the pan. If you're adding fruit, drop it on top of the pancake now.

When the batter starts to look dry around the edge of the pancake and bubbles start to form and burst on the top, flip the pancake over. Let it brown on the other side for about 30-45 seconds.

Serve hot and enjoy!


Monday, June 4, 2012

Spelt Blueberry Banana Muffins

The impulse baker strikes again.

I bought blueberries at the store this morning because they were on sale. I figured they'd be great in my museli. There were a few too many for them to all fit in my container. Extra blueberries? The impulse baker knows just what to do with those!

Notes: These muffins aren't too sweet, so they're great for breakfast.

I've read in various places that you can use chia seeds as an egg substitute. I tried it for these and it worked great. You don't even know the chia seeds are in there.

This recipe can admit of lots of substitutions. Don't have yogurt? Use sour cream. Don't want dairy? Swap the regular milk for almond or coconut. I know people think baking has to be perfectly exact, but think of it this way: people have been baking long before there were measuring cups and conversion charts. It can't be that fussy!

Ingredients:
2 cups spelt or whole wheat flour
2 teaspoons baking soda
1/2 cup brown sugar
4 tablespoons melted butter
1 cup plain yogurt
1/2 cup milk
2 teaspoons vanilla
1 tablespoon chai seeds
3 tablespoons water
1/4 teaspoon kosher salt
1/4 teaspoon cinnamon
1/4 teaspoon nutmeg
1 banana
1 cup blueberries

Directions: Heat the oven to 350 degrees.

Start by adding the chia seeds and water to a small bowl. Stir them together and set aside so that the seeds become sticky.

Add the brown sugar and butter to a bowl. Whisk them together until the brown sugar is mostly dissolved. Add in the chia mixture, yogurt, milk, and vanilla and whisk to combine.

Mash your banana and add it to your wet ingredients. Add flour, salt, spices, and baking soda to the bowl and stir everything to combine. Fold the blueberries into the mix.

Spoon the mix into your muffin tin. Bake for 18-20 minutes until a tester comes out clean. Enjoy!


Tuesday, March 27, 2012

Chia Oat Pancakes with Pistachio Honey Butter

Cooking breakfast for people might be my favorite way to entertain. There's nothing like enjoying a relaxing morning with a hearty breakfast and a cup (or four) of coffee.

Notes: Pancakes are delicious, but can run out on you energy-wise. But mix some oats in the flour and you'll have something a bit more substantial.

I have joined the chia bandwagon. Why, yes, I do mean the seeds that you use to grow those humorous grassy pets. It turns out chia seeds are a superfood: they have tons of calcium, iron, zinc, and potassium. That's a lot of vitamins! They don't really taste like anything and you can add them to anything you make. I put them in my museli in the morning.

My BFF who was enjoying pancakes with me has never been a fan of maple syrup. I decided to whip up the honey butter as a topping replacement.


Ingredients:
Pancakes (makes about 10 pancakes):
3/4 cup quick oats
3/4 cup of "instant" pancake mix (recipe here)
1 teaspoon cinnamon
1 tablespoon chia seeds
1 egg
1 cup of milk
2 tablespoons butter plus more for the pan

Pistachio Honey Butter:
2 tablespoons of butter
1 tablespoon crushed pistachios
1/2 tablespoon honey

Directions: Melt the two tablespoons of butter for the pancakes and allow it to cool completely. Mix it with the milk and beaten egg in one bowl. Add the pancake mix, oats, chia seeds, and cinnamon in another bowl. Mix the wet ingredients with the dry. 

Heat a skillet and rub it with butter. Wipe the excess butter off. Ladle the batter into the pan. When large bubbles rise to the surface and burst, flip the pancake over. Cook for about 30 more seconds. 

For the pistachio butter, allow two tablespoons of butter to soften. Mix crushed pistachios, honey, and butter together in small bowl. 

Photograph by Shelly!


Serve and enjoy!

Tuesday, February 28, 2012

Muffin Tin Eggs

It's fun to entertain with breakfast or brunch, but there aren't a lot of breakfast dishes that lend themselves to easy prep for large groups. Baked eggs solves that problem!

Notes: I debated posting this because frankly I didn't care for the results. The eggs turned out very spongy and I was not a fan. But I figure some people might like their eggs well done. I've done some more digging and it turns out you should use some kind of base in bottom of the tin. I would recommend a little pile of kale, since kale and eggs are such a delicious combination! I have also seen recipes with sauteed onions and bell pepper in the bottom. Having something on the bottom will keep your egg from the direct heat of the bottom of the tin.

I did two types of eggs: one just cracked on its own and one scrambled with some kale and parmesan cheese (like a mini frittata). The regular one was much better. The scrambled eggs had an even spongier texture. Not tasty!

The lesson here is that you need to experiment in order to ward off the tough texture. Either shorten the cooking time, turn the heat down, or keep the eggs off the direct heat. I'm posting the recipe the way I did it.


Ingredients:
2 eggs
1 or 2 leaves of kale
1 teaspoon parmesan cheese
salt
pepper
butter

Directions:

Heat the oven to 350.

Use the butter to grease the two muffin tins that you will use for the eggs.

Crack the regular egg directly into the muffin tin and season with salt and pepper. Beat the other egg in a small bowl. Tear your kale into small pieces. Add the kale, cheese, salt, and pepper and mix to combine. Pour the the mixture into the other prepared muffin tin.

Bake for 12-15 minutes until the eggs are set. Serve and enjoy!

Tuesday, January 31, 2012

Dill Scrambled Eggs

Fresh herbs are awesome. They add tons more flavor than dried herbs. The trouble is they are sometimes difficult to use up. The co-op where I buy my groceries sells bunches of fresh herbs that are the size of a small bouquet. If I buy fresh dill for my egg salad, I better be prepared to eat dill in everything else I make that week.

Case in point: I mistakenly bought some dill last week forgetting I was going out of town. I didn't manage to use it all up, but I at least used a little more with this dish.

Notes: This isn't so much a recipe as an idea. If you have fresh herbs to use up, don't forget about breakfast!

Also, I will tell you my strategy for making (the perfect?) scrambled eggs. 

Ingredients:
2 eggs
2 tablespoons butter
1 heaping tablespoon of fresh dill
Salt
Pepper

Directions:

Take your eggs out of the fridge. Crack them into a measuring cup and whisk. [Many people add milk at this point. Nay, my friends. It detracts from the creaminess of the eggs.] Add the salt, pepper, and dill and whisk to combine. Let them hang out on the counter while you heat your pan. [Most people crack them too late. They need to take the chill off.]

Melt the butter in the pan over medium-low heat. [Many people rush the cooking of their eggs. Rookie mistake. Take your time.] Once the butter is melted, add the eggs to the pan. Let them sit for a minute. [Most people want to stir them immediately. Let them warm through so that they start to congeal.]

Stir the eggs by drawing the sides into the center and gently folding them over as you go. Once you make it all the way around the pan once, stir the eggs in a circle starting in the middle to redistribute them in the pan. Keep doing this motion until they start to look like scrambled eggs.

Take them out of the pan when they still look a little moist. [Most people take them out only when they look dry. Newsflash! You'll have dry eggs.] Serve them up warm and enjoy!

I'd eat those green eggs any day!

Saturday, January 21, 2012

Pomegranate Pancakes

My husband and I see eye-to-eye on most things, but pancakes is not one of them.

I am pro fruit and he is anti-fruit.

If you ask me, adding bits of fruit inside of pancakes is just about the only thing that can make them better than they already are. Blueberry pancakes? Please! Apple pancakes? Don't mind if I do. Banana pancakes? Bring me a dozen, garcon!

If you ask my husband, fruit should be safely on the outside of the pancake. Perhaps in a bowl as a refreshing side, but it could be all the way on the other side of the room for all he cares. As long as it's not in his pancakes.

I believe his views are backward at best and he believes that he should be able to enjoy his fruitless pancakes in peace (without my commentary). It's an impasse. But since he does not currently live with me, I can make all the fruit pancakes I want. So there!

Notes: I experimented with two different ways of adding in the fruit: one where I add the fruit to each pancake after it was in the pan and one where I mixed the fruit with the batter. I preferred the former method. The pancakes were less doughy around the bits of fruit. If you have a favorite way of adding fruit, by all means I'm open to suggestions.

Hear me when I say that you do not want to skip the cinnamon. I learned this trick from my brother-in-law. You don't actually taste the cinnamon, but you can tell the pancake has a deeper and more interesting flavor. Everyone will wonder why your pancakes taste so much better than the ones they make at home. It will be our secret.

Now, here's the thing: I suck at making pancakes. I wish I was kidding, but when I make them, I almost always have to throw out the first two and probably one in the middle. They don't come out right! They're too light or I can't manage to flip them correctly. So, if you screw up a few, you're not alone. This batch will make enough for two people, unless you're like me and then it's enough for three correct pancakes and three jacked-up pancakes. 

Ingredients:
1 cup of "instant" pancake mix (recipe follows)
1 egg
2 tablespoons of melted butter, plus more non-melted butter for the pan
1 cup of milk
1/2 teaspoon of cinnamon
1/4 cup of pomegranate seeds (or as much as you like in your pancakes)

Directions:

First of all, melt your two tablespoons of butter. You'll want it to cool off before you make the mix. I just heat mine in the microwave for about 30 seconds.

Crack your egg into a mixing bowl and beat it just slightly. Add in your milk. Once your melted butter is cool, add it in and whisk the liquids together. Add in the dry mix and the cinnamon. Whisk it all together until most of the lumps are gone, but don't fret about getting it perfect.

Heat your skillet. You want it on medium-high: not hot enough to where the pancakes brown too quickly, but hot enough so that the pancakes don't spread too much. Once it's hot, take a pat of butter in a paper towel and coat the bottom of the skillet. Then use another paper towel to wipe out the excess butter (this is key to getting the nice even brown).

Use a ladle to add the batter to the pan. You know it's time to flip the pancake when big bubbles rise to the top and start to burst. The edges of the pancakes will also start to look a little dry. Sprinkle pomegranate seeds on top of the batter and then flip it over. Cook for another 30 seconds or so until the pancake puffs up a bit. Repeat until your have reached your desired number of pancakes.

This is technically bottom side up, but I wanted you to see the pomegranate seeds.

Add your favorite pancake topping and enjoy!

"Instant" Pancake Mix

You can make about 3 batches of pancakes with this. It's adapted from Alton Brown's recipe and his makes WAY more. So if you have room to keep a big batch, use his measurements.
 
3 cups spelt flour 
3/4 teaspoon baking soda 
1 1/2 teaspoons baking powder
1 tablespoon sugar
1/2 tablespoon kosher salt

Mix all the ingredients and store in an airtight container.

Sunday, January 15, 2012

The Kale Diaries, Part Four: Brown Butter Greens and Eggs

Greens for breakfast? Why not! Actually, you could make this dish any old time. It would be great for brunch or an easy dinner. I tweaked this dish from Healthy Green Kitchen.


Notes: This dish was even more delicious than I thought it would be. The greens were tender-crisp and went perfectly with the egg. You simply must try it. I made it for one, but you can easily add as many eggs and bunches of kale as you have people.

Ingredients:
1 egg
3 tablespoons of butter
2-3 kale leaves, stemmed and sliced thin
Dash of red pepper flakes
Salt
Pepper

Directions:

Heat your butter in a skillet (with a lid -- you'll need it later) on medium-high. Once the foaming subsides, allow the butter to brown slightly, just until it smells nutty.

Add your chopped kale and stir it around for just about 30 seconds. The kale will make a lot of noise and might spatter, so just be watchful. Season with salt, pepper, and red pepper flakes.

Make a hole in your kale bunch (like a bird's nest) and drop your egg into the hole. Turn the heat down to medium-low. Season your egg with salt and pepper. Cover the pan and let your egg cook to your preference. I like my yolks runny, but my whites set.

Serve it up and enjoy!

Sunday, August 21, 2011

Farmer's Market Creation: Spelt Blueberry Spice Muffins

I cannot tell you how proud I am of myself for making this recipe.

It is the first time I've ever made up a baking recipe. I can make things up when it comes to cooking because there aren't any exact measurements. Baking is another story: it requires at least a little knowledge of one of my worst subjects, which is chemistry.

My parents were visiting and we went to the Swarthmore farmer's market. We're big breakfast people: we love eating breakfast out and making big breakfasts at home. We decided we wanted some muffins and found some beautiful blueberries at the market.

I have lots of cookbooks with lots of muffin recipes, but none of them looked that great to me. Plus, they all required baking powder. I have yet to restock my pantry completely, so I didn't have any. This lead me on an internet quest to see what I could use as a substitute. Once I started looking around, I decided I would piece together my own muffin recipe.

Notes: I beam with pride in telling you that these were yummy. I still kind of can't believe that my Frankenmuffins turned out so well. They were moist and flavorful.

These are not vegan, but I found lots of recipes for vegan muffins in my quest. As long as you have baking powder at your disposal and you get the amount and consistency of liquid right, I think you could make them dairy free pretty easily. For instance, you could add coconut milk instead of sour cream and more almond milk in the place of the butter.  You could probably add applesauce instead of eggs.

My dad was my guest photographer for the finish photo (he reads the blog -- Hi, Dad!).

Ingredients:
2 cups of spelt flour
1 cup of sour cream
1 1/2 teaspoons baking soda
1/2 cup of almond milk
2 teaspoons vanilla
1/2 cup of brown sugar
4 tablespoons of melted butter
1 egg
1/4 teaspoon of cinnamon
1/4 teaspoon of nutmeg
1/4 teaspoon of kosher salt
1/2 pint of blueberries

Directions:
Preheat your oven to 350.

In one bowl, mix together your flour, salt, spices, and baking soda. Set aside.

In another bowl, add your melted butter and whisk in your brown sugar so that the sugar dissolves a bit (it will look thick-ish like molasses). Whisk in your egg. Stir in your almond milk, sour cream, and vanilla. Stir just until the mixture is smooth.

Add your dry ingredients to the wet mixture in thirds, mixing just to combine after each third (over-mixing makes for tough muffins). Finally, fold your blueberries into the batter.

Divide the batter into your muffin tin (I use the paper cups, it makes my life easier).


Bake at 350 for 18-20 minutes.

Serve them up for the breakfast-loving people in your life and enjoy!

Copyright to Dad Photography, Inc.

Thursday, August 4, 2011

A Better Breakfast: Cinnamon Muesli

I have given up breakfast cereals.

This was actually a difficult decision for me. I've been eating cereal my whole life -- were it not for Cheerios, I probably wouldn't have made it past the age of four. Cold breakfast cereals are really refreshing and I still love milk as much as I did when I was a kid. But, then I started reading labels.

Ever look at a cereal box ingredients list? Those lists are long. I mean, really long. And they contain a lot of things that you might not expect: lots of different kinds of oils, various gums, colors that are identified by number. As I said when I started the blog, I don't so much have a food agenda. If I did have one, it would be probably in line with the real food movement. This fits well with my original plan: if you can't find it outside or you can't pronounce it, don't eat it.

And there's a bunch of things I can't pronounce on the back of cereal boxes.

So, now what? It's on to better breakfast food. If I do buy cereals, I go for the ones that have very short ingredients lists. Otherwise, I eat a hard boiled egg on toast or I make oatmeal. But my latest favorite breakfast food and the one I eat most often is muesli.

Muesli is one of those wonderful things that comes to us from the Swiss, along with delicious cocoa, those handy knives, and Roger Federer. There are plenty of pre-packaged kinds you can buy, but why bother? It's easy to make, cheaper, and you can experiment with your favorite stuff.

Notes: I had a hard time finding the dried fruit that I wanted. I made my batch before I had looked into the local health food store, which means I missed out on the figs and cherries I could have used. It's OK. I still love raisins and there's always next time!

You can eat your muesli either quick or "soaked." The quick version means you put muesli in a bowl and pour milk or yogurt over it just like regular cereal. I prefer the soaked version because the oats get a little soft overnight in the fridge. The trick, of course, is remembering to make it before you go to bed. It took me a few days to get into the habit, but I got the hang of it. If the absent-minded professor can remember, you can too.

This is a big batch. It will probably last me two months. You can't stretch a boxed cereal that long!

Ingredients:
4 cups rolled oats
1 cup raisins
1 1/2 cups of sliced toasted almonds
1/4 teaspoon of salt
1/2 teaspoon of cinnamon
1/2 cup of plain yogurt (for serving)
Drizzle of honey (for serving)

Directions:

Mix oats, raisins, almonds, salt, and cinnamon in a bowl. Toss until all the ingredients are coated with cinnamon.


 Store in an airtight container.


To serve, mix 1/4 cup of muesli with 1/2 cup plain yogurt (I use Greek yogurt, but use what you like -- you could even use vanilla yogurt). Cover and refrigerate overnight. Drizzle with honey right before you serve it up in the morning. Enjoy a better breakfast!