Thursday, January 31, 2013

Eat Food, Save Money: Breakfast Edition

This is not so much a recipe, but more of a suggestion. Ok, it's probably more like a rant, but whatever. It's my blog.


Uncle Sam (read: the professor) wants you to stop buying those silly single-serving envelopes of oatmeal. You're wasting money and paper, and chances are you are consuming more junk than you need to.

First of all, buying in bulk saves you money. How much are those little packets costing? Maybe $3 or $4? You can get a big ol' canister of oatmeal for about a $1.50. You get more servings and it's cheaper, so why don't you do it?

I know, I know. The little packets are convenient. They're already pre-flavored and pre-measured, you'll say.

Look, I don't mean to sound like a jerk, but you do know how to use a measuring cup, right? What's more, the canister has the measurements and the water amounts written right there on the side! You have to measure the water when you use the packets anyway, so how much more time and energy does it take to measure out the oats, too? If you have a microwaveable bowl, you can make the canister oats in the microwave, too -- it literally takes the same amount of time.

Also, do you really want the pre-flavored oatmeal? Have you read the back of the box? How many terms in the ingredient list do you recognize as food? Yeah, I thought so.

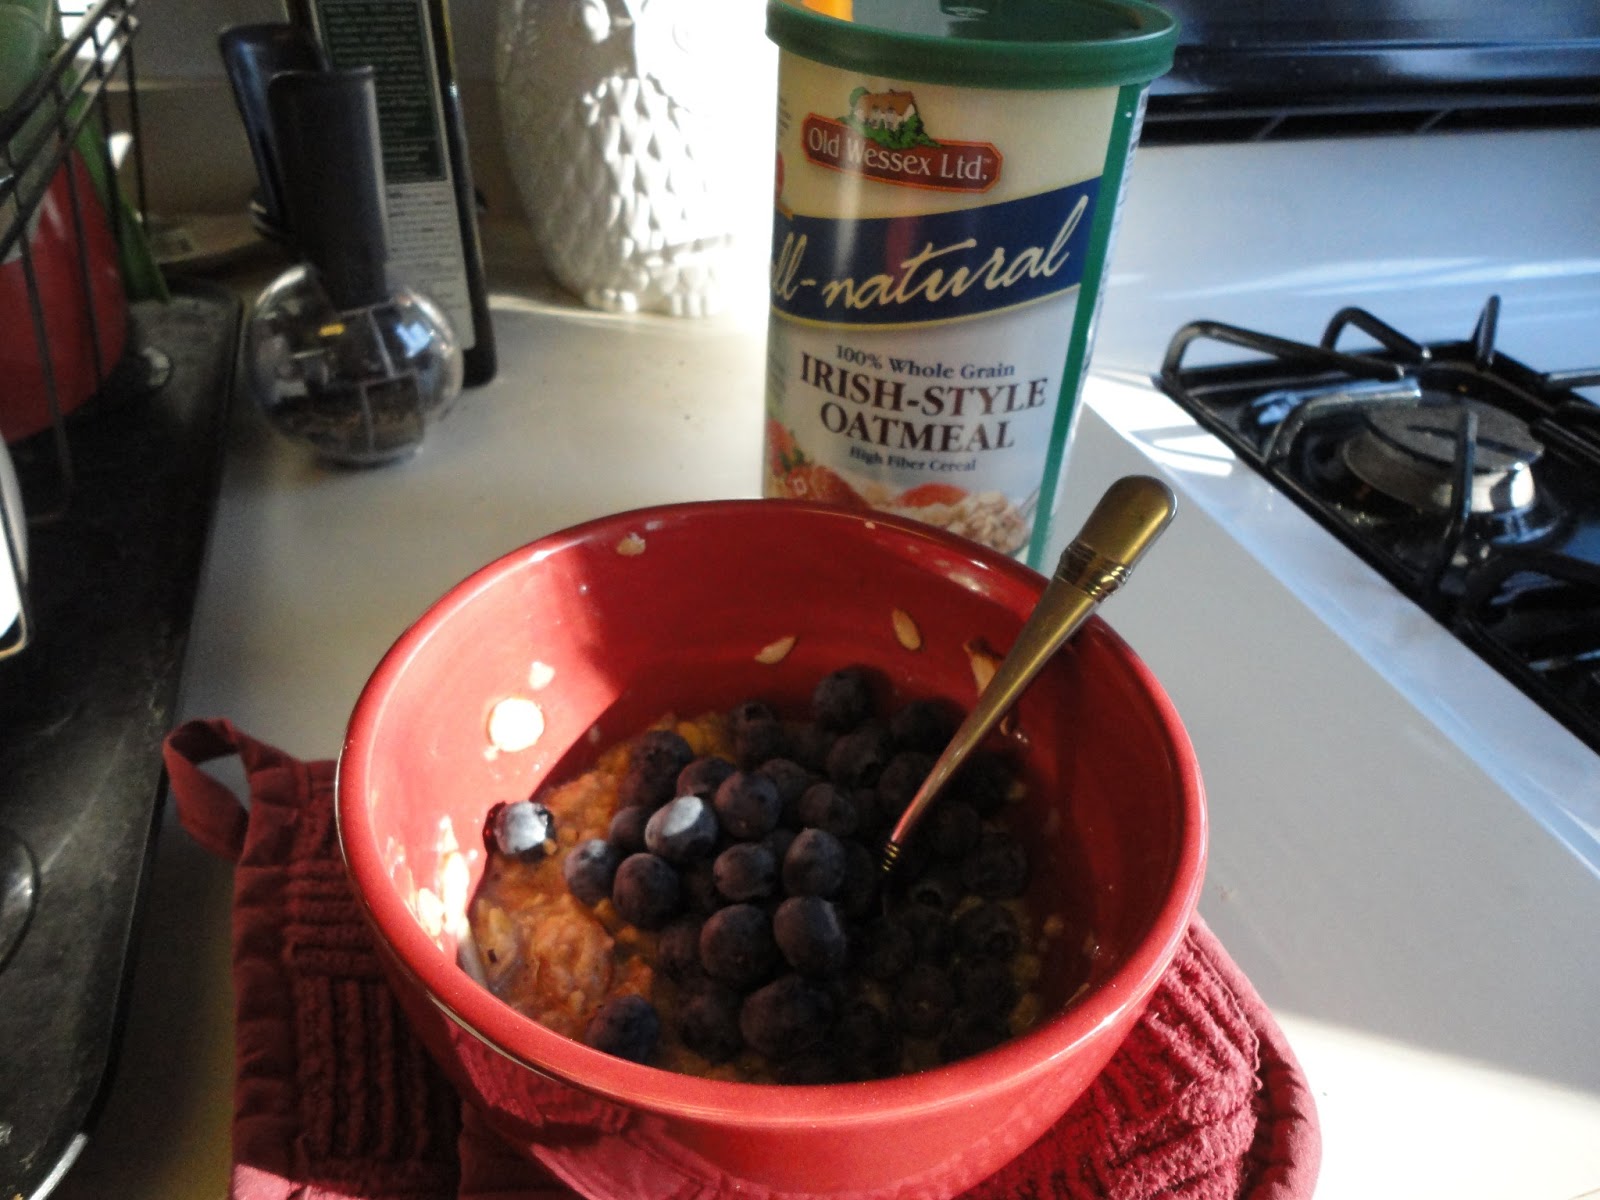
Chances are the flavors you like in your oatmeal are things you already have in your kitchen. Cinnamon? Most people have that. Brown sugar? Most people have that too. Better yet, if you buy the canister of oats, you can have WHATEVER FLAVOR YOU WANT! Heck, you could throw some leftover pumpkin pie spice in there! Or how about some peanut butter? Buy yourself some dried fruit and some nuts out the (very economical) bulk bin and get creative.

You can eat real food AND save money. Ditch the packets. Go for the can.

Q.E.D.: Roasted Broccoli Flower Pasta with Pesto

You may have noticed that there is dearth of cauliflower recipes on this blog. There's a good reason for that, namely that I hate cauliflower.

I know, it's a failing.

There are two vegetables that I simply cannot get on board with: cauliflower and beets. You've never seen a beet recipe on this blog because I have only made one recipe with them in my life. To my palate, they have a kind of vinegar aftertaste that I just can't handle.

My dislike of cauliflower is slightly weirder. I think it looks like a brain.

This is not the only reason I don't eat it. It's very crunchy and somewhat bitter and there's something about that particular combination that I don't care for. But add to it that I feel like I'm munching on tiny brains -- well, you can see why I might avoid it.

But, as a grown human being and someone who loves cooking, I feel committed to trying things multiple times. Different preparations can make all the difference. I'm sure I'll try beets again sometime and in this recipe I gave the brain-liflower another go. It turned out very tasty.

Notes: It's been a few posts since we've done a Q.E.D meal. If your weeks are anything like mine, you need good food and you need it fast. Look no further, my friends!

The name of this recipe is not literal in that I did not use the actual hybrid vegetable broccoliflower to make it. I just used a combination of broccoli and cauliflower.

I roasted the veggies because I wanted the depth of flavor. If you really didn't want to turn your oven on, you could always just toss the veggies into the pasta water during the last few minutes of cooking time. It's no fuss and it gets you a one-pot meal. The two downsides to that method are losing the roasted flavor and losing some of the vitamin content of the veggies (water leeches some of the nutrients out of them).

Ingredients:
1 pound short cut pasta like medium-sized shells, orecchiette, or bowties
1 head of broccoli
1 head of cauliflower
2-3 tablespoons of prepared pesto sauce (I used my favorite brand from the grocery store)
Salt
Pepper
1 tablespoon of olive oil

Directions: Heat the oven to 425.

Chop the broccoli and cauliflower into bite-sized pieces. Put them on a baking sheet in one layer. Toss with salt, pepper, and olive oil. Roast them for 15-20 minutes until you can pierce the pieces with a fork, but they're still tender-crisp.

While the veggies are roasting, fill a stock pot with water and bring to a boil. Cook the pasta according to the directions, but short cut pastas usually take between 10-12 minutes to cook.

When the pasta finishes, drain it and return it to the pot. Add in the veggies and pesto. Stir to combine. Serve and enjoy!

BRAAAAIIINNNNNS


Sunday, January 20, 2013

Meatball Sandwiches with Brown Butter Kale


I know, there's no sandwich in that picture. I decided at the last minute that I just wanted the meatballs. Scott assured me that the sandwiches were good.

Now, meatballs.

People have a lot of theories about how to make a good meatball. For me, it's all method. What do you really want out of meatball? You want a tender, flavorful meatball bathed lovingly in sauce, right? Does that mean you fry the living daylights out of it or bake it into a hockey puck? No, it does not. It means you steam it.

That's right, I said steam it.

The only downside to steaming is that you don't get the pretty brown crust on the outside. But, look, do you want the meatball to be tender or do you want it to be pretty? It's going to be bathed lovingly in sauce anyway, so you won't be able to see the color! Trust me on this one. If you want a melt-in-your-mouth meatballs, steam them.

Notes: The only reason this isn't Q.E.D. is because you have to give the meat about 10 minutes to come to room temperature. Otherwise, meatballs are just not that complicated.

You want a decent fat content in these (they're meatballs, not a salad). I like a meatball mix with beef, pork, and veal. I couldn't find that in the store today, so I just got beef and pork.

Use your favorite cheese on the sandwiches. Provolone is a favorite for cheesesteaks in Philly, so we went we that.

If you feel bad about eating meatballs, just serve it with kale and it will make you feel better.

Ingredients:
1/2 pound ground beef, chuck, or sirloin
1/2 pound ground pork
1 cup panko bread crumbs
2 tablespoons of herbs de provence
Salt
Pepper
1/3 cup grated parmesean cheese
3-4 tablespoons milk
1 bunch kale
4 tablespoons butter
Hoagie rolls
Provolone cheese
26 oz. jar of your favorite marinara sauce (or homemade!)

Directions:

Heat the oven to 400. Take the meat out of the fridge and let it sit for about 10 mintes.

While you're waiting, thinly slice the kale. Add the bread crumbs, herbs, and parmesean cheese to a large bowl. Stir them together just to mix them evenly. Slice open your hoagie rolls.

Add water to a large skillet (just enough to cover the bottom of the pan). Heat it on medium. You want the water to simmer, not boil.

Add the meat and the milk to your bowl. Season with salt and pepper. Mix the meat into the dry ingredients. You don't want to knead it like dough, so use a gentle touch. Just make sure everything is evenly mixed.

Roll the mixture into 1 1/2 inch balls and put them in your simmering skillet. Put the lid on it and steam the meatballs for 25 minutes.

When the meatballs are done, pour off any excess liquid. Pour the sauce over the meatballs and put the lid back on. Turn the heat back to medium-low and let the meatballs simmer in the sauce.

While the meatballs are simmering, add the butter to another skillet and heat on medium-high. When the butter browns and starts to smell nutty, add in the kale. It'll pop and crackle, but don't worry. Toss the kale in the butter for about five minutes until it's wilted and emerald green. Season with salt.

Right before you put the kale in the pan, put your hoagie rolls on a baking sheet and put a slice or two of provolone inside. Heat in the oven for 5 minutes until the cheese melts and the bread toasts. Nestle your meatballs and sauce into the rolls and enjoy!

VTMK: Applesauce Molasses Cookies

I'm teaching a seminar this semester. It's an upper level course mainly for majors and upperclass students. Seminars last four hours, which is a long time to be in class. As such, we have a tradition of "seminar breaks." Seminar breaks involve food.

Since the first day of school is tomorrow, I'm in charge of the snacks for break. I originally made some chocolate chip cookies, but Scott loves them so much, I decided to let him keep them. Instead, I decided to try some vegan cookies. A lot of my students are vegan nowadays, and even if they're not, a lot of them have food allergies. Vegan recipes leave out a lot of the things that cause people trouble. Hopefully these will go over well!

Notes: I followed this recipe pretty closely, but I spiced the cookies up a little differently. I also baked mine a little longer. If I had to do it over, I would have used regular sugar for rolling, but I only had raw sugar. You don't notice that much of a difference.

If you like gingerbread, you'll like these.

Ingredients:
1 cup unbleached all-purpose flour
1/2 cup packed dark brown sugar
1 teaspoon baking soda
1/4 teaspoon salt
1/2 teaspoon cinnamon
1/4 teaspoon ground ginger
1/4 teaspoon nutmeg
1/4 teaspoon ground cloves
1/4 cup olive oil
2 tablespoons molasses
1/4 cup applesauce
small bowl of granulated sugar for rolling

Directions:

Add the dry ingredients to a large bowl (flour, baking soda, spices, salt, brown sugar). Whisk them together. Make a well in the center. Add all the wet ingredients into the well (molasses, oil, and applesauce). Stir everything together. When it starts to form a solid mass, you may just want to switch to using your hands and gently knead it together. Chill the dough for an hour.

Heat the oven to 350. Pour some granulated sugar in a small bowl. Roll the dough into 1-inch balls and roll the balls in the sugar. Put the balls 2-3 inches apart on a cookie sheet (you'll need two sheets -- the cookies will spread).

Bake the cookies for 10-12 minutes until the sides are set and the tops are little moist. The cookies will be puffy, but they'll flatten out as they cool. Cool them on the baking sheets for 10 minutes. Move to a wire rack to finish cooling. Enjoy!


Sunday, January 13, 2013

Pineapple Fried Rice


Continuing with the trend of healthy new year eating, what could be healthier than whole grains and veggies?

Notes: If you've never made fried rice before, never fear. The two things you need to remember are (1) high heat and (2) be prepared. Be sure your skillet is nice and hot before you start and have all your ingredients ready by the stove. Add the ingredients to the pan in order from longest cooking time to shortest cooking time: thicker, denser ingredients go in first, more delicate ingredients go in later.

You could use fresh pineapple if it's in season, but the canned works just as well (plus you don't have to chop it). You'll need to drain the juice out of the can, but you can reserve it for the fried rice. If the veggies get too hot and start to cook too fast, just pour a little bit of the juice over them.

The rice will have a better texture if you chill it for few hours or even overnight.

The great thing about fried rice is that you can put in it whatever veggies you like.

Ingredients:
2 cups cooked brown rice
1 15-20 oz. can of pineapple chunks (in juice, not syrup)
1 cup matchstick carrots
1 cup snow peas
1 small bunch of bok choy, cleaned and root end removed
1 small bunch of scallions
1/3 cup of soy sauce (low sodium preferred)
2-3 garlic cloves
2 teaspoons fresh ginger
1 small bunch cilantro
Dash red pepper flakes
Salt
Pepper
Oil for frying

Directions:

Before you start heating the pan, prep all your ingredients. Drain the liquid from the pineapple and reserve it in a measuring cup. Chop the bok choy and cut the snow peas in half. Mince the garlic and ginger. Slice the scallions and chop the cilantro

Turn the pan to just below high and add a tablespoon of oil (I used coconut oil). Arrange all your ingredients by the stove. When the pan is hot and the oil starts to shimmer and disappear, add the garlic and ginger and stir for 30 seconds. Add the carrots and snow peas and stir for about a minute. Add the bok choy and stir for a minute. Add the scallions and pineapple and stir for a minutes. If at any point the veggies start to get too brown, add a little bit of the pineapple juice to the pan. Season with salt and pepper each time you add new ingredients.

Make a hole in the middle of the veggies and add in the rice. Flatten the rice with your spoon so that as much of the rice as possible touches the bottom of the pan. Let it sit for 30 seconds and then start stirring it. After 30 more seconds, add the soy sauce. Add the red pepper flakes. Stir everything together for about two minutes.

Take the pan off the heat and add the cilantro. Stir to incorporate. Serve hot and enjoy!

Wednesday, January 9, 2013

Pomegranate and Goat Cheese Salad with Cranberry Mustard Dressing

I'm sure many of you have a new year's resolution to eat healthier. There's no rule that says your healthy eating can't be delicious too.

I take my lunch to work most of the time and I'm always looking for things to take that aren't sandwiches. Don't get me wrong; I love sandwiches. But you need to shake up the routine and a salad fits the bill.

Incidentally, if you're looking for a handy salad container that fits in a lunch box, this is the one I have (Rubbermaid is giving me no money for the plug, by the way). I love it.

Notes: I think the flavors in this salad are perfectly balanced. The goat cheese is smooth and tangy while the pomegranate seeds are sweet and fresh. The dressing adds a nice depth without overpowering the other ingredients.

This salad is enough just for a single serving, but you could easily double it for two if you need to. If you don't happen to have cranberry mustard, you could use your favorite mustard. Or you could just mix the olive oil and vinegar and make a basic balsamic vinaigrette.

Perplexed by pomegranates? Worry not! Hop on over to this post to jog your memory.

Ingredients:
2 cups washed salad greens
2-3 tablespoons of crumbled goat cheese
2 tablespoons of pomegranate seeds
1/4 teaspoon cranberry mustard
Splash of balsamic vinegar
1/2 tablespoon olive oil
Salt
Pepper

Directions:

To your salad bowl (the bowl you're going to eat out of), add the mustard, balsamic vinegar, and olive oil. Whisk together until the mixture is emulsified.

Add your salad greens to the bowl and toss them in the dressing to coat (you can just use your hands -- it's easier). Top with goat cheese and pomegranate seeds and toss lightly to mix. Season with a sprinkle of salt and pepper.

If you plan to take your salad to work, pack your dressing in a separate container and just lay the goat cheese and pomegranates on top of the greens. When you get ready to eat lunch, shake the container to mix the dressing and then pour it over the salad.

Pretty AND delicious
Enjoy!


Monday, January 7, 2013

Baked Ziti with Spinach

It's January and that means baked pasta dishes!

On a cold winter's night, you need some baked cheesy goodness to warm you from the inside out. And if for some reason you think that cheese and pasta aren't what you might call a "balanced diet," throw some spinach in there and forgive yourself.

Notes: The only downside to this dish is that it's not Q.E.D., but that's pretty much it. The leftovers are amazing. You could also assemble the whole dish and then put it in the fridge until you're ready to bake it. You might even be able to leave it in the fridge overnight.

Ingredients:
1 pound box of ziti
15 oz. of ricotta cheese
1 large or two small fresh mozzarella balls
1 26 oz. jar of your favorite marinara sauce
3-4 garlic cloves
1 bunch of baby spinach leaves
1 small bunch of fresh basil
Dash red pepper flakes
Salt
Pepper

Directions: Heat the oven to 375.

Cook the pasta according to the box directions. While the water is boiling, mince your garlic, and chop the basil and spinach. Pull the cheeses out of the fridge while the pasta cooks so that they come to room temperature.

Once the pasta is finished, drain it and add it back to the hot pot. Add in the ricotta, sauce, spinach, basil, garlic, and season the whole thing liberally with salt and pepper. Add the red pepper flakes and stir everything together until all the ingredients are evenly distributed.

Pour the whole thing into a 9x13 baking dish. Slice or dice your fresh mozzarella and cover the top. Cover the dish with foil and bake for 30 minutes. Take the foil off and bake for an extra 7-10 minutes until the cheese is melted and slightly browned.


Now who wouldn't want to eat that on a chilly winter night? Enjoy!

Q.E.D.: Smoked Sausage and Kale (with Veg. Option)

If you've been following this blog at all, you'll know that I love kale. It's my new favorite green. The more dishes I can make with kale, the better. And if they're fast, even better.

Pictured here with crostini

During the semester, my days can be really long. One those days, you need a fast meal. And if you don't always like to eat your dinner out of paper bag, you need a go-to meal that you don't feel bad about eating. Enter sausage and kale.

The great thing about kielbasa (other than that it's delicious) is that it's already cooked, so it's a fast prep. Plus it provides all the (minimal) fat and flavor you need to saute your kale. It's a one-pot meal that's fast, easy, and delicious.

Notes: If you wanted to make a vegetarian version of this dish, you could use pressed tofu that was seasoned like sausage. You could season it with some cumin, salt, black pepper, and fennel seed and produce a pretty similar flavor. You'd need to make sure that the tofu gets a little crispy in the pan, so you might have to add some olive oil.

You think two ingredients can't make an awesome dish? Just give it a try.

Ingredients:
1 pound of smoked kielbasa
1 bunch of kale, stemmed and cleaned
Salt
Pepper

Directions:

Heat a non-stick skillet over medium-high heat. Diced the kielbasa (or tofu) and add it to the pan. Saute until the sausage is heated and starts to get brown and crispy on the outside.

While the sausage is heating, thinly slice the kale leaves. Once the sausage starts to brown, add the kale to the pan and season with salt and pepper. Saute until the kale is dark green and tender. Serve and enjoy!

Gingerbread Cookies

So. Things have gotten a bit off schedule.

Life has been a little complicated in the professor's kitchen of late. Sadly, my day job took up a lot of time last term (the injustice of it all!!!!). I can't promise I'll get the blog rolling like it does during the summer, but let's hope 2013 turns out to be better for a lot of reasons.

Right before Christmas, I decided I desperately needed gingerbread cookies. I was hoping to make old fashioned gingerbread, but unfortunately most of recipes I found made somewhere along the lines of 900 pounds of cake. I mean, I like gingerbread and all, but most of it was probably going to go to waste.

I opted for cookies instead. I would have rather had chewy cookies, but these were tasty enough that I didn't mind the crunch. I took my leftovers to work and they were snapped up fast.

Notes: I adapted my recipe from this one over at Smitten Kitchen. It wasn't my intention to roll and cut them, but I ended up doing it anyway because the dough was so cold. I used the only cookie cutter I have, which is an owl. So, Christmas owls? Well, why not.

You can make this dough a day ahead and chill it overnight, which is handy.

Ingredients:
3 cups all purpose flour (plus more for rolling out the cookies)
1/2 teaspoon of baking soda
1/4 teaspoon baking powder
2 teaspoons ground ginger
2 teaspoons cinnamon
3/4 teaspoon cloves
3/4 teaspoon kosher salt
1/2 cup brown sugar
1 egg
1/2 cup molasses

Directions:

In an electric mixer (or using a whisk and a lot of elbow grease), cream the butter and brown sugar together. Beat in the egg and the molasses. Whisk together all the dry ingredients in a separate bowl and then add them into the mixer in batches of three.

When the dough is finished, lay out two pieces of plastic wrap. Divide the dough in half, putting each half onto a piece of plastic wrap. Flatten the dough into a disc, wrap it up, and chill for two hours.

When you're ready to bake the cookies, heat the oven to 350. Take one dough disc out at a time and roll it out on a floured surface until it's 1/4 an inch thick. Cut your shapes and lay them on a parchment-lined baking sheet. Once you're done with one disc, put the baking sheet back in the fridge while you roll out and cut the second disc.

Bake the first sheet for 12-14 minutes until the cookies are crisp, but not darkened. While the first sheet it baking, chill the second sheet.

Transfer the cookies to a wire rack to cool. Store them in an airtight container between wax paper. They should last five days to a week. Enjoy!