Monday, September 6, 2021

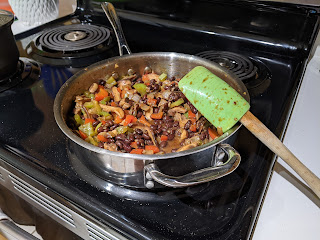
Slow Cooker Ramen

I have been wanting to try ramen for a good long while. Despite the fact that the calendar says September, it's not exactly chilly fall weather. Ramen is a cold-weather comfort food, for sure, but I decided I couldn't wait any longer to make it.

Notes: Ramen is all about the broth. The time you take to build the flavor and pay attention to it is 100% worth it. 

Remember those chicken wings I made? I saved the bones after we ate them and used them in the broth. In all the recipes I read, bones were considered essential to getting the right depth and texture. If you want your ramen to be properly vegetarian, leave them out. You might need to supplement and add more soy sauce to make up for the flavor loss. 

When you put all the ingredients in the broth, don't bother chopping or peeling. You'll fish out all the big pieces so you can strain the broth later, so all the solids will end up in a strainer.

Is this traditional ramen broth? Hardly. I'm not a fan of buying speciality ingredients that I'm not sure I will like or use. So, when I do recipe research, I usually try to replace the specialty stuff with similar things I use. For example, I don't have fish sauce or miso, both of which are traditional for ramen. But, I do have anchovy paste, which has some of the same flavor notes. Also, I left out the traditional soft boiled egg because Scott doesn't eat eggs.

Speaking of specialty ingredients, ramen noodles in the Asian section of the grocery store are kind of expensive. Ramen noodles in the pre-packaged food section are cheap. So, I bought a six-pack of those. You follow the directions on the package, but you skip the step where you add the little flavor packet (holy moly, that thing is chocked full of salt). 

This recipe makes enough noodles for two bowls. If you're feeding four people, I'd use two packages of noodles. 

Haven't used bok choy before? It's in the cabbage family and is often in Asian dishes. The green tops and the white lower parts are both edible. It had a nice mild flavor and the white parts have a great crunch.

Ingredients:

For broth:

4 cups (32 oz) beef stock

4 cups water (preferably filtered)

1/4 cup soy sauce

1 dozen bones from chicken wings (approx)

2 carrots

2 spring onions

1 stalk rosemary

5 garlic cloves

1-inch piece if ginger (or 2 tablespoons grated ginger)

2 tablespoons anchovy paste (or 4 anchovy filets)

For serving:

1 package of shitake mushrooms

1 bunch bok choy (or 2 bunches baby bok choy)

2 tablespoons soy sauce

1 small bunch cilantro

2 spring onions

1 carrot

1 package of ramen noodles + 2 cups of water (see notes)

Sesame seeds

Red pepper flakes

Olive oil

Directions: In the slow cooker, combine all the broth ingredients and set on low for 8 hours. When time is up, remove the large ingredients with a spider or tongs and discard.

Put a stock pot in the sink. Take a strainer, line it with cheese cloth, and place it inside the stock pot. Pour the broth through the strainer. Put the broth on the stove and bring to a boil for 10 minutes. Turn the heat down to a simmer while you prepare the rest of the ramen.

For the base, slice the mushrooms and boy choy. Add a bit of olive oil to a large skillet and heat on medium high. When the oil is hot, add the mushrooms and cook until just starting to brown (about 7 minutes). Add the bok choy, soy sauce, and red pepper flakes, stirring frequently, until the bok choy is wilted and tender. Sprinkle in some sesame seeds toward the end of cooking.

For the noodles, bring 2 cups of water to a boil. Add the noodles from the ramen package (do not use the seasoning packet). Cook for three minutes, stirring occasionally, until the noodles are tender.

For the toppings, use a peeler to make ribbons with the carrot. Rough chop the cilantro and finely slice the spring onions.

To assemble, place a little pile of noodles in the bottom of soup bowl. Ladle in the broth, filling the bowl about 3/4 full. Spoon in some of the mushroom and bok choy. Top with carrot ribbons, cilantro, and spring onions. Serve, slurp, and enjoy!


Sunday, September 5, 2021

Pear Pie

Why do people not use pears in dessert more often? I think they're one of the forgotten fall flavors. Apples and pumpkins get all the glory, but pears are right there waiting for their moment! I saw a magazine article about pear desserts and saw a pear and apple pie. But why let apples hog the spotlight? I re-tooled it to be a pear pie. 

Notes: I adapted this recipe from one I found in Southern Living magazine. 

You can probably use whatever pears you like in here. You want pears that are ripe, but not super mushy. I got some pretty ripe pears and was worried they'd be too soft, but they turned out fine. If you have tart pears, you might want to let them sit in the sugar for a little bit to let them macerate a little. 

Could you use a pre-made pie crust? Of course. But making your own pie crust is not as hard as it sounds. Lots of pie crust recipes call for a food processor, but you don't need one. People have been making pies before food processors were in existence. This recipe makes a top and a bottom crust.

When you're adding the water to the flour to make the pie crust, just add it slowly. You'll get impatient because it seems like the dough isn't coming together. Resist the temptation to dump more water into the bowl. It's hard to correct a wet dough, but it's easy to add water to a dry one. You just want the dough to be formed enough so that it holds together in a ball. That's all you need it to do, so don't knead it or anything once it gets to that stage. 

If you let your pie crust sit in the fridge for more than an hour, you'll want to take it out while you're preparing the pie filling so that it can take some of the chill off. It'll be easier to roll out. 


Ingredients:

1 prepared pie crust (recipe follows)

4-5 pears (I used Bartlett) 

1/4 cup all purpose flour

1/3 cup sugar

3 tablespoons brown sugar

1 tsp vanilla

2 tsps cinnamon

1/2 tsp ground ginger

1/4 teaspoon ground cloves

1 egg beaten for egg wash (optional)

Directions: Heat the oven to 375. 

Peel and cut your pears into about 1-inch cubes. In a large bowl, mix them with the two sugars, flour, spices, and vanilla. Set aside while you roll out your pie crust.

Roll one disc into a 12-inch circle and line it in the bottom of the pie dish. If you want to make a lattice top, roll the other disc into a 12-inch circle and cut it into strips about an inch or inch and a half wide (I used a pizza cutter). If you just want a standard pie, leave the top as a circle. 

Pour your pie filling into the pie dish. You can either lay the dough strips across the pie and weave them into a lattice or you can just lay half the strips in one direction and the other half in the other direction (that's what I did) to create a lattice pattern. Cut off the excess dough and crimp the dough closed on the edge of the dish using a fork (you can also just pinch it closed if you like the fluted look). 

If you're not doing the lattice top, be sure to cut some slits into the top pie crust to let air escape. If you're using egg wash, brush it on the pie.

Bake for about 45 minutes. Once that time is up, loosely cover the pie with foil to prevent the edges from browning too much. Bake for another 10-15 minutes until the pie is bubbly and the crust is a light golden brown. Let the pie cool for a least an hour. Serve and enjoy!

Pie crust

2.5 cups all purpose flour

1 tbs sugar

2 tsps kosher salt

1 cup (2 standard sticks) cold unsalted butter (if you use salted butter, omit the salt above)

1/4-1/3 cold water 

Directions: In a mixing bowl, whisk together flour, sugar, and salt. Cut the butter into small cubes and use a pastry blender to cut it into the flour mixture until it's the texture of wet sand and the butter is the size of small peas. Add in the cold water a little at a time and mix with your hands until the dough comes together. Divide it in half and shape into discs. Wrap each disc in plastic wrap and refrigerate for at least 1 hour. 

Saturday, September 4, 2021

Honey Ginger Baked Chicken Wings

When you think chicken wings, you probably think Buffalo wings. But there are so many more flavor combinations to explore! And there's no need to fry them to get a juicy, delicious wing. Baking them on a rack at a high temp will get you the same crispiness you're looking for. 

Notes:  These are so, so delicious. I could eat them all by themselves and be happy. 

I bet this would be lovely on chicken thighs as well. If you're using white meat, I would let the spice mixture sit on the chicken in the fridge for at few hours. White meat is hard to season really thoroughly. 

If you're looking for something to make for a football-watching spread, these wings would make a great appetizer. 

I haven't tried it, but I think it would be safe to double this recipe if you need to feed more people. This feeds Scott and I, but it wouldn't be enough for four.

Ingredients:

1 dozen chicken wings, approx (party wings, drumettes, etc.)

3 teaspoons kosher salt

2 teaspoons black pepper

2 teaspoons chili powder

2 teaspoons onion powder

1 teaspoon allspice

2 tablespoons soy sauce

2 tablespoons honey

1/2 teaspoon grated fresh ginger or ginger paste

Sesame seeds garnish

Olive oil

Directions: Heat the oven to 425. Line a baking sheet with foil. Put an oven-safe cooling rack on the baking sheet.

In a large bowl, toss the chicken wings with all the dry spices (salt, pepper, chili powder, onion powder, allspice). Drizzle with olive oil and toss to coat. Place the wings on the rack. Bake for 35-40 minutes until they're starting to get brown and crispy. 

In a small bowl, whisk together soy sauce, honey, and ginger. When the wings are done, let them cool a few minutes just so you can safely handle them. Put them in a large bowl and pour the soy sauce mixture over them. Toss to coat. 

Put the wings back on the rack, pouring any excess sauce left in the bowl over the top. Sprinkle with sesame seeds. Serve and and enjoy!

Almost didn't get a photo before we ate them all


Tuesday, August 31, 2021

Homemade cole slaw dressing

When I made veggie burgers the other night, I made cole slaw as a side dish. Now, you can buy cole slaw dressing in a jar, but (a) those jars are huge and you won't use it all and (b) it's super easy to make your own!

Notes: I make this even easier by mixing the dressing right in the bowl where I plan to put the cole slaw. 

This makes enough dressing to reasonably dress about 4 cups of cole slaw (about half of one those bagged mixes). I say "reasonably" because I don't like over-dressed slaw. It should be thoroughly coated, but not swimming in dressing. 

You can 100% make this ahead of time. Even a day ahead would be fine! But certainly the morning of. I think it's best if you make it at least an hour ahead so it has time to sit in the fridge and marinate. 

Ingredients

2.5 tablespoons mayo

1 teaspoon honey

2 teaspoons honey mustard

2 teaspoons relish (sweet or dill, whichever you like)

About 10 dashes hot sauce

Salt and pepper

Directions: Mix all the ingredients in a bowl until well combined. Toss with about four cups of your favorite cole slaw mix.

Monday, August 30, 2021

White Bean and Roasted Carrot Burgers

Veggie burgers: when they are terrible, they are really terrible. Dense, dry, and flavorless. I think they're hard to do well. Partly it's because people tend to think of them as mere meat replacements rather than allowing them to speak for themselves. 


Notes: There are plenty of things you can do ahead of time for this recipe. I made the carrots the day before. If you're putting sliced tomato or onion on your burgers, slice those up as early as the morning you plan to serve them. Just put them in separate plastic containers in the fridge.

If you have a grill pan, you can use that to cook the burgers. I wouldn't put them on the actual grill. They're soft, so they'll fall apart far too easily.

You could season these burgers a number of different ways. Some lemon zest and fresh oregano would be delicious, if you wanted a Greek-inspired flavor. You could also do a Moroccan-style combo with some ginger and some allspice. I think next time I make them I'll use some chipotle.

Have fun with your burger fixin's, too. I had some leftover sun-dried tomato pesto, so I made some pesto mayo. 

Ingredients:

2 15oz cans of cannelini beans (or Great Northern beans)

2 cups baby carrots (or "adult" carrots cut into 1-inch pieces)

1 cup bread crumbs (not Panko)

1 egg

2 tablespoons cumin

2 tablespoons chili powder

2 teaspoons onion powder

1/4 cup chopped fresh parlsey

2 tablespoons chopped fresh mint

Hot sauce to taste

Salt & pepper

Olive oil

You favorite burger fixin's

Directions: Heat the oven to 400. Toss the baby carrots with olive oil, salt, and pepper. Roast them for about 40 minutes until they're brown and can be pierced easily with a fork. 

Let the carrots cool for a few minutes. Use an immersion blender or a food processor to buzz them into a paste. Set aside (or put in the fridge if you do this ahead of time). 

Drain (but don't rinse) the beans. In a large bowl, mash the beans with a potato masher (don't break them up completely, you want some whole beans for texture). Add in the carrots, egg, the spices, and hot sauce and combine. Season with salt and pepper. Add in the bread crumbs and herbs until everything is mixed together. Form the mixture into four patties and set aside. 

Heat olive oil in a large skillet on medium-high. When the oil is hot, add in your burger patties. Cook for about 7 minutes per side or until each side is crispy and brown. Put them on a plate lined with a paper towel to drain slightly. 

Dress up your burger buns with your favorite stuff and enjoy!

Saturday, August 21, 2021

Roasted Eggplant and Mushroom Lasagna

I'm trying to up my vegetarian meals game. I make lasagna fairly regularly, and the vegetarian version is usually spinach. I decided I needed a refresh. 

Notes: If you're in a hurry, just use your favorite jarred sauce. But if you have the time, the homemade version is easy to do!

Maybe you're surprised by the appearance of mint on the herbs list? You shouldn't be! Mint is under-used in savory dishes and it goes great with eggplant.

I used to think that you had boil lasagna noodles like you boiled other pasta, but really there's no need. You just need them to be pliable. If you cook them all the way, you lose the texture when you put them in the oven. It's also way harder to layer them when you need to assemble everything---they just fall apart. 

I know those no-boil lasagna noodles are all the rage, but honestly? They aren't very good. They don't stand up to a hearty lasagna. And they have a weird taste.

Lasagna is a great make-ahead dish. You can roast the veggies and put the ricotta mixture together earlier in the day and just keep them in the fridge until dinner time. I'd take them out while your pasta water is coming to a boil so that they're closer to room temperature. You can also assemble the whole lasagna and put the baking dish in the fridge! Make sure you let it sit out for 30 minutes before you put it in the hot oven.  

Ingredients

1 normal-sized eggplant

1 package of mushrooms (white or baby bella)

1 small onion

1 15 oz. package of ricotta

1 mozzarella ball

Approx. 28 oz of marinara sauce (homemade recipe to follow)

1 egg

1 box of lasagna noodles

2 tablespoons each of chopped fresh basil, fresh parsley, fresh oregano, fresh mint

Salt and pepper

Olive oil

Directions: Heat the oven to 400. 

Start with your marina sauce if you're making your own (recipe follows). If not, roast your vegetables. De-stem the mushrooms and slice them. Dice the eggplant in 1-inch pieces. Slice the onion thick. Put everything on a sheet tray, drizzle with olive oil, season with salt and pepper. Roast them for 15-20 minutes until soft and starting to brown. Set aside and drop the oven temperature down to 375.

In a mixing bowl, beat the egg and then add the ricotta and fresh herbs. Season with salt and pepper. Stir everything together until well combined. Put the bowl in the fridge while you do other things. 

In a large pot, bring water to just below a boil. Add salt and then put in your lasagna noodles. Let them cook until they're pliable, use tongs to gently separate them in the pot. Slice your mozzarella ball (keep the slices kind of thin).

When the noodles are done, ladle about a cup of marinara sauce into a 9x13 baking dish. Put four noodles in the dish. Top them with 1/3 of the ricotta mixture. Top that with 1/3 of the eggplant mixture. Top with another cup of sauce. Repeat the layers until the veggies and ricotta are used up. Put four noodles on top and pour the remaining sauce over them. Put slices of mozzarella on top. 

Cover with foil and bake for between 30-40 minutes until it's all bubbly and the noodles have expanded. Take the foil off and bake for 5-10 more minutes until the mozzarella starts to brown. Remove from the oven and wait about 7-10 minutes before you cut into it. Serve and enjoy!

Easy marina sauce

Ingredients

1 small onion

5-6 garlic cloves

2 tablespoons each of chopped fresh basil, fresh oregano, fresh parsley

1 28 oz can crushed tomatoes

3 tablespoons of tomato paste

Salt and pepper

Olive oil

Directions: In a skillet or sauce pan on medium, sauté the onion in a few tablespoons of olive oil until it's tender and starting to brown (about 10-15 minutes). Add in the garlic and cook 5 more minutes. Add the tomato paste and stir. Add in the herbs and pour in the crushed tomatoes. Stir everything together. If it looks a little thick, add just a bit of water. Turn the heat to low and let the sauce simmer, stirring occasionally, for as long as you have--the longer the better. 


Tuesday, August 3, 2021

Crispy Brussel Sprouts with Avocado

There's a restaurant in Swarthmore that serves an appetizer called crispy broccoli. You would think a broccoli appetizer would be boring, but you'd be wrong about this one. Since we're in Durham this year, no crispy broccoli for me. So, I thought I'd try to make a version of it at home as a side dish. 

Notes: You think you don't want avocado with your vegetables, but oh you do. That's the part that makes the crispy broccoli appetizer interesting! It's a great mix of textures and the smooth avocado pairs great with the earthy brussel sprouts. 

When you make oven-baked fries, you sprinkle them with flour or cornstarch to get them to crisp up on the outside. I tried that with the brussel sprouts, but I'm not sure it made a difference. They basically has the same texture they always do when I roast brussel sprouts. I went ahead and included that step anyway. 

If you don't roast your veggies, you're missing out. It's one of the most flavorful preparations. If you have a veggie hater in your life, serve them roasted veggies and they might change their tune. 

Ingredients:

1 package/bunch of brussel sprouts

1-2 avocados

1 lime, juiced

2 teaspoons soy sauce

1 teaspoon sesame seeds

1 teaspoon flour or cornstarch

Salt and pepper

Olive oil for drizzling


Directions: Heat the oven to 425. While the oven is heating, put your baking sheet in the oven so that it gets hot. 

While the oven is heating, trim the ends off brussel sprouts and remove the smaller outer leaves. Slice them in half. Put them in a bowl, season with salt and pepper, and drizzle with olive oil. Sprinkle on the flour or cornstarch and mix with your hands until no white remains on the sprouts. 

When the oven is hot, take your baking sheet out and brush it with olive oil. Put the sprouts cut side down on the baking sheet. Bake for 25 minutes, flipping halfway through cooking.

While the sprouts are in the oven, prep the avocado. Mash it in a bowl, add in the soy sauce and lime juice, and season with a little salt. Taste it before you add more salt (since soy sauce can be salty). 

To serve, spread some avocado on the plate. Sprinkle with sesame seeds. Pile the sprouts on top of the avocado and enjoy!

Sunday, August 1, 2021

Greek Chicken with Tzatziki and Homemade Pita

Long-time readers of this blog will recall that I am an impulse baker. I bake on a whim all the time. You'll recall that I made chicken pot pie risotto earlier this week. I ended up with leftover chicken. I had planned to make some greek-inspired chickpea cakes, but, I decided, chickpeas will keep just fine in their cans. The chicken will not keep as long. So, why not make greek-inspired chicken instead? 

I'm not sure what made me think "pita," but I decided yesterday that I would make them today. That's advanced notice for the impulse baker. I've never made them before, but I will definitely be making them again.

Notes: I tweaked this recipe for the pita and this recipe for the tzatziki sauce.

So, making bread from scratch. It can be intimidating, but that shouldn't stop you. You just need planning and patience. These tasted so fresh and delicious, it was well worth the work!

A lot of the kneading is about feel. When you first start kneading, the bread will feel loose and almost too soft. That's because the gluten hasn't developed yet. Just keep going, sprinkling more flour on the bread and your hands if it starts to stick. As you knead, the gluten will develop and the dough will start to feel springier and denser. 

When you're rolling out the pita, be careful not to sprinkle too much flour on it. Try to flour the rolling pin. I got a little too much flour on mine and it was stuck on there after my pitas were cooked. 

You can see the too much flour here, but also, look at that good puff!

It's likely you will have leftover pita. Don't worry, you can keep them in the fridge. Let them cool completely and put them in a zip top bag, separated by pieces of wax paper. Then you can heat them up for a few minutes in the oven.

English cucumbers work best for the tzatziki sauce because they're seedless and the skin is thinner and less bitter. But, if you don't have them, don't go buy one just for this. Use a regular cucumber, but peel it first. 

I would make the tzatziki first and get it out of the way. If you're doing all this in one go, make sure you have your chicken ingredients all prepped and ready to go before you start rolling and cooking the pita. You'll probably have to cook some pita while you roll out the others (if you're like me and don't have enough counter space for 8 pitas). Start the chicken when you're about halfway through the pitas.

I don't have a picture of the whole assembled pita with the chicken. The pita was kind of the star of the show. It all turned out really well.

Ingredients:

For the pita:

1 packet of yeast

1/2 teaspoon sugar

1 cup lukewarm water

2 teaspoons salt

2 tablespoons olive oil plus more for the bowl

3 cups of flour plus more for dusting

For tzatziki:

1 cup of greek yogurt

1/2 English cucumber (see notes)

1 garlic clove

1 tablespoon olive oil

Salt and pepper for seasoning

For chicken:

2 cups shredded cooked chicken (approx)

1 lemon

3 tablespoons of olive oil

4-5 cloves garlic

3-4 springs of fresh oregano

Diced fresh tomatoes, sliced onion, sliced cucumber for serving

Directions for pita: In a large mixing bowl, mix the water, sugar, and yeast together until the yeast and sugar dissolve (it's OK if there are some little lumps left). Allow it to sit uncovered in a warm spot in your kitchen until it's bubbly and frothy (about 15-20 minutes). 

Stir in the olive oil, salt, and flour. The dough should start out looking sort of rough and shaggy. If it's really sticky and wet, sprinkle in some more flour. Knead the dough in the bowl until it comes together and starts to look a little smoother. Then turn it out on a floured surface and knead for about 10 minutes until the dough is smooth and springs back when you poke it. Wipe out the dough bowl with a paper towel and coat bowl with olive oil. Return the dough to the bowl, cover with plastic wrap and a kitchen towel, and allow it to rise until it's doubled in size, about an hour.

When the dough has risen, deflate it and shape it back into a ball. Turn it out on a floured surface and divide it into 8 pieces. Let them sit under a clean kitchen towel for 10 minutes. Roll the pieces out into circles, about 8 inches or so in diameter (see notes).

Heat a large skillet on the stove over medium-high heat. To check and see if it's hot, flick a drop or two of water in the pan. If it beads up and sizzles immediately, you skillet is hot. Drizzle the pan with olive oil and wipe the excess away. Put a pita circle in the pan. It will start to puff and bubble after about 45 seconds. Flip it over with a big spatula (you should see some little brown spots on the side that was touching the pan). Cook for about another minute. Put your finished pita on baking sheet lined with a clean kitchen towel. Cover the finished pita with a towel while you make the rest. 


Directions for tzatziki: Grate the cucumber on the small holes of the box grater into a strainer lined with a paper towels or cheese cloth. Squeeze the water out and leave in the strainer. 

Add the yogurt, salt, pepper, and olive oil to a small mixing bowl. Grate the garlic with a microplane or zester straight into the bowl. Add in the cucumber and stir well to combine everything. Refrigerate for at least two hours.

Directions for chicken: Mince garlic and oregano. Zest the lemon and cut it in half. Heat a skillet on medium and add olive oil. Add garlic to the pan and cook for a few minutes. Add oregano and lemon zest and cook for another minute or two. Squeeze half the lemon into the oil mixture and then add the chicken. Cook for about 10-15 minutes until the chicken is heated and some of the liquid in the pan evaporates. Turn off the heat and finish by squeezing the other half of the lemon over the chicken.

To serve: Speak some tzatziki sauce on one of the pitas. Top with chicken and add whatever toppings you like. Enjoy!

Friday, July 30, 2021

Chicken Pot Pie Risotto

It's just like me to decide that the hottest day of the summer is also the day to make risotto, a dish that you have babysit on the stove. It's a good thing this turned out well.

Notes: Risotto can be fussy, but it's worth it. The rice has a creamy, rich texture that you just don't get from regular rice. You make risotto using arborio rice, which you can find at the majority of grocery stores these days. It's usually right there with the other rice. You use a special method to make it. Instead of bringing water to a boil and then adding the rice, you add the warm liquid to the rice. This allows the starches to develop, which is how you get the creamy texture. 

This is essentially chicken pot pie over rice rather than in a pie crust. You make the filling just as you would if you were planning to bake it into a pie.

There are several steps to this dish, so you should do some things ahead of time. To make shredded chicken, I throw chicken breasts in a slow cooker for about 5 hours on low (set it for 8 and then check it at 5, if it comes apart easily and there's no pink, it's done). I did this step the day before I made the risotto. I also roasted the vegetables this morning and just kept them in the fridge until I was ready to make dinner. 

If you'd rather not do that much work, feel free to get a rotisserie chicken from the grocery store. You can also use some of the frozen mixed veggies. 

Ingredients:

For the rice:

1 cup of arborio rice

4 cups of water or chicken stock (approx)

2 tbs of butter

Salt and pepper 

For the chicken pot pie filling:

2 cups cooked shredded chicken

1.5-2 cups each of:

-Broccoli florets

-Celery, diced

-Green beans, cut into bite-size pieces

-Carrots, diced

-Frozen peas

-Frozen corn

1 onion, diced

5 tbs butter 

1/3 cup of flour

2 cups of chicken stock

1 cup of milk (not skim)

Olive oil

Nutmeg (a pinch)

Salt and pepper

Directions: Start with your roasted veggies. Put green beans, carrots, and broccoli on a baking sheet (you can mix them together). Drizzle them with olive oil, season with salt and pepper, and roast them at 425 for about 15 minutes. When they're done, set aside while you prep everything else. 

For the risotto, pour the 4 cups of chicken stock into a sauce pan heat it on medium. Heat a large skillet on medium-high and add a little butter. When the butter melts, add the dry rice, stir, and toast it just for a minute. Add about four ladles of stock to the rice and stir. Let the rice bubble away until it starts to look dry and then add two more ladles of stock. Continue this process until the rice is done. The timing will depend on your rice, it will be between 25-40 minutes. 

When the rice is about halfway done, start the pot pie filling. 

In a large skillet or stock pot, heat the 5 tablespoons of butter on medium-high. When it's melted, add the diced onion and celery to the pot and cook until translucent. Season with salt and pepper and stir in the flour. Cook for about 3 minutes and then whisk in the 2 cups of chicken stock. Stir well and then add the milk. Add the nutmeg and season again with salt and pepper. If the mixture gets too stiff, just add a little more milk until it loosens up. 

When the milk mixture thickens a little, stir in the chicken, the roasted veggies, the peas, and the corn. Let everything heat together (about 5-7 minutes). Add the rice and stir everything to combine. Serve (preferably on a day that isn't so hot) and enjoy!


Thursday, July 22, 2021

Loaded Veggie Burritos


We've officially moved to Durham for my sabbatical year, so the professor is cooking from a new kitchen. It's got way more counter space than my old one. Unfortunately, it has an electric stove. I learned to cook with electric, so you'd think it wouldn't be a big deal, but I really love the precision and control that natural gas gives you. No matter! I'll re-adapt


Since we're still unpacking, I decided I needed a make-ahead, lots-of-leftovers dish. Veggie burritos are perfect for that. You can make them and assemble them, wrap them in foil, store them in the fridge and just heat them up for dinner. They only take about 30 minutes in the oven and then you're ready to eat. 

Notes: The best thing about making burritos at home is that you can control everything. You can add whatever veggies you want and season them how you want.

I like a yellow rice in my burritos and I have a favorite packaged version that I use (it's this one). If you don't like yellow rice, use your favorite. Spanish rice would be equally delicious. You can also just leave the rice out: add extra beans or extra mushrooms instead.

For burrito assembly, I like to make a little assembly line next to the stove. I divide my mixture into roughly equal portions depending on how many tortillas I have. That way you don't run out of filling before you get to the last tortilla. 

I buy blocks of cheese that I shred myself. I don't like the texture of pre-shredded cheese. If you use pre-shredded cheese, you may need to use the whole package. You should have about 1/4 cup of cheese per burrito.

Never rolled a burrito before? This video might help.

Ingredients:

2 bell peppers, any color you like

1 onion

5-6 garlic cloves

1 package of your favorite mushrooms (I used shitake)

About 2 cups of cooked rice (yellow, Spanish, white, or brown)

1 15 oz. can black beans

1.5 tablespoons cumin

1.5 tablespoons chili powder

2 teaspoons garlic powder

2 teaspoons onion powder

1 teaspoon cinnamon

1 teaspoon paprika (I use smoked)

1.5 teaspoons salt

Hot sauce, to taste

1 package of burrito-sized tortillas (8 or 10 count)

4-5 oz of cheese, shredded (I used pepper jack)

Olive oil for cooking the veggies 

Directions:

Dice your onions and bell peppers. Slice your mushrooms. Mince your garlic. Heat olive oil over medium-high. When the pan is hot, add all your spices (cumin, chili powder, garlic powder, onion powder, cinnamon, and paprika) to the oil and stir. Add the peppers and onions and cook until they're tender (about 8-10 minutes). Add your mushrooms and garlic and cook about 5-7 more minutes until the mushrooms get some nice brown color and shrink up. Add the salt and hot sauce toward the end of the cooking. 

While your veggies are cooking, shred your cheese and divide it into little piles according to how many tortillas you have. Drain your beans in a strainer. 

Once your veggies are done, stir in the cooked rice and beans. Turn the heat off and allow the mixture to cool while you prepare your burrito assembly line. 

Tear off squares of foil (about 10 x 10) according to how many tortillas you have. Divide your veggie mixture into little piles (just do this right there in the pan on the stove) according to your number of tortillas. Get your stack of tortillas and start assembling. 

Put a pile of the veggie mixture in the middle of the tortilla toward the bottom of the circle (but not all the way at the bottom). Add some cheese. Fold the bottom of the tortilla over the veggies and cheese. Fold in both sides to make a little package. For the last step, roll the little package over and up toward the top of the tortilla. The top of the tortilla becomes the "seam" on the bottom of your burrito. 

Put the rolled burrito on the corner of a piece of foil. Roll it up halfway, tuck in the sides of the foil, and then roll it the rest of the way. Put them in the fridge (I stack mine up straight on the shelf) They'll store nicely for about five days and freeze for even longer.

When you're ready to eat, heat the oven to 375. Pull the burritos from the fridge (keep them wrapped in the foil) and put them on a baking sheet. Bake for 30 minutes, unwrap, and enjoy!


Sunday, July 11, 2021

Grilled Summer Corn Pasta Salad

Let's not even joke about how long it's been since I posted a recipe here. 

I'll be honest: I love cooking, but I hate writing recipes. I'm imprecise, I don't follow directions, I make things up as I go, and I don't write anything down. Any recipe I create is an after-the-fact best guess at what I actually did in the kitchen. Also, I can't take pretty food pictures. 

All that said, I'm on sabbatical this year, and in a brief fit of madness, I thought "Hey, what if I dust off the cooking blog?" Scott thought it was a good idea. "You're happier when you have a project in the summer," he said. He is, of course, correct. 

So, I bring you a solution to a common summer cooking problem, namely convincing yourself to cook when it's hot. Pasta salad is a perfect remedy for this. First of all, you serve it cold, so it's refreshing. Second, because it has to chill in the fridge, you can make it in the morning when it's not so hot (that's what I did today). 


Notes: If you don't have a grill or a grill pan, you can just wrap your corn in some foil and bake it in the oven (at 400 for 20 minutes or so), but you won't get the delightful char flavor. 

Sub out the romaine for your favorite greens. I would just make sure it's something sort of light, like a baby spinach. Arugula would be good too, but it would be a stronger flavor.

If you want your mint and lemon to have a stronger presence in the dish, wait and add them to the pasta at the same time you add the greens.

Ingredients:

1 box dried, short pasta (elbows, shells, bowties)

1 package of baby romaine (10 or 12 oz)

4 ears of fresh corn

1/4 cup of olive oil

2 tablespoons of butter

1 small bunch fresh mint 

1 lemon

1 teaspoon dried dill

1 teaspoon onion powder

1 teaspoons kosher salt

1/2 teaspoon pepper

Red pepper flakes to taste

Directions:

Start with your corn: if you're using a grill, heat it to medium. Put the shucked ears directly on the grill. Grill for about 15 minutes, turning occasionally. Put aside and let them cool a little. 

While the ears are cooling, start your pasta. 

While the water is boiling, heat oil and butter in a small pan over medium-low. Add in dill, onion powder, salt, pepper, and red pepper flakes. Zest your lemon and add the zest to the oil mixture. Squeeze the lemon juice into the mixture. Once everything is heated through, turn off the heat. Allow to cool slightly. 

Once the oil mixture cools, add in your chopped mint leaves. Swirl everything around and let the mixture sit until the pasta is done. 

While the pasta cooks, give your greens a rough chop. Strip the kernels of corn off the cob by standing the ears upright in a large bowl and running your knife down the cob. The kernels will fall into the bowl.  

Once the pasta is finished, drain it and then return it to the pot on the stove (turn the heat off). Pour the oil over it and add the corn. Stir everything together. Allow the pasta to cool a bit (about five to ten minutes). Just leave it in the pot and stir it occasionally. If it starts to look dry and sticky, drizzle a little more olive oil over it. Add the chopped greens and stir until the greens wilt. Once you've mixed everything, give it a taste to check for seasoning (you might need to add some salt). Transfer everything to a large container and then chill in the fridge for at least 8 hours. Serve cold and enjoy!