Saturday, August 31, 2013

Pesto Spaghetti Squash with Bacon and Peas

Ever had gluten-free pasta? I tried some once. Um, it got a less than stellar review. I may have just tried the wrong brand, but I'm not exactly itching to give it another try.

I've seen the trick of using spaghetti squash in the place of pasta and I thought that might be a better bet than the gluten-free version.

Notes: Spaghetti squash does not taste like pasta. It's reminiscent of pasta and it looks like pasta, but if you're expecting it to mimic spaghetti exactly, you'll be disappointed.

Spaghetti squash is also a bit bland, so it needs flavor help. I thought the bacon grease would do the trick, but that wasn't enough. Neither was the pesto. It needs salt. So, be sure to salt the squash before you add in the pesto and peas.

I love that you can roast the squash ahead of time (thanks to Martha Stewart for the tip). You could roast it on the weekend and make this a Q.E.D. weeknight meal.

Ingredients
1 large spaghetti squash
5-6 slices of bacon
1/2 bag frozen peas
2 tablespoons (homemade) pesto
Salt
Pepper

Directions:

Heat oven to 375. Using a small knife, prick the squash all over. Put it on a baking sheet and bake for 1 hour and 20 minutes, flipping once halfway through. Allow the squash to cool and cut it open. Scoop out the seeds and discard. Using a fork, scrape out the strands of squash into a large bowl. This step can be done up to 2 days ahead. You can keep the squash in an airtight container in the fridge.

In a large skillet, fry bacon until crisp. Set the slices on a plate lined with a paper towel. Add the squash to the bacon grease and toss to coat and warm through. Season with salt and pepper (don't be shy). Add the peas and toss enough to heat the peas. Turn off the heat, add the pesto, and stir to combine.

Dish it up, crumble the bacon on top, and enjoy!

Pictured here with optional parmesan cheese!


Wednesday, August 28, 2013

Chocolate Banana Bread

Ever have one of those disagreements about when a fruit is ripe? My mother and are this way about bananas. She likes her bananas yellow with no or very few spots. I can't stand underripe bananas, so I like mine with several spots. I'll eat them long past the point that my mom has deemed them unfit.

But the bananas that were still on my counter after we got back from out of town were past their prime even by my standards. Banana bread it is then!

Notes: I modified this recipe from Joy of Baking.

I don't have many notes here. It's chocolate and bananas. What's left to say?

Ingredients:
1 2/3 cups of flour
1/3 cup of unsweetened cocoa powder
2/3 cup of brown sugar
1 teaspoon baking powder
1/4 teaspoon baking soda
1/2 teaspoon salt
1 teaspoon cinnamon
1/2 cup plain yogurt
2 eggs
3 bananas
3 tablespoons prepared coffee

Directions: Heat oven to 350

In a large bowl, whisk together flour, sugar, cocoa powder, salt, baking soda, baking powder, and cinnamon.

In another bowl, beat eggs. Mash the bananas. Stir in yogurt and coffee. Add the dry ingredients to the wet. Stir until just combined.

Pour batter into a buttered loaf pan and bake between 55-65 minutes until a tester comes out clean. Let cool, slice, and enjoy!


Shaved Asparagus Pizza with Roasted Garlic Oil

Our plans were a bit thrown off last week when our landlords decided they would update our furnace, duct work, and water heater with only 15 hours notice. The dogs can't be in the house when workmen are here, so we had to go out of town very quickly. Home is just about the only place you can go on such short notice, so that's where we went.


While we were at home, I made a pizza crust for my dad. It looked so good, I decided I needed to make pizza when we got home.

Notes: I tried a different method for making pizza crust this time that I learned from Smitten Kitchen: pizza crust in the fridge. It worked great, with a big caveat: make sure you let it sit out on the counter for at least an hour before you deflate it and bake it. Mine didn't come to room temperature before I baked it and it did not get as crispy as I like it. Otherwise, it's a nice method. You can make the crust in the morning before you go to work, put it in the fridge, and it's ready when you get home.

Shaving asparagus is a bit difficult. It works a little easier if you lay the asparagus on the cutting board and run your peeler over it. It'll break and some pieces will be thicker than others, but no worries.

I tweaked this recipe from Smitten Kitchen only slightly.

Ingredients
1/2 bunch of asparagus spears
1 large or 2 small balls of fresh mozzarella
Roasted garlic oil (recipe follows)
1 homemade pizza crust (recipe here)
Salt
Pepper
Olive oil

Directions:

If you're using the fridge pizza dough method, in the morning, make the pizza crust as normal. After you put the dough in the oiled bowl, instead of placing it on the counter, put it in the fridge for about 8 hours. When you're ready to bake, let the bowl sit out on the counter for an hour before you deflate it and roll it out.

When you're ready to bake, heat the over to 475. Arrange the racks in the oven with one at the top and one at the bottom.

While you're waiting for the dough to rest, shave the asparagus by laying the spears on a cutting board and "peeling" them like you would a carrot or potato. Put the shaved pieces in a bowl, season them with salt and pepper, drizzle them with olive oil and toss. Set aside.

Dice the mozzarella into small cubes. Roll out the pizza dough and brush it with roasted garlic oil. Spread the cheese out and then spread the asparagus on top. Bake for 8-10 minutes on top rack and them transfer to the bottom rack and bake 8-10 more minutes until crispy and bubbly. Slice up and enjoy!

Roasted garlic oil:
1 head garlic
1/4 cup olive oil plus more for drizzling
salt
pepper

Heat oven to 400. Slice the top off the head of garlic. Drizzle with olive oil and season with salt and pepper. Wrap the head in foil and bake directly on the oven rack for 1 hour.

Pour 1/4 cup of oil in a small skillet and heat on medium. Squeeze the roasted garlic out the skin and into the skillet. Stir, breaking up the large chunks of garlic. Heat the oil for about 10 minutes. Use as desired.

Sunday, August 18, 2013

Brown Sugar Pound Cake

People disagree about which version of Van Halen is the best: David Lee Roth as front man or Sammy Hagar as front man.

I don't care because I hate them both.

For some reason, Greensboro LOVED Van Halen (I think they loved both versions). When we lived there, you would hear them on the radio constantly. Van Halen actually opened their tours in Greensboro because they knew they would sell out. Van Halen was everywhere and I couldn't stand it.

That said, there is exactly one and only one occasion where I will allow Van Halen to be played in my house: when I'm baking poundcake.

Notes: Scott's birthday is this week, so I was looking for cake recipes. I stumbled on this one from Pioneer Woman. Before you could say "happy birthday," I decided I needed to make poundcake TONITE.

I tweaked it a bit. I used brown sugar instead of white and ginger ale instead of lemon-lime soda. I also replaced the flavorings with vanilla. I baked it in two loaf pans rather than a Bundt pan. It. Was. Amazing.

Ingredients:
3 sticks of butter, softened
3 cups of brown sugar
3 cups of flour
1 tablespoon of vanilla
1 cup (8 oz.) of ginger ale
5 eggs

Directions: Heat oven to 325.

With the mixer on medium, cream the butter. Add the sugar one cup at a time, allowing it to incorporate. Cream together until lighter and fluffy.

Drop the mixer speed down and add in one egg at a time. Mix in vanilla.

Add the flour one cup at a time until it's blended in. Scrape the bowl down and add in the ginger ale. Mix everything until is just combined.

Divide batter into two greased loaf pans. Bake for 1 hour until the top of the cake is set. When they're done, allow them to cool in the pans for 10 minutes. Loosen the sides with a thin spatula or knife and turn the cakes out onto a cooling rack. Cool for five more minutes, slice, serve, and enjoy!


Q.E.D.: Kale, Sausage, and Mushrooms Over Rosemary Polenta

You remember my affinity for kale and sausage.

I was thinking about polenta the other day and I decided it would taste great with some kale and sausage on top of it. I was not wrong.

Notes: "Polenta" is the Italian word for cooked cornmeal. If you like grits (and you should), you'll like polenta.

If I had to do it over, I think I would finely chop some spinach, saute the mushrooms, and just stir it all into the polenta, but this is crazy good.

You can bake, fry, or grill leftover polenta. I had some leftover and I'm going to try baking it, so I'll let you know how it turns out.

Want a vegetarian version? Leave out the sausage. You can make it as is or add some more mushrooms.

Ingredients:
1 lb kielbasa
1 large or 2 medium bunches of kale, cleaned and stemmed
2 pints shitake mushrooms
1 quart water or stock
1 cup cornmeal
3 tablespoons butter
1 small bunch fresh rosemary
Salt
Pepper

Directions:

In a large sauce pan or stock pot, bring water or stock to a boil.

While you're waiting for it to boil, clean and slice the mushrooms and slice the sausage. Chop the kale into bite-sized pieces. Mince the rosemary.

Heat a large skillet on medium high. Add in the sausage and cook for a few minutes until it gives off a little fat. Add the mushrooms and cook a few more minutes. Add in half the minced rosemary. Add in the kale and saute until the kale is dark green and tender.

When the water or stock is boiling, whisk in the cornmeal and turn the heat back to medium-low. Whisk frequently until the mixture is thickened (the consistency of grits or oatmeal). Add in the other half of the rosemary and season with salt and pepper. Stir in the butter.

To serve, spoon polenta into the bottom of a wide-mouthed bowl and top with kale mixture. Enjoy!


Saturday, August 17, 2013

Roasted Summer Squash and Tomatoes with Roasted Garlic Chive Toast

Here in the northeast, summer in waning, which means we have to savor summer food while we can. What better way to do that than with a big ol' bowl of summer vegetables?

Notes: The only people who wouldn't like this dish are people who hate delicious things (and I guess people who hate vegetables). Roasting the tomatoes gives them a deep, sweet flavor. Roasted broccoli has a nutty taste. And I don't know about you, but I could eat summer squash any old time.

You could easily make this as a side dish if you need to feed a crowd. I love it as is. If you have a garden with a boatload of summer squash, this is a great way to use it up.

Don't skimp on the fresh herbs here. They make a huge difference. If you're not a fan of garlic, do me a solid and just try it. Roasted garlic doesn't have the bite that raw garlic does.

Ingredients:
For squash:
1 large or 2 medium yellow squash
1 large or 2 medium zucchini
2 small heads of broccoli
2 pints of cherry or grape tomatoes
4 tablespoons of olive oil (divided)
1 head of garlic
1 tablespoon herbs de provence
1/2 bunch cilantro
Salt
Pepper

For toasts:
2-4 slices of bread (I used sourdough)
1 small bunch chives
3 tablespoons butter

Directions: Heat oven to 425.

Dice the squash and zucchini into 1-inch pieces. Cut the broccoli into small florets. Split up the head of garlic keeping the skin on each of the cloves. Leave the tomatoes whole.

Using two baking sheets, spread out the squash, zucchini, tomatoes, garlic cloves, and broccoli into one layer (I put the squash on one sheet and the broccoli and tomatoes on the other. I split the garlic between the two). Drizzle each tray with 2 tablespoons of olive oil. Sprinkle the herbs de provence over the squash. Season with salt and pepper. Toss the veggies around with your hands until they're all coated with oil. Bake for 25-30 minutes.

Chop the fresh herbs. Put butter in a small bowl and let it come to room temperature (it needs to be softened) while the veggies are roasting.

Right before the veggies are done, pull the garlic cloves out of the oven. Peel them and make a paste with your knife: slice the cloves and then using the wide end of the knife, mush (technical term) them around on the cutting board. Add the paste and half of your chopped chives to the butter and mash everything together with a fork. Spread half the butter on the bread.

When the veggies are done, pull them out and put the bread in (it takes about 5 minutes). Put the remaining butter and cilantro on the veggies and toss together. Serve the veggies in bowl alongside the toast. Enjoy!

Pumpkin Pie Cornmeal Muffins

After I made my enchiladas, I had some leftover pumpkin. What better way to use it than in pumpkin muffins?


Notes: You can see I'm on a bit of a cornmeal muffin kick. I'm trying to keep muffins around because they are great for a snack or a sweet treat after dinner, but they aren't as sugary as cookies or ice cream. Plus, they're homemade. They keep well in the fridge. Just nuke one in the mircowave for a few seconds and you have warm baked goods any ol' time.

These are delicious. They aren't too sweet. If you wanted to add a layer of flavor (and some more sweetness), add a 1/2 of maple syrup.

You say pumpkin in only for fall, I say pish posh! That's why we can things.

Ingredients:
1 cup flour
1 cup cornmeal
2 teaspoons baking soda
1/2 teaspoon salt
1/2 tablespoon cinnamon
1/2 teaspoon nutmeg
1/4 teaspoon cloves
1/4 teaspoon ground ginger
1 cup canned pumpkin
1 cup plain yogurt
1 cup brown sugar

Directions: Heat oven to 350.

Add the flour, cornmeal, baking soda, salt, sugar, and spices into a large bowl and whisk together until blended.

Add in yogurt and pumpkin and stir everything together until just combined.

Spoon batter into muffin tin and bake for 18-20 minutes. Allow muffins to cool for 5 minutes before transferring them to a cooling rack. Serve warm and enjoy!

Sunday, August 11, 2013

Q.E.D.: Charred Corn and Black Bean Enchiladas

Scott and I just got back from visiting his brother, sister-in-law, and their twin girls. Their family has recently gone gluten free. Lots of people are doing that these days and many of them find it helps with a number of common problems. I'm all for experimenting with your diet in order to make life changes. Since I've cut out a lot of processed foods, I know I've felt better.

I decided I might try writing a recipe that could be made gluten free if you needed one. Everyone needs recipes in their arsenal that can please people with dietary restrictions. And if it's quick to make, all the better!

Notes: The ingredients I used were likely not all gluten free, so be sure you read the labels carefully.

Smitten Kitchen has more detailed directions for the charred corn and it was that recipe that was my inspiration for this one. If you don't have a gas stove, just skip this step. They won't be charred corn enchiladas, but they will still be delicious.

The brown rice tortillas, as it turns out, were not as pliable as the wheat tortillas, but heating them would have helped that. I wrote that step in the recipe. If you split a tortilla, no biggie. You'll cover it with sauce and cheese.

You don't taste the pumpkin in these, but it gives the texture of refried beans (without the work or the fat) and it pumps up the nutritional content. Perfection.

Trader Joe's enchilada sauce was pretty good. If you're feeling industrious, you can make your own, but it wouldn't be Q.E.D. for sure.

Ingredients:
1 can black beans
1/2 can pumpkin puree
2 ears corn
6 brown rice tortillas
1 jar/can of your favorite enchilada sauce
3 teaspoons cumin
1/2 tablespoon chili power
1/2 bunch of fresh cilantro
2 cups shredded cheese (colby jack works great)
Salt
Pepper

Directions: Heat oven to 375.

Open the beans, drain and rinse them under cold water, and set aside.

Shuck the ears of corn leaving the stem on for a handle. If you have a gas stove, turn on a burner to medium high. Hold the ears over the burner (you can rest them on it -- just watch them) and turn them until they start to char, pop, and turn brown.

Keep an eye on the corn, but go ahead and chop the cilantro. Add the pumpkin to a large bowl. Season with cumin, chili power, salt, and pepper. Add in the beans. When the corn is done, strip the kernels off  into the bowl with a sharp knife. Add in the chopped cilantro and mix everything together. Add in 1/2 cup of cheese and stir.

Warm your tortillas by wrapping them in a moist paper towel and zapping them in the mircowave for about 15-20 seconds.

In a 9x13 baking dish, pour about a tablespoon of the enchilada sauce in the bottom of the pan to coat it (alternatively, you can butter the dish). Assemble the enchiladas by adding about 3 tablespoons or 1/4 cup of filling in the tortilla, toward the bottom of the round. Roll the tortilla up from the bottom and set it in the dish seam side down.

When you're finished assembling, pour the rest of the sauce over all the tortillas and top with remaining cheese. Bake for 15-20 minutes until bubbly and the cheese starts to brown.


Serve and enjoy!


Tuesday, August 6, 2013

Q.E.D.: Mushroom and Broccoli Fried Rice

One of the things that people aren't up front about when you start learning how to cook is how often you'll screw up. When I first started cooking, I definitely screwed up. A LOT.

That time I tried to substitute a cup of dried herbs for a cup of fresh herbs in an herb sauce and it was like eating confetti? Totally.

Or that time I tried to use frozen vegetables in a stir fry and none of them cooked? You bet.

And the time I didn't chill my oatmeal cookie dough and ended up with one huge half baked cookie mass? Not pretty.

There were times we had to toss it all and order pizza. And there were times we ate some things that just weren't that tasty. But that's OK. Just because things don't turn out right at the beginning, it doesn't mean you should throw in the towel and give up on cooking.

And here's the other dirty secret that you might not learn from reading food blogs with pretty pictures (unlike mine) and perfect recipes: you STILL screw up, even if you've been cooking a long time.

This dish? It was a screw up. I originally made beef and broccoli fried rice. Trouble is, I thought using stew beef would work out just fine. Boy was I wrong. The beef was well-seasoned, but it was like biting into an inner tube. So, I did what any cook would do. I picked the beef out, fed some to the dogs, tossed the rest, and rewrote the recipe. For every good recipe, there's one that didn't turn out so well.

Notes: If I had my druthers, I'd make this with scallions instead of regular onions, but regular onions is what I had. I would have also used wild mushrooms, but again, crimini was all I had.

If you don't have or can't find toasted sesame oil, you could just use some sesame seeds.

You can make the rice ahead of time and chill it in fridge or just use some plain leftover rice if you have it. This is still Q.E.D. even if you don't have the rice already made. If you can find the veggies pre-cut, it's even quicker.

Ingredients:
1 cup white or brown uncooked minute rice
1 cup water
1 pound of mushrooms
1 small onion or 1 bunch scallions
2 cups broccoli florets (about 2 small broccoli crowns)
1/4 cup soy sauce
1 teaspoon toasted sesame oil
2 cloves garlic
2-inch piece of ginger
Salt
Pepper
Red pepper flakes
High-temp oil like vegetable oil or coconut oil

Directions:

Start with the minute rice. Bring water to a boil, stir in the rice, take off the heat and let sit for 5 minutes. When it cools a bit, put it in the fridge and let it chill while you do everything else.

Dice the onion, slice the mushrooms, and chop the broccoli florets. Heat a skillet on high with a tablespoon of oil. Mince the garlic and ginger while the oil heats.

Add the garlic, ginger, and onion to the skillet and stir one minute. Add the mushrooms and let them brown (about 2-3 minutes). Season with salt and pepper. Add the broccoli and cook 2-3 more minutes (if the broccoli pieces are larger, you might want to throw the skillet lid on it and steam it for about a minute).

Pull the rice out of the fridge and add it the pan. Let it sit for a minute, then stir. Add in the soy sauce and stir for 2 minutes. Add in the sesame oil and red pepper flakes (to taste) and stir to combine.

Serve and enjoy!


Saturday, August 3, 2013

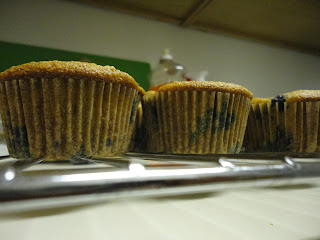
Blueberry Banana Cornmeal Muffins

I decided to experiment with some muffins.

I had a over-ripe banana and some blueberries. I've made banana muffins. I've made blueberry muffins. I've made banana and blueberry muffins. But I have not made blueberry banana cornmeal muffins! Well, until now.


Notes: These came out nicely. They were a little flat. I think I added too much liquid, so I wrote the recipe without the extra 1/2 cup of milk. But they're sweet and a little dense. The blueberries add a nice little sweet/tart burst.

Ingredients:
1 cup flour
1 cup cornmeal
1/2 teaspoon salt
2 teaspoons baking soda
1 cup yogurt (or sour cream if you have it)
1/2 cup brown sugar
1/2 cup maple syrup
1-2 small bananas
1 cup blueberries

Directions: Heat the oven to 350.

Mash up the banana in a large bowl. Add in the yogurt and maple syrup.

In a separate bowl, whisk together the flour, cornmeal, salt, sugar, and baking soda. Add the dry ingredients to the wet and stir until just combined. Fold the blueberries in gently.

Bake for 18-20 minutes, cool and enjoy!